
 Carmen J. Moore
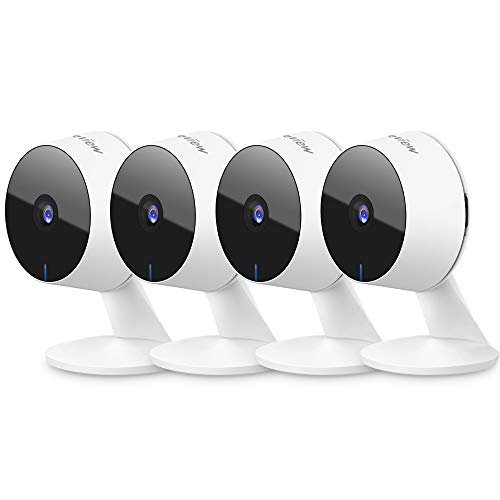
Surveillance video cameras are an essential tool for home security and monitoring. Whether you want to keep an eye on your property while you’re away or monitor your front door for deliveries, setting up a surveillance camera can provide peace of mind. In this guide, we’ll walk you through the steps to set up a surveillance video camera in your home.


Choose the Right Camera: Before you start setting up your surveillance camera, make sure you choose the right camera for your needs. There are many options available, including wireless cameras, outdoor cameras, and indoor cameras. Consider factors such as resolution, field of view, and night vision capabilities when selecting a camera.
Find the Ideal Location: Once you have your camera, the next step is to find the ideal location to install it. For outdoor cameras, choose a spot that provides a clear view of the area you want to monitor. For indoor cameras, consider placing them in high-traffic areas such as the living room or entryway. Make sure the camera is mounted securely and angled correctly for optimal coverage.
Step-by-Step Guide on Setting Up Surveillance Video Camera
Step 1: Choose a strategic location for your surveillance camera where it can capture the desired area effectively.
Step 2: Mount the camera securely on a wall or ceiling using the appropriate mounting hardware.
Step 3: Connect the camera to a power source using the provided power adapter.
Step 4: Connect the camera to a monitor or recording device using the appropriate cables.
Step 5: Adjust the camera angle and focus to ensure optimal coverage of the area.
Step 6: Set up the recording device to start capturing video footage from the surveillance camera.
Step 7: Test the camera and recording device to ensure they are functioning properly.
Step 8: Configure any additional settings or features on the camera or recording device as needed.
Step 9: Regularly check and maintain the surveillance camera to ensure it continues to operate effectively.
Select the Right Camera Model
When choosing a surveillance camera for your setup, it is important to consider several factors to ensure you select the right model for your needs. Here are some key points to keep in mind:
- Resolution: Higher resolution cameras provide clearer images, so consider the level of detail you require.
- Indoor vs. Outdoor: Make sure the camera is suitable for the environment where it will be installed.
- Field of View: Determine the area you need to cover and choose a camera with an appropriate field of view.
- Night Vision: If you need surveillance at night, select a camera with infrared or low-light capabilities.
- Power Source: Decide if the camera will be powered by a wired connection or a battery.
By considering these factors, you can choose a surveillance camera model that meets your specific requirements and provides effective monitoring for your setup.
Determine the Ideal Location
When setting up a surveillance video camera, it is crucial to determine the ideal location for maximum coverage and effectiveness. Consider the following factors:
Visibility: Choose a location where the camera has a clear line of sight to the area you want to monitor. Avoid obstructions such as trees, walls, or other objects that may block the view.
Height: Mount the camera at an appropriate height to capture the desired area without being too high or too low. A recommended height is around 10 feet for optimal coverage.
Lighting: Ensure that the area is well-lit or use a camera with night vision capability if monitoring during low-light conditions. Position the camera to avoid glare or backlighting that can affect the quality of the video.
Accessibility: Place the camera in a location that is easily accessible for maintenance and adjustments. Consider factors such as power source, connectivity, and weather protection when choosing the installation site.
Legal Considerations: Be aware of any legal restrictions or regulations regarding surveillance cameras in your area. Ensure that you are complying with privacy laws and guidelines when setting up the camera.
Install Necessary Mounting Hardware
Before mounting your surveillance camera, make sure you have all the necessary hardware. This typically includes screws, anchors, and brackets.
Begin by attaching the bracket to the mounting surface using the screws and anchors provided. Ensure the bracket is securely fastened to the surface.
Next, attach the camera to the bracket using the screws provided. Make sure the camera is facing the desired direction and is securely attached.
Double-check all connections and tighten any loose screws to ensure the camera is securely mounted and properly positioned for surveillance.
Connect Camera to Power Source
Before you can start using your surveillance video camera, you need to connect it to a power source. Follow these steps to ensure a proper connection:
- Locate the power adapter that came with your camera.
- Plug one end of the power adapter into the camera’s power input port.
- Plug the other end of the power adapter into a power outlet.
- Ensure that the power source is stable and provides a consistent power supply.
- Wait for the camera to power up and start functioning.
Once you have successfully connected your camera to a power source, you can proceed with the setup and configuration process.
Configure Camera Settings
Once you have physically set up your surveillance video camera, it’s important to configure the camera settings to ensure optimal performance and functionality. Here are some key settings to consider:
Resolution and Frame Rate
Adjust the resolution and frame rate settings to achieve the desired level of video quality and smoothness. Higher resolutions provide clearer images, but may require more storage space.
Motion Detection
Enable motion detection to trigger the camera to start recording when motion is detected. This can help save storage space and only capture relevant footage.
Connect Camera to Network
After mounting your surveillance camera, the next step is to connect it to your network for remote monitoring. Follow these steps to ensure a successful connection:
- Locate the Ethernet port on the camera.
- Use an Ethernet cable to connect the camera to your router or switch.
- Power on the camera and wait for the indicator lights to show a connection.
- Check your router settings to assign a unique IP address to the camera.
- Access the camera’s web interface using the assigned IP address to configure network settings.
- Set up port forwarding on your router to access the camera remotely.
Once the camera is successfully connected to your network, you can access it from anywhere using a computer or mobile device.
Set Up Monitoring Software
Once your surveillance video camera is installed, you will need to set up monitoring software to view and manage the footage. Follow these steps to properly configure your monitoring software:
- Download and install the monitoring software provided by the camera manufacturer.
- Launch the software and follow the on-screen instructions to set up your camera(s).
- Create a secure login and password for accessing the software.
- Adjust the settings to customize the recording schedule, motion detection sensitivity, and other preferences.
- Ensure that the software is connected to the internet for remote viewing capabilities.
- Test the software to make sure the cameras are recording and transmitting footage properly.
By setting up monitoring software correctly, you can effectively monitor and manage your surveillance video camera system for enhanced security and peace of mind.
Test Camera Functionality
Before you start using your surveillance camera, it’s important to test its functionality to ensure everything is working correctly.
1. Power On: Make sure the camera is properly connected to a power source and turned on.
2. Check Connectivity: Verify that the camera is connected to your network and that you can access it remotely if applicable.
3. Adjust Settings: Configure the camera settings such as resolution, frame rate, and motion detection sensitivity to suit your needs.
4. Test Recording: Record a short video clip to ensure the camera is capturing footage properly.
5. Monitor Live Feed: Check the live feed from the camera to ensure the video quality and angle are to your satisfaction.
6. Test Alerts: Trigger motion detection alerts or other notifications to ensure you receive them as expected.
By following these steps, you can ensure that your surveillance camera is set up correctly and ready to monitor your desired area effectively.
Adjust Camera Angles and Settings
Once you have installed your surveillance video camera, it is important to adjust the camera angles and settings to ensure optimal coverage and image quality. Start by positioning the camera at the desired location and angle to capture the area you want to monitor. Make sure the camera is securely mounted and has a clear view of the area.
Next, adjust the camera settings such as brightness, contrast, and resolution to achieve the best image quality. You may also need to adjust the camera’s motion detection sensitivity and recording settings to suit your surveillance needs. Test the camera by monitoring the live feed and making any necessary adjustments until you are satisfied with the results.
Regular Maintenance and Monitoring
Once your surveillance video camera system is set up, it is important to regularly maintain and monitor it to ensure optimal performance and security. Here are some tips for maintaining and monitoring your surveillance system:
1. Check Camera Connections
Regularly inspect the connections of your surveillance cameras to ensure they are securely in place. Loose connections can result in poor video quality or even camera failure.
2. Clean Camera Lenses
Periodically clean the lenses of your cameras to remove dust, dirt, and smudges that can affect video clarity. Use a soft, lint-free cloth to gently wipe the lenses clean.


I’m considering two models, one with night vision and another with a wider field of view but no night vision. Which feature do you all think is more important for home security?
Both features serve important roles. If your area is well-lit at night, a wider field of view might be advantageous. Evaluate your home’s specific needs to choose effectively.
I think night vision is crucial if you want to monitor at night. A wider field of view is helpful, but without clear imagery, it’s less effective.
I recently set up a surveillance camera at my house, and I went with a wireless model. It was super easy to install, especially following the steps in the article! I placed it high up near the entrance, and the night vision works great. Just make sure the area is well-lit, or it’ll struggle a bit to capture clear footage at night.
What kind of camera do you recommend for a small front porch? I'm looking for something with good night vision.
I recently set up a surveillance camera in my house, and I found the step about choosing the right location really crucial. I initially placed it near the front door, but it was too low and blocked by plants. After moving it to a higher spot, the view improved dramatically. Also, I opted for one with good night vision, which has been a game-changer at night!
Thanks for sharing your experience! It's great to hear that adjusting the camera placement made such a difference. Proper elevation and a clear line of sight are indeed key factors in effective surveillance.
I didn’t see anything about storage options for the footage. Is there a specific type of storage that works best for surveillance cameras?
Good article! I’m curious about whether wireless cameras are just as reliable as wired ones for outdoor use. Can anyone share their experiences with either type?
I'm not sure I agree with mounting the camera at 10 feet. I think it should be lower to catch more detail, especially for facial recognition. Higher placements might miss important details.
That makes sense, but I feel like higher placements can prevent tampering. Maybe a balance is needed based on the area?
I have to disagree about the importance of night vision. I’ve found that a good quality light source works just fine, and night vision often doesn’t give a clear picture anyway.