
 Carmen J. Moore

So you’ve got yourself a fancy DSLR camera, but now what? If you’re new to the world of photography, navigating the myriad of settings and functions on your camera can be overwhelming. Fear not, as we’re here to guide you through the basics of using a DSLR camera for photography.


From understanding aperture and shutter speed to mastering composition and lighting, this beginner’s guide will help you unlock the full potential of your DSLR camera. Whether you’re looking to capture stunning landscapes or candid portraits, learning how to use your DSLR effectively is the first step towards taking your photography skills to the next level.
Understanding DSLR Camera Basics
Before you start using your DSLR camera for photography, it’s important to understand some basic concepts:
- Aperture: Aperture refers to the opening in the lens that controls the amount of light entering the camera. A wider aperture lets in more light, while a narrower aperture lets in less light.
- Shutter Speed: Shutter speed determines how long the camera’s shutter remains open when taking a photo. A faster shutter speed freezes motion, while a slower shutter speed creates motion blur.
- ISO: ISO measures the camera’s sensitivity to light. A lower ISO is less sensitive to light but produces less noise, while a higher ISO is more sensitive to light but may result in more noise in the image.
- Focal Length: Focal length is the distance between the lens and the camera’s image sensor. A shorter focal length captures a wider field of view, while a longer focal length magnifies the image.
Understanding these basic concepts will help you control the exposure, focus, and composition of your photographs when using a DSLR camera.
Exploring Camera Settings
Understanding your DSLR camera’s settings is crucial for capturing high-quality photographs. Here are a few key settings to explore:
1. Aperture
Aperture controls the amount of light that enters the camera lens. A lower f-stop (e.g., f/2.8) results in a wider aperture and a blurred background, while a higher f-stop (e.g., f/16) creates a sharper image with more in focus.
2. Shutter Speed
Shutter speed determines how long the camera’s shutter remains open. A faster shutter speed (e.g., 1/1000) freezes motion, while a slower speed (e.g., 1/30) creates motion blur. Experiment with different speeds to capture dynamic or still images.
Choosing the Right Lens
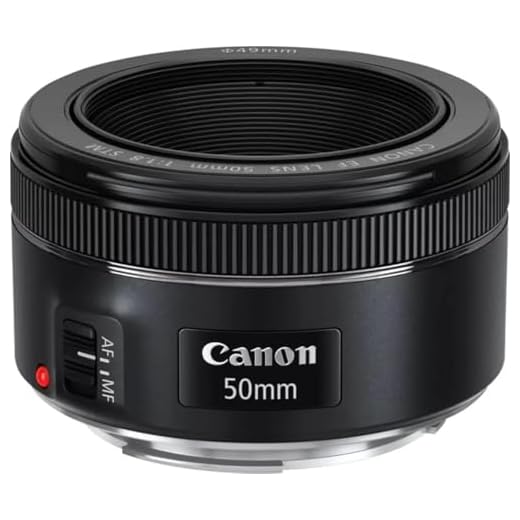
When using a DSLR camera for photography, one of the most important decisions you’ll make is choosing the right lens. The lens you select will have a significant impact on the quality and style of your photos. Here are some factors to consider when choosing a lens:
1. Focal Length
The focal length of a lens determines the angle of view and magnification of your photos. A shorter focal length (e.g., 18mm) will give you a wider angle of view, while a longer focal length (e.g., 200mm) will provide more magnification. Consider the type of photography you’ll be doing to determine the ideal focal length for your needs.
2. Aperture
The aperture of a lens controls the amount of light that enters the camera. A wider aperture (e.g., f/1.8) allows more light in and is ideal for low-light conditions and creating a shallow depth of field. A narrower aperture (e.g., f/16) is better for landscapes and other scenarios where you want everything in focus.
| Lens Type | Best For |
|---|---|
| Prime Lens | Portraits, low-light photography |
| Zoom Lens | Landscape, wildlife photography |
Mastering Exposure and ISO
Exposure and ISO are crucial elements in photography, especially when using a DSLR camera. Proper exposure determines the brightness or darkness of an image, while ISO controls the camera’s sensitivity to light. Here are some tips to master exposure and ISO:
Understanding Exposure
Exposure is determined by three main factors: aperture, shutter speed, and ISO. Aperture regulates the amount of light entering the camera, shutter speed controls the duration of light exposure, and ISO adjusts the camera’s sensitivity to light. Balancing these three factors is key to achieving the desired exposure.
Setting the Right ISO
Choosing the right ISO setting depends on the lighting conditions and the desired effect. A lower ISO (e.g., 100-400) is ideal for bright conditions and produces less noise, while a higher ISO (e.g., 800-3200) is suitable for low-light situations but may introduce more noise. Experiment with different ISO settings to find the perfect balance between exposure and image quality.
Composition Techniques for Photography
Composition is a crucial aspect of photography that can make or break a photo. Here are some composition techniques to help you take better photos with your DSLR camera:
Rule of Thirds
The rule of thirds is a basic composition technique where you divide your frame into nine equal parts using two horizontal and two vertical lines. By placing your subject or key elements along these lines or at their intersections, you can create a more visually appealing and balanced composition.
Leading Lines
Leading lines are lines in a photo that lead the viewer’s eye towards the main subject or focal point. They can be straight or curved lines like roads, rivers, fences, or even shadows. By incorporating leading lines into your composition, you can create a sense of depth and guide the viewer’s gaze through the image.
| Composition Technique | Description |
| Rule of Thirds | Divide your frame into nine equal parts and place key elements at the intersections. |
| Leading Lines | Use lines in your photo to lead the viewer’s eye towards the main subject. |
Understanding White Balance
White balance is a crucial aspect of photography that determines the overall color temperature of your photos. It ensures that the colors in your images appear natural and accurate, without any unwanted color casts.
When setting the white balance on your DSLR camera, you can choose from preset modes like daylight, cloudy, shade, tungsten, fluorescent, and flash. Alternatively, you can manually adjust the white balance to match the lighting conditions of your environment.
Understanding white balance settings and how they affect your photos can significantly improve the quality of your images. Experiment with different white balance settings to achieve the desired color temperature and enhance the overall look of your photographs.
Using Filters for Creative Effects
Filters are a great way to add creative effects to your photographs. There are various types of filters that you can use with your DSLR camera to enhance your images. Here are some popular filters and their effects:
- Polarizing Filter: This filter helps reduce glare and reflections, making colors appear more vibrant and saturated. It is great for landscape photography.
- Neutral Density Filter: This filter reduces the amount of light entering the lens, allowing you to use slower shutter speeds or wider apertures in bright conditions.
- Graduated Neutral Density Filter: This filter is useful for balancing exposure in scenes with bright skies and dark foregrounds.
- Color Filter: These filters can add a tint of color to your images, creating a unique look and feel.
- Special Effects Filter: There are various special effects filters available, such as soft focus, starburst, and sepia, which can add a creative touch to your photos.
Experiment with different filters to see how they can enhance your photography and add a creative flair to your images.
Post-Processing Tips for DSLR Photos
After capturing stunning photos with your DSLR camera, the next step is post-processing to enhance and refine your images. Here are some essential tips to help you make the most of your DSLR photos:
1. Use RAW Format
When shooting with a DSLR, always use the RAW format instead of JPEG. RAW files retain more image data and provide greater flexibility during post-processing.
2. Adjust White Balance
Correcting white balance is crucial for achieving accurate colors in your photos. Use editing software to fine-tune the white balance and ensure that your images look natural and balanced.
Pro tip: Experiment with different white balance settings to see how they affect the overall mood of your photos.
By following these post-processing tips, you can take your DSLR photography to the next level and create stunning images that truly stand out.
FAQ
What are the basic settings to consider when using a DSLR camera for photography?
When using a DSLR camera for photography, it is important to consider the basic settings such as aperture, shutter speed, and ISO. Aperture controls the amount of light entering the camera, shutter speed determines how long the shutter stays open to capture light, and ISO adjusts the camera’s sensitivity to light.
How can I achieve a blurred background in my photos using a DSLR camera?
To achieve a blurred background, also known as bokeh, with a DSLR camera, you can use a wide aperture setting (low f-stop number), focus on your subject while keeping the background at a distance, and use a longer focal length lens. This combination helps to create a shallow depth of field, resulting in a beautifully blurred background.
What are some tips for capturing sharp images with a DSLR camera?
To capture sharp images with a DSLR camera, make sure to use a sturdy tripod to prevent camera shake, choose a fast shutter speed to freeze motion, focus accurately on your subject, and use the appropriate aperture setting for the desired depth of field. Additionally, clean your lens regularly and use the camera’s image stabilization feature if available.
How can I improve my composition skills when using a DSLR camera for photography?
To improve your composition skills with a DSLR camera, consider using the rule of thirds to place your subject off-center, pay attention to leading lines that guide the viewer’s eye through the image, experiment with different perspectives and angles, and practice framing your shots to create visually appealing compositions. Don’t be afraid to try new techniques and explore creative ways to capture your subjects.
What are the advantages of shooting in manual mode with a DSLR camera?
Shooting in manual mode with a DSLR camera gives you full control over the exposure settings, allowing you to customize the aperture, shutter speed, and ISO according to your creative vision. This enables you to fine-tune the settings for different lighting conditions, experiment with different techniques, and achieve the desired look in your photographs. Manual mode also helps you learn more about the technical aspects of photography and improves your overall skills as a photographer.




I don't think using a higher ISO is always the best solution for low-light situations. It can introduce noise that ruins photos, especially at high settings.
You're correct about noise being an issue with high ISO settings. Balancing ISO, aperture, and shutter speed is key to achieving great results in low-light conditions.
I recently took my DSLR on a trip and experimented with different shutter speeds. I found that using a fast shutter speed really helped with capturing the motion of flowing waterfalls. Slower speeds created some beautiful silky effects, but it was tricky to get right without a tripod! Any tips on stabilizing the camera for those slower shots?
What do you suggest for beginners when it comes to choosing the right lens for their DSLR? I’ve seen so many options and I'm a bit lost.
For beginners, a versatile zoom lens can be a great choice, like an 18-55mm lens. It allows you to try different focal lengths without needing multiple lenses right away.
I recently started using my DSLR and found that understanding ISO was a game changer for me. Shooting in low light used to be a nightmare until I learned to adjust my ISO accordingly. I started with 800 and worked my way up to see how it affected my shots. It's amazing how much difference it makes!
That’s great advice! I always stuck to auto settings. I’ll try adjusting ISO manually next time.
I'm just starting out with my DSLR and I'm confused about what aperture to use for portraits. Should I stick with a wider aperture or is there a better choice?
For portraits, a wider aperture like f/2.8 or f/1.8 is great because it creates a beautiful blurry background, helping your subject stand out.