
 Carmen J. Moore

Passport photos are essential for various official documents, and having a high-quality photo is crucial. If you own a DSLR camera, you have the advantage of capturing professional-looking passport photos right at home. With the right equipment and techniques, you can easily take a passport photo that meets all the requirements.
Before you start, make sure your DSLR camera is set up correctly and you have the necessary lighting and background. Follow these simple steps to take a perfect passport photo with your DSLR camera.


From adjusting the camera settings to ensuring proper lighting and composition, this guide will help you capture a passport photo that is clear, sharp, and meets all the official requirements. Say goodbye to costly visits to photo studios and take control of your passport photo process with your DSLR camera.
Guide to Capturing Passport Photo with DSLR Camera
Getting a passport photo taken at a professional studio can be costly and time-consuming. Fortunately, you can capture your own passport photo at home using a DSLR camera. Follow these steps to ensure you get a high-quality passport photo:
Step 1: Set Up Your Camera
Choose a well-lit area with a plain white or light-colored background. Set up your DSLR camera on a tripod to ensure stability. Adjust the settings to ensure the photo meets passport requirements, such as resolution and size.
Step 2: Position Yourself
Stand or sit in front of the camera with your shoulders square and your head facing forward. Make sure there are no shadows on your face and that your expression is neutral. Avoid smiling or making any facial expressions.
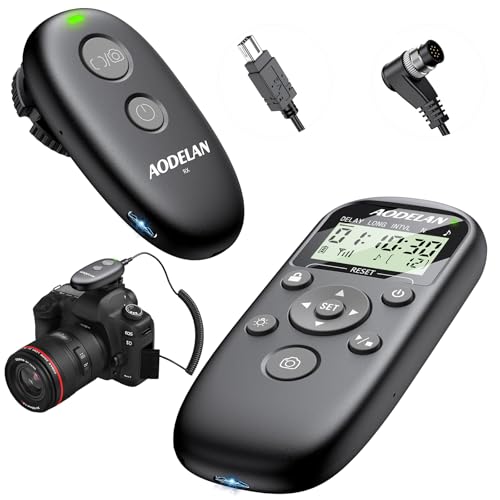
Pro tip: Use a remote shutter or self-timer to avoid camera shake when taking the photo.
Follow these steps to capture a professional-looking passport photo with your DSLR camera. Remember to check the specific requirements for passport photos in your country to ensure your photo meets all necessary criteria.
Choosing the Right Camera Settings
When taking a passport photo with a DSLR camera, it is important to choose the right camera settings to ensure that the photo meets the official requirements. Here are some tips for selecting the appropriate settings:
1. Resolution
Ensure the resolution is set to the recommended size for passport photos, which is typically around 2,000 x 1,500 pixels. This will ensure that the photo is clear and sharp when printed.
2. White Balance and Exposure
Adjust the white balance and exposure settings to ensure the photo has accurate colors and tones. You can use the camera’s automatic settings or manually adjust them to achieve the desired effect.
Setting Up the Perfect Lighting
When taking a passport photo with a DSLR camera, one of the key factors to consider is the lighting. Proper lighting can make a huge difference in the quality of your photo.
Here are some tips for setting up the perfect lighting:
- Use natural light if possible. Position yourself near a window where natural light can illuminate your face evenly.
- Avoid harsh shadows by using diffused light. You can achieve this by using a softbox or a white umbrella to soften the light.
- Consider the direction of the light. Position the light source in front of you to avoid unflattering shadows on your face.
- Avoid overhead lighting, as it can create unflattering shadows on your face. Instead, position the light slightly above eye level for a more flattering effect.
- Adjust the intensity of the light. You may need to experiment with different light settings to find the right balance that works best for your photo.
Positioning the Subject for Best Results
When taking a passport photo with a DSLR camera, it’s crucial to position the subject correctly to ensure the best results. Here are some tips to help you achieve that:
1. Stand the subject against a plain background
Choose a plain white or light-colored background to ensure the focus remains on the subject. Avoid busy backgrounds or patterns that may distract from the subject.
2. Ensure proper lighting
Good lighting is key to a successful passport photo. Make sure the subject is well-lit without harsh shadows on their face. Natural light or diffused artificial light works best.
Tip: Position the light source in front of the subject for even lighting.
By following these positioning tips, you can capture a professional-looking passport photo with your DSLR camera.
Framing the Shot Correctly
When taking a passport photo with a DSLR camera, it is important to frame the shot correctly to ensure that it meets the required specifications. Here are some tips for framing the shot:
- Position the camera at eye level to ensure that your face is centered in the frame.
- Leave some space above your head to comply with the passport photo guidelines.
- Ensure that your shoulders are visible and that there is no excessive space on the sides of the frame.
- Use a plain background to avoid distractions in the photo.
- Avoid tilting your head or posing in a way that distorts your facial features.
Ensuring Sharp Focus and Clarity
When taking a passport photo with a DSLR camera, it is crucial to ensure that the image is sharp and clear. To achieve this, follow these tips:
| 1. | Use a tripod: Stability is key to getting a sharp image. Mount your camera on a tripod to eliminate any camera shake. |
| 2. | Set the aperture: Choose a small aperture (higher f-stop number) to increase the depth of field and ensure that both your face and background are in focus. |
| 3. | Focus on the eyes: Make sure the eyes are in focus as they are the focal point of any portrait. Use manual focus if necessary to ensure precision. |
| 4. | Check the exposure: Proper exposure is essential for a clear image. Use a light meter or the camera’s histogram to adjust the exposure settings. |
| 5. | Use good lighting: Ensure you have adequate and even lighting to avoid shadows and provide a clear view of your face. |
Adjusting White Balance for Accuracy
When taking passport photos with a DSLR camera, it is important to adjust the white balance settings for accurate color representation. White balance ensures that the colors in the photo appear true to life and not too warm or too cool.
To adjust the white balance on your DSLR camera, navigate to the white balance settings in the menu and select the appropriate option based on the lighting conditions. You can choose from presets like daylight, cloudy, shade, fluorescent, or tungsten, or manually set the white balance by using a gray card or a neutral object in the scene.
Make sure to check the white balance before taking the passport photo to ensure that the colors are accurate and true to life. This will help prevent any color casting or inaccurate representation of skin tones in the final photo.
Reviewing and Editing the Captured Images
Once you have taken the passport photos with your DSLR camera, it’s important to review the images to ensure they meet the required specifications. Check for factors such as proper lighting, correct framing, and sharp focus.
You can then transfer the images to your computer for further editing. Use photo editing software such as Adobe Photoshop or Lightroom to adjust the brightness, contrast, and color balance of the images. Make sure to crop the photos to the correct size and resolution required for a passport photo.
Printing and Formatting Passport Photos
Once you have taken a perfect passport photo with your DSLR camera, the next step is to print and format it correctly. Here are some tips to ensure your passport photos meet the required specifications:
| 1. Use high-quality photo paper: | Print your passport photos on high-quality photo paper to ensure clarity and durability. |
| 2. Set the correct size: | Make sure the dimensions of your passport photo match the official requirements of your country. |
| 3. Adjust the brightness and contrast: | Before printing, adjust the brightness and contrast of the photo to ensure accurate colors and details. |
| 4. Leave space around the head: | Make sure there is enough space around the head in the photo and avoid cropping it too close. |
| 5. Follow the guidelines: | Follow any specific guidelines provided by the passport office regarding background color, facial expression, and other requirements. |
By following these steps, you can ensure that your passport photos are printed and formatted correctly for official use.
Complying with Passport Photo Requirements
When taking a passport photo with a DSLR camera, it is crucial to ensure that your photo meets the specific requirements set by the passport office. Here are some key points to keep in mind:
1. Background
- The background of the photo should be plain white or off-white without any patterns or shadows.
- Avoid using busy or textured backgrounds that may distract from your face.
2. Lighting
- Ensure that the lighting is even across your face with no harsh shadows or reflections.
- Avoid using flash, as it can cause glare or shadows on your face.
By following these guidelines, you can ensure that your passport photo meets the necessary requirements for a successful application.
Additional Tips and Tricks for Professional Results
1. Use a tripod to steady your camera and avoid blurry images.
2. Make sure the lighting is even and not too harsh to prevent harsh shadows on the face.
3. Consider using a white backdrop to ensure a clean and professional look.
4. Set your DSLR camera to manual mode for more control over exposure settings.
5. Use a remote trigger or self-timer function to avoid camera shake when taking the photo.
6. Adjust the aperture to achieve a shallow depth of field and blur the background for a professional look.
7. Experiment with different poses and angles to find the most flattering shot.
8. Pay attention to details like hair, clothing, and facial expression to ensure a polished result.
FAQ
What equipment do I need to take a passport photo with a DSLR camera?
To take a passport photo with a DSLR camera, you will need a DSLR camera, a tripod, a plain white or light-colored background, good lighting, and a photo editing software to crop and resize the image according to the passport photo requirements.
Can I take my own passport photo with a DSLR camera and use it for official documents?
Yes, you can take your own passport photo with a DSLR camera as long as you follow the guidelines provided by the official passport agency in your country. Make sure the photo meets size, background color, and other specific requirements to ensure it is accepted for official documents.




I recently took my own passport photo using a DSLR and followed the tips here. It was surprisingly easy! I used natural light from a window and a white wall as the background. The photo was accepted without issues. Just make sure to check the specific requirements for your country first!
What camera settings do you recommend for the best results? I have a DSLR but not sure about the right resolution and exposure settings for passport photos.
For passport photos, set your resolution to around 2,000 x 1,500 pixels. Use a low ISO (like 100) for clarity and adjust the aperture to around f/8 for good depth of field.