
 Carmen J. Moore

Fungus growth on a DSLR camera lens can be a nightmare for photographers, as it can affect the image quality and performance of the lens. Fungus thrives in dark and humid environments, making camera lenses a perfect breeding ground. If left untreated, fungus can spread and permanently damage the lens, so it’s crucial to address the issue as soon as possible.

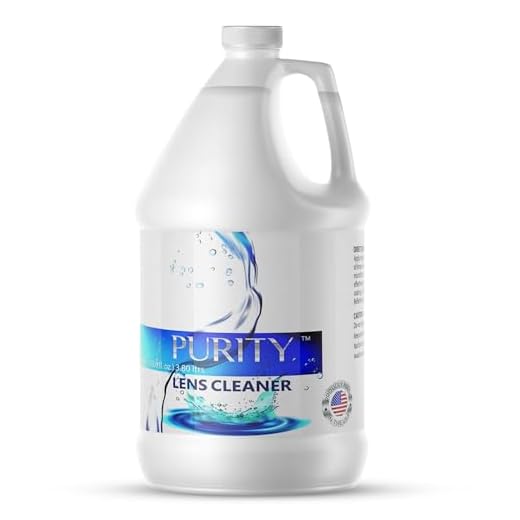

Removing fungus from a DSLR camera lens requires careful handling and attention to detail. In this guide, we will walk you through the steps to effectively clean and remove fungus from your lens. By following these steps, you can restore your lens to its optimal condition and ensure that your photos are free from any unwanted artifacts caused by fungus.
Before you begin the cleaning process, it’s important to note that prevention is key to avoiding fungus growth in the future. Store your camera and lenses in a dry and well-ventilated area, and regularly inspect them for any signs of fungus. With proper care and maintenance, you can prolong the lifespan of your camera equipment and avoid costly repairs.
Step-by-step guide to removing fungus from your DSLR camera lens
Fungus can be a common problem for DSLR camera lenses, especially if they are stored in a humid environment. If you notice fungus growing on your lens, it’s important to take action quickly to prevent further damage. Here is a step-by-step guide to help you remove fungus from your DSLR camera lens:
Step 1: Gather your materials
- Cotton swabs
- Lens cleaning solution
- Microfiber cloth
- Lens blower
Step 2: Remove the lens from your camera
Before you begin cleaning the lens, make sure to remove it from your camera body to avoid any damage to the internal components.
Follow these steps to clean the lens:
- Use the lens blower to remove any loose debris or dust from the lens surface.
- Dampen a cotton swab with lens cleaning solution and gently wipe the affected areas where the fungus is present.
- Use a dry cotton swab to remove any excess cleaning solution from the lens.
- Finally, use a microfiber cloth to gently polish the lens surface until it is clean and free of fungus.
Once you have completed these steps, your DSLR camera lens should be free of fungus and ready to use again. Remember to store your lenses in a dry, cool place to prevent fungus growth in the future.
Identifying the presence of fungus on your lens
If you suspect that your DSLR camera lens may have fungus growth, there are a few signs to look out for. Here are some common indicators:
- Spots or specks: Fungus may appear as small spots or specks on the lens surface.
- Cloudy or hazy appearance: Fungus growth can cause the lens to look cloudy or hazy, affecting image quality.
- Webs or threads: In advanced stages, fungus may form webs or threads inside the lens.
- Strange patterns or marks: Fungus growth can create unusual patterns or marks on the lens elements.
If you notice any of these signs, it’s important to take action to remove the fungus and prevent further damage to your lens.
Precautions before starting the cleaning process
Before you begin cleaning the fungus from your DSLR camera lens, it is important to take some precautions to ensure that you do not damage the lens or camera. Here are some important steps to follow:
- Turn off your camera and remove the lens carefully to avoid any accidental damage.
- Work in a clean and dust-free environment to prevent any additional particles from getting inside the lens.
- Avoid using harsh chemicals or cleaning solutions that can damage the lens coating.
- Use a soft, lint-free cloth or a lens cleaning brush to gently remove the fungus from the lens surface.
- Avoid applying excessive pressure while cleaning to prevent scratching the lens.
Gathering the necessary supplies for cleaning
Before you begin cleaning the fungus from your DSLR camera lens, make sure you have the following supplies on hand:
- Lens cleaning solution
- Cotton swabs or lens cleaning cloth
- Blower brush
- Lens cleaning pen
- Microfiber cloth
- Distilled water
- Small bowl or container
Cleaning the lens with the right technique
When cleaning a DSLR camera lens with fungus, it is crucial to use the right technique to avoid damaging the lens. Here is a step-by-step guide:
| Step 1: | Remove the lens from the camera body carefully. |
| Step 2: | Use a blower brush to remove any loose particles or dust on the lens surface. |
| Step 3: | Dampen a microfiber cloth with a small amount of lens cleaning solution. |
| Step 4: | Gently wipe the affected areas of the lens in a circular motion, starting from the center and moving outwards. |
| Step 5: | Repeat the process if necessary until the fungus is completely removed. |
| Step 6: | Allow the lens to air dry before reattaching it to the camera body. |
By following these steps and using the right technique, you can effectively clean fungus from your DSLR camera lens without causing any damage.
Dealing with stubborn fungus spots on the lens
If you have stubborn fungus spots on your DSLR camera lens, here are some steps you can take to remove them:
- Cleaning solution: Use a cleaning solution specifically designed for camera lenses. Avoid using harsh chemicals that can damage the lens coating.
- Lens cloth: Use a microfiber lens cloth to gently wipe the affected areas. Avoid using rough materials that can scratch the lens surface.
- Blower: Use a blower to remove any loose particles before cleaning the lens. This will help prevent further scratching.
- Professional cleaning: If the fungus spots are persistent and cannot be removed with DIY methods, consider taking your lens to a professional for cleaning.
It’s important to regularly inspect your camera equipment for fungus growth and take preventive measures to avoid future issues.
Maintaining and preventing fungus growth on your lens
Proper maintenance of your camera lens is essential to prevent the growth of fungus. Here are some tips to help you keep your lens fungus-free:
1. Store your lens properly
Make sure to store your lens in a cool, dry place with proper ventilation. Avoid storing it in humid environments or places with extreme temperature fluctuations.
2. Use silica gel packets
Place silica gel packets in the same storage area as your lens to help absorb excess moisture and prevent fungus growth.
| Do: | Don’t: |
|---|---|
| Keep your lens clean and dry | Store your lens in a damp basement |
| Use a lens hood to protect your lens from dust and moisture | Leave your lens exposed to the elements for extended periods |
| Inspect your lens regularly for any signs of fungus | Use harsh cleaning chemicals on your lens |
FAQ
What is the best way to remove fungus from a DSLR camera lens?
The best way to remove fungus from a DSLR camera lens is to use a mixture of isopropyl alcohol and distilled water. Dampen a microfiber cloth with the solution and gently wipe the affected areas of the lens. Be careful not to apply too much pressure to avoid damaging the lens coating.
Can I use a hairdryer to remove fungus from my camera lens?
No, using a hairdryer to remove fungus from a camera lens is not recommended. The heat from the hairdryer could potentially damage the lens or its coatings. It is best to use a gentle cleaning solution and a soft cloth to remove fungus from the lens.
Is it possible to prevent fungus growth on camera lenses?
Yes, it is possible to prevent fungus growth on camera lenses by storing your equipment in a dry and well-ventilated area. Avoid keeping your camera in damp or humid environments for extended periods of time. Additionally, regularly inspect and clean your lenses to prevent the buildup of fungus.
What should I do if I notice fungus on my camera lens?
If you notice fungus on your camera lens, it is important to address it promptly. Begin by gently cleaning the affected areas with a mixture of isopropyl alcohol and distilled water. If the fungus persists, it may be necessary to take the lens to a professional for further cleaning and treatment.





I've seen some people recommend using distilled water and vinegar for cleaning. Is that effective compared to the solutions mentioned here?
Using distilled water mixed with vinegar isn't recommended for camera lenses, as vinegar can potentially damage coatings. It's better to use a designated lens cleaning solution.
I found that regularly inspecting your lens really helps catch fungus early. Just a quick check every month can save a lot of trouble later!
I recently removed fungus from my DSLR lens using the DIY method mentioned in the article. I gathered all the materials as suggested and took my time with the cleaning. It worked well for me, but I had to do it a couple of times to fully clear the spots. Just make sure to be gentle, as I accidentally scratched the lens once when I was too aggressive. Now I store my camera with silica gel packets to prevent future issues.
Thanks for sharing your experience! It's great to hear that the cleaning method worked for you. Silica gel packets are an excellent preventive measure.
I disagree about using just a blower before cleaning. I think a damp microfiber cloth is essential to really remove any buildup before applying cleaning solutions.
I noticed some cloudy spots on my lens. Is that usually a sign of fungus? What should I do first?
Yes, cloudy spots can indicate fungus. I faced the same issue and started by using a blower to clean the surface before applying any solution.