
 Carmen J. Moore

Printing your photos from a DSLR camera can be a rewarding experience, allowing you to showcase your photography skills in physical form. Whether you want to create a stunning gallery wall or gift a memorable photo to a loved one, printing your DSLR pictures is a great way to bring your images to life.
However, the process of printing photos from a DSLR camera can be a bit daunting if you’re unfamiliar with the steps involved. From choosing the right printing method to selecting the best paper for your photos, there are several factors to consider to ensure your prints look their best.
In this article, we’ll guide you through the process of printing pictures from your DSLR camera, covering everything from preparing your images for print to selecting a printing service that meets your needs. By following these tips, you’ll be able to create professional-quality prints that do justice to your photography skills.
Guidelines for printing photos from DSLR camera
Printing photos from your DSLR camera can be a rewarding experience, allowing you to showcase your photography skills and create beautiful prints to display or share with others. Here are some guidelines to help you get the best results when printing photos from your DSLR camera:
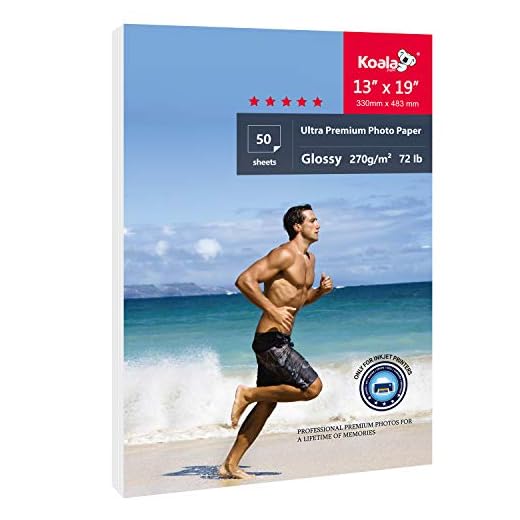

| 1. Use high-quality photo paper: | Choose a premium photo paper with the appropriate finish (glossy, matte, or satin) to enhance the quality of your prints. |
| 2. Calibrate your monitor: | Ensure your monitor is properly calibrated to accurately display colors before editing and printing your photos. |
| 3. Adjust image resolution: | Check the resolution of your photos and adjust it to the recommended print resolution (usually 300 DPI) for sharp and clear prints. |
| 4. Choose the right printing method: | Decide whether to print your photos at home using a photo printer or use a professional printing service for high-quality results. |
| 5. Crop and edit your photos: | Make any necessary adjustments to your photos, such as cropping, color correction, and sharpening, to ensure they look their best when printed. |
| 6. Consider print size: | Choose the appropriate print size for each photo based on its composition and intended display location. |
| 7. Proof your prints: | Before printing a large batch of photos, print a test page to check for any issues with colors, exposure, or composition. |
Prepare your DSLR camera
Before you can print pictures from your DSLR camera, you need to make sure your camera is ready to go. Here are some steps to prepare your camera:
| 1. | Charge your camera battery to ensure it has enough power for the printing process. |
| 2. | Insert a memory card with enough storage capacity to hold the pictures you want to print. |
| 3. | Check the settings on your camera to ensure the image quality and resolution are set to your desired level. |
| 4. | Clean the camera lens to ensure your pictures come out clear and sharp. |
Choose the right photo printer
When it comes to printing pictures from your DSLR camera, choosing the right photo printer is essential. There are a few key factors to consider when selecting a photo printer:
1. Print quality: Look for a printer that offers high resolution and color accuracy to ensure your photos look vibrant and true to life.
2. Print speed: Consider how quickly the printer can produce a print, especially if you need to print a large number of photos at once.
3. Connectivity options: Check that the printer is compatible with your DSLR camera and offers the connectivity options you need, such as Wi-Fi or Bluetooth.
4. Paper compatibility: Make sure the printer supports the type and size of paper you want to use for your prints.
By considering these factors, you can select a photo printer that meets your needs and helps you create beautiful prints from your DSLR camera.
Transfer photos to your computer
To print pictures from your DSLR camera, you first need to transfer the photos to your computer. Follow these steps to transfer your photos:
| Step 1: | Connect your DSLR camera to your computer using a USB cable. |
| Step 2: | Turn on your camera and select the option to transfer photos to the computer. |
| Step 3: | Open the file transfer software on your computer (e.g., Adobe Lightroom, Canon EOS Utility). |
| Step 4: | Select the photos you want to transfer and import them to your computer. |
| Step 5: | Once the photos are transferred, you can access them on your computer and proceed to print them. |
Select the best photo editing software
When it comes to editing your DSLR camera photos, choosing the right photo editing software is crucial. There are many options available, each with its own set of features and capabilities. Here are some popular photo editing software programs:
Adobe Photoshop: One of the most widely used photo editing software programs, Adobe Photoshop offers a wide range of tools and features for editing and enhancing photos. It is a powerful program that is popular among professional photographers.
Lightroom: Another Adobe product, Lightroom is a photo editing software that is specifically designed for photographers. It offers tools for organizing, editing, and sharing photos, making it a great choice for those who work with large numbers of photos.
GIMP: GIMP is a free, open-source photo editing software that offers many of the same features as Photoshop. It is a great option for those who are looking for a powerful photo editing program without the high price tag.
Corel PaintShop Pro: Corel PaintShop Pro is a photo editing software program that offers a wide range of features for editing and enhancing photos. It is user-friendly and offers tools for both beginners and advanced users.
Before choosing a photo editing software program, consider your editing needs and skill level. Try out a few different programs to see which one works best for you and your photos.
Adjust the Image Settings
Before printing your pictures from your DSLR camera, it’s important to adjust the image settings to ensure the best print quality. Here are some key settings to consider:
| Resolution: | Make sure the resolution of your images is set to the highest quality for sharp prints. A resolution of 300 DPI (dots per inch) is recommended for optimal print quality. |
| Color Mode: | Choose the appropriate color mode for your prints. For most printing purposes, the RGB color mode is suitable. However, if you are printing professional photos, consider using the CMYK color mode for better color accuracy. |
| File Format: | Save your images in a high-quality file format such as JPEG or TIFF to preserve image quality during printing. |
| White Balance: | Adjust the white balance settings on your camera to ensure accurate color representation in your prints. Consider using a custom white balance setting for the best results. |
Print a test photo
To print a test photo from your DSLR camera, first connect your camera to a computer using a USB cable. Transfer the desired photo from your camera to your computer. Once the photo is on your computer, open the photo in a photo editing software or a printing program. Adjust the size, resolution, and color settings as needed. Then, connect your printer to the computer and select the printer settings. Finally, click on the “Print” button to print the test photo. Make sure to use high-quality photo paper for the best results.
Choose the right paper for printing
When printing pictures from your DSLR camera, it’s important to choose the right paper to ensure the best quality and longevity of your prints. Here are some factors to consider when selecting the paper:
1. Paper Type
There are various types of paper available for printing, such as glossy, matte, satin, and lustre. Each type has its own unique finish and texture, so choose one that best complements your photo.
2. Paper Weight
The weight of the paper also plays a role in the quality of the print. Heavier paper tends to be more durable and has a more professional feel, while lighter paper is more economical but may not hold up as well over time.
Print your photos with high quality
When printing photos from your DSLR camera, it is important to ensure that you are using a high-quality printer and paper to achieve the best results. Here are some tips to help you print your photos with the highest quality:
| 1. | Use a printer with high resolution: To ensure that your photos are printed with crisp details and vibrant colors, use a printer with a high resolution (at least 300 dpi). |
| 2. | Choose the right paper: Select a high-quality photo paper that is compatible with your printer and is designed for printing photos. Matte or glossy paper can enhance the look of your photos. |
| 3. | Adjust the print settings: Before printing, make sure to adjust the print settings on your computer to match the size and resolution of your photos. This will help ensure that your photos are printed accurately. |
| 4. | Calibrate your monitor: To ensure that the colors in your photos are accurately represented in print, calibrate your monitor regularly to ensure color accuracy. |
| 5. | Print in a controlled environment: To avoid issues such as smudging or fading, print your photos in a clean and controlled environment with stable temperature and humidity levels. |
FAQ
What equipment do I need to print pictures from my DSLR camera?
To print pictures from your DSLR camera, you will need a computer or a printer with a memory card slot or a USB connection. You can also transfer the pictures from your camera to the computer using a USB cable or a memory card reader.
Can I print pictures from my DSLR camera at home?
Yes, you can print pictures from your DSLR camera at home if you have a printer that is compatible with your camera. You can connect your camera directly to the printer or transfer the pictures to a computer and then print them.
What are the recommended settings for printing pictures from a DSLR camera?
When printing pictures from a DSLR camera, it is recommended to use high-resolution images to ensure good print quality. You can adjust the size, color, and layout of the pictures using photo editing software before printing.
Do I need to calibrate my printer before printing pictures from my DSLR camera?
It is recommended to calibrate your printer before printing pictures from your DSLR camera to ensure accurate colors and optimal print quality. You can use printer calibration tools or software to adjust the settings.
What paper is best for printing pictures from a DSLR camera?
The best paper for printing pictures from a DSLR camera is photo paper designed specifically for inkjet printers. Glossy or matte photo paper can enhance the color and sharpness of the printed pictures. Make sure to choose the right paper size for your printer.




Don’t forget to check printer compatibility with different paper types. It's made a big difference for me!
What type of paper do you recommend for printing landscape photos? I'm looking for something that really brings out the colors.
I’m a bit confused about the image resolution. When you say 300 DPI, does that mean I should set my camera to that before taking photos?
Great question! The 300 DPI recommendation is for the print resolution, not the camera settings. Your camera will usually shoot at a higher resolution, so you just need to ensure the image is adjusted to 300 DPI before printing.
I disagree about using glossy paper for all photos. Sometimes, matte paper can give a more timeless quality, especially for portraits. Glossy finishes can reflect light and wash out details depending on the lighting in the room.
That's a valid point! Matte paper does offer a different aesthetic and can be better for certain types of photography. It really boils down to the type of photo and the desired effect.
I recently printed some family photos from my DSLR, and I followed most of the tips in the article. I used a professional printing service and was blown away by the quality! They suggested using a heavier semi-gloss paper, which really made the colors pop. I also found that calibrating my monitor beforehand made a huge difference in how the prints turned out. Highly recommend the extra step if you care about accuracy!
I’ve heard mixed reviews about using GIMP for photo editing. How does it compare to Lightroom for printing purposes?
I'm torn between using a professional printing service or printing at home. What are the main differences in quality and cost?
I recently printed some family photos using a professional printing service after following the guidelines in this article. The prints came out amazing, especially when I calibrated my monitor beforehand. I used a glossy finish, and it really made the colors pop! Just a heads up, I found that using a standard printer didn't give me the same quality, so investing in a good photo printer was worth it.
When you mention adjusting image resolution, does that mean I should increase the DPI to 300 even if my original photo is lower than that?
Good question! It's best to start with a high-resolution image, ideally at 300 DPI. If your original photo is lower, upscaling might not give the best results, so it's often better to shoot in a higher resolution if possible.
What kind of photo paper do you recommend for printing landscape photos? I want something that enhances colors without being too shiny.
How does printing at home compare to using a professional service in terms of cost and convenience?
What type of photo paper do you recommend for printing landscape photos? I've heard glossy can look stunning, but I'm not sure if matte would be better for details.
When you mention cropping and editing, do you have any specific tips for beginners? I sometimes struggle with knowing how much to crop without losing important parts of the photo.
Great question! A good rule of thumb is to focus on the main subject of your photo. Try not to crop too tightly; leave some space around the subject to give it context.
I recently printed some photos from my DSLR, and I used a local service instead of my home printer. The colors came out so much better than I expected! I followed the guidelines on calibrating my monitor, and it really made a difference. I would suggest trying a professional service if you're looking for high-quality prints.
I disagree about using 300 DPI for all prints. For smaller sizes, I find 150 DPI works just fine.
I disagree about using glossy paper. I find that matte paper gives a more artistic look, especially for portraits. Glossy can sometimes reflect too much light.
I recently printed some photos from my DSLR and used glossy paper. The prints turned out amazing! I did calibrate my monitor first, which I think made a huge difference. If you're planning to print, definitely invest in good quality paper and consider testing a few different types before committing to a larger batch.
Thanks for sharing your experience! Glossy paper does enhance colors well for landscapes. Testing different types before printing a large batch is a smart approach.
I’m new to photography and printing. Can someone explain why DPI is so important for print quality?
I recently printed some photos from my DSLR, and I was surprised at how much the printer settings affected the output. The first batch had dull colors because I used the wrong color mode. After switching to CMYK for my professional prints, the difference was night and day. Also, using high-quality paper made everything pop. Totally worth it!
I tried printing some photos using glossy paper, and they turned out amazing! The colors were so vibrant. I do wonder if matte would give a different feel though.
I've used matte for portraits and loved it! It tends to reduce glare, which can be great for certain shots.
What kind of photo paper would you recommend for a landscape photo? I want it to look really vibrant.
I've had great results with glossy photo paper for landscapes. It really brings out the colors!
I disagree with using glossy paper for all prints. For portraits, I think matte paper looks much softer and more appealing.
I think using a professional printing service is overrated. I've had amazing results from my home printer. It's all about the settings!
Home printers can deliver excellent results if properly calibrated and configured. However, professional services often use superior technology and materials that can enhance quality, especially for large prints.
What type of photo paper do you recommend for landscape photography? I want the colors to pop!
What does it mean to calibrate your monitor? Is it really necessary?
What type of photo paper do you recommend for prints? Glossy or matte?
Remember to check your printer settings before printing. I often forget to set the right resolution, and it makes a big difference!
Could you clarify what you mean by calibrating the monitor? Is it necessary for every print, or just for professional work?
I recently printed some photos from my DSLR using satin paper, and I was really impressed with the results! The colors popped without the glare you sometimes get with glossy paper. I also calibrated my monitor before editing, which made a noticeable difference in color accuracy when printed. Definitely worth the extra effort!
I disagree with the suggestion that 300 DPI is always necessary. Sometimes, lower resolutions still look fine for smaller prints.
I have Adobe Lightroom, but I'm curious about GIMP. Is it really comparable to Photoshop or Lightroom? How does it hold up for professional work?
I use GIMP for personal projects, and it has a lot of powerful features. It's not as user-friendly as Lightroom, but it's great for those who can invest the time to learn.