
 Carmen J. Moore

Capturing the beauty of the night sky with a DSLR camera can be a rewarding and awe-inspiring experience. Whether you’re a beginner or a seasoned photographer, the night sky offers endless opportunities for stunning images. With the right techniques and equipment, you can create breathtaking photos of stars, planets, galaxies, and even the Milky Way.
However, taking night sky pictures with a DSLR camera can be challenging due to the low light conditions and the need for long exposure times. But fear not, with the right guidance and preparation, you can master the art of night sky photography and capture images that will leave viewers in awe.
Mastering Night Sky Photography with Your DSLR Camera
Do you want to capture stunning images of the night sky with your DSLR camera? Follow these tips to improve your astrophotography skills:
1. Choose the Right Equipment
Make sure you have a DSLR camera with manual settings, a sturdy tripod, and a wide-angle lens with a large aperture for better light gathering.


2. Find a Dark Sky Location
Avoid light pollution by shooting in remote areas away from city lights. National parks or rural areas are great options for clear night skies.
- Use a star map app to locate constellations and interesting celestial objects.
- Plan your shoot during a new moon phase for darker skies and better visibility of stars.
By following these tips, you can enhance your night sky photography skills and capture breathtaking images of the cosmos.
Choosing the Right Equipment
When taking night sky pictures with a DSLR camera, it is essential to have the right equipment to capture stunning shots. Here are some key items to consider:
1. DSLR Camera: Choose a camera with manual settings, high ISO capabilities, and good low-light performance. Full-frame cameras are ideal for capturing night sky images.
2. Wide-angle Lens: Invest in a wide-angle lens with a fast aperture (f/2.8 or wider) to capture more of the night sky and allow more light to enter the camera.
3. Tripod: A sturdy tripod is essential for keeping your camera steady during long exposures. Look for a tripod that is lightweight yet stable.
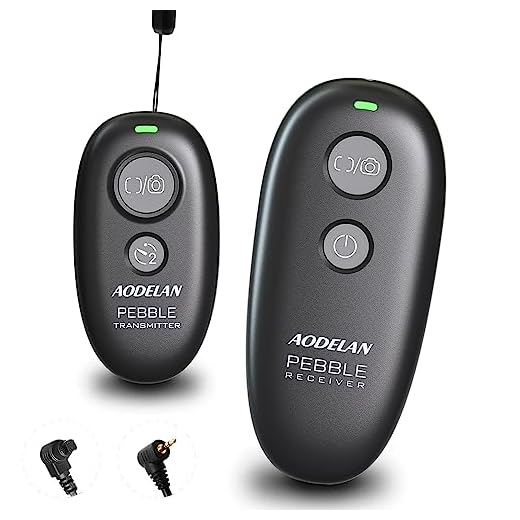
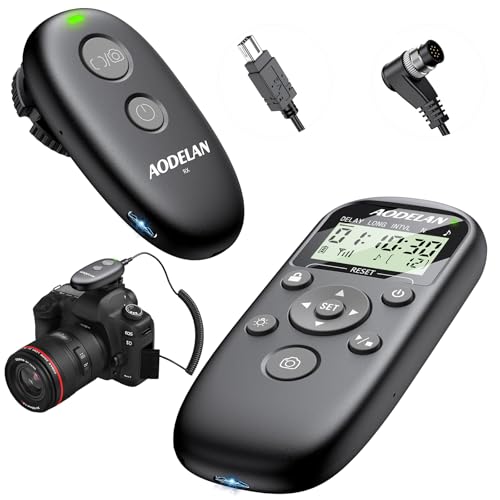
4. Remote Shutter Release: Using a remote shutter release will help prevent camera shake when taking long exposure shots of the night sky.
5. Extra Batteries and Memory Cards: Make sure to have plenty of extra batteries and memory cards on hand, as night sky photography can quickly drain your camera’s battery and storage space.
By choosing the right equipment, you can enhance your night sky photography and capture stunning images of the stars, Milky Way, and other celestial wonders.
Understanding Camera Settings for Night Sky Photography
When capturing the beauty of the night sky with your DSLR camera, understanding the right camera settings is crucial to achieving stunning results. Here are some key settings to consider:
1. Aperture
Set your aperture to its widest setting (lowest f-stop number) to allow more light to enter the camera. This will help capture the faint light of stars and other celestial objects in the night sky.
2. Shutter Speed
Use a slow shutter speed to gather more light and prevent star trails in your photos. Experiment with different shutter speeds to find the right balance between capturing light and avoiding motion blur.
| Setting | Recommendation |
|---|---|
| Aperture | Widest setting (low f-stop number) |
| Shutter Speed | 15-30 seconds |
| ISO | Start at 800 and adjust as needed |
| White Balance | Use “Daylight” or “Tungsten” for accurate colors |
By understanding and adjusting these camera settings, you can capture stunning night sky photos that showcase the beauty of the cosmos.
Finding the Perfect Location
When it comes to capturing stunning night sky pictures with your DSLR camera, finding the perfect location is crucial. Here are some tips to help you choose the best spot:
- Look for a location away from city lights to minimize light pollution.
- Choose a spot with a clear view of the sky and minimal obstructions like trees or buildings.
- Consider the weather conditions – clear skies with minimal cloud cover are ideal for astrophotography.
- Research dark sky locations or designated stargazing spots in your area for the best viewing experience.
- Plan your shoot around the moon phase – a new moon or crescent moon will provide darker skies for capturing stars.
By selecting the right location for your night sky photography, you can enhance the quality of your images and capture the beauty of the cosmos with your DSLR camera.
Setting Up Your Camera for Night Sky Shots
To capture stunning night sky photos with your DSLR camera, you need to set up your camera properly. Here are some key steps to help you get the best shots:
1. Use Manual Mode
For night sky photography, it’s essential to use manual mode on your camera. This gives you complete control over settings like aperture, shutter speed, and ISO, allowing you to capture the faint light of the stars effectively.
2. Adjust Your Aperture
Set your aperture to its widest setting (lowest f-stop number) to allow more light to enter the lens. This will help capture the dimly lit night sky and make the stars appear brighter in your photos.
Mastering Exposure and Shutter Speed
When capturing night sky pictures with a DSLR camera, mastering exposure and shutter speed is crucial. The exposure determines how light or dark the image will be, while the shutter speed controls how long the camera’s sensor is exposed to light.
To properly expose a night sky photo, start by setting your camera to manual mode. Adjust the ISO to a low value (e.g., ISO 100 or 200) to reduce noise in the image. Next, set the aperture to a wide opening (e.g., f/2.8 or f/4) to let in more light.
For capturing stars and celestial objects, a good starting point is to use a shutter speed of 15-30 seconds. Experiment with different shutter speeds to find the right balance between capturing enough light and avoiding star trails.
Remember that longer shutter speeds can result in star trails due to Earth’s rotation, so consider using a tripod to stabilize your camera. Additionally, using a remote shutter release or setting a timer can help minimize camera shake.
By mastering exposure and shutter speed, you can create stunning night sky pictures with your DSLR camera. Practice and experimentation will help you refine your skills and capture breathtaking images of the cosmos.
Using a Tripod for Stable Shots
When capturing night sky photos with a DSLR camera, using a tripod is essential for achieving sharp and stable shots. Here are some tips on how to effectively use a tripod for your night sky photography:
- Choose a sturdy tripod: Make sure your tripod is stable and can support the weight of your camera and lens. A sturdy tripod will prevent camera shake and ensure sharp images.
- Adjust the height: Set the height of your tripod so that the camera is at a comfortable shooting level. This will help you frame your shots easily and prevent any strain on your back or neck.
- Use a remote shutter release: To further reduce camera shake, consider using a remote shutter release or the camera’s timer function. This will allow you to trigger the camera without physically touching it.
- Position the tripod securely: Ensure that the tripod legs are firmly planted on the ground and that the center column is locked in place. This will prevent any wobbling or movement during long exposure shots.
Conclusion
By using a tripod for your night sky photography, you can achieve sharp and stable shots that capture the beauty of the stars and galaxies above. Take the time to set up your tripod correctly, and you’ll see a significant improvement in the quality of your images.
Capturing Stars and Constellations
To capture stunning images of stars and constellations with your DSLR camera, follow these tips:
- Use a sturdy tripod to keep your camera stable during long exposures.
- Set your camera to manual mode to have full control over settings.
- Choose a wide aperture (low f-stop) to let in more light.
- Set a long exposure time (usually 20-30 seconds) to capture the faint light of stars.
- Adjust the ISO to a higher value (e.g., 800-1600) to make the stars appear brighter.
- Focus your lens to infinity to ensure the stars are sharp in the image.
- Consider using a remote shutter release or the camera’s self-timer to avoid camera shake.
- Experiment with different compositions and locations to capture unique starry landscapes.
Editing Your Night Sky Photos
Once you have captured some amazing night sky photos with your DSLR camera, the next step is to edit them to make them even more stunning. Here are some tips for editing your night sky photos:
Adjust the Exposure
One of the key aspects of editing night sky photos is adjusting the exposure. You may need to increase the exposure to bring out more details in the stars and the Milky Way. Be careful not to overexpose the image, as this can lead to loss of details and introduce noise.
Enhance Colors
Another important step in editing night sky photos is enhancing the colors. You can adjust the color temperature to make the sky more vibrant and bring out the different hues of the stars. You can also increase the saturation to make the colors pop.
By carefully editing your night sky photos, you can create breathtaking images that showcase the beauty of the night sky.
Sharing Your Stunning Night Sky Images
After capturing breathtaking images of the night sky with your DSLR camera, it’s time to share your masterpieces with the world. Here are some tips on how to showcase your stunning night sky images:
- Post your photos on social media platforms like Instagram, Facebook, and Twitter to reach a wider audience.
- Consider creating a dedicated photography portfolio on websites like Flickr or 500px to display your work in a professional manner.
- Enter your photos in photography contests or exhibitions to gain recognition and exposure in the photography community.
- Print your favorite images and frame them to decorate your home or give them as unique gifts to friends and family.
- Collaborate with other photographers or artists to create stunning visual projects or exhibitions that showcase the beauty of the night sky.
By sharing your stunning night sky images, you can inspire others to appreciate the beauty of the cosmos and the art of astrophotography.
FAQ
What equipment do I need to take night sky pictures with a DSLR camera?
To take night sky pictures with a DSLR camera, you will need a DSLR camera with manual settings, a sturdy tripod to keep your camera stable, a wide-angle lens with a large aperture (f/2.8 or wider), a remote shutter release or timer, and a flashlight for adjusting settings in the dark.
How do I set up my DSLR camera for night sky photography?
To set up your DSLR camera for night sky photography, start by setting your camera to manual mode. Choose a wide aperture (f/2.8 or wider) to let in more light, set your ISO to a high value (usually between 800-3200), and select a long exposure time (usually between 15-30 seconds). Make sure to focus manually on a bright star or distant light source.
What are the best locations for capturing night sky pictures with a DSLR camera?
The best locations for capturing night sky pictures with a DSLR camera are areas with low light pollution, such as remote countryside or national parks. Look for places with clear skies and minimal artificial light to ensure the best visibility of stars and the Milky Way.
How can I edit my night sky pictures taken with a DSLR camera?
To edit your night sky pictures taken with a DSLR camera, you can use photo editing software like Adobe Photoshop or Lightroom. Adjust the exposure, contrast, and color balance to enhance the details of the stars and the Milky Way. You can also remove noise and sharpen the image for a clearer result.




What type of wide-angle lens do you recommend for capturing the Milky Way? I’m considering a few options, but I’m not sure which specifications are most important.
For capturing the Milky Way, look for a wide-angle lens with a large aperture, ideally f/2.8 or wider. Some popular options include the Canon EF 16-35mm f/2.8 and the Rokinon 14mm f/2.8. These lenses are great for low-light conditions.
I totally agree about the tripod! I used to think it wasn't that important, but it makes such a difference in stability for long exposures.
What are some good apps for planning night sky photography? I'd love to know how to find the best constellations and planets for my shoots.
There are several great apps for planning night sky photography, such as SkySafari, and Star Walk. These apps can help you locate celestial objects and plan your shooting sessions effectively.
I think using a full-frame camera is overrated for night sky shots. My crop sensor does just fine, especially with a good lens! I believe it’s more about technique than the camera itself.
While full-frame cameras often perform better in low-light conditions, a good crop sensor can still capture amazing night sky photos. It all depends on your technique and the quality of your lens!
You mentioned using a remote shutter release. Is that really necessary, or can I just use the camera's timer?
Using a remote shutter release is ideal because it minimizes camera shake, but the timer function also works well if you don’t have a remote. Both options can help you achieve sharper images!
I recently tried capturing the night sky with my DSLR and it was a challenge! I didn’t think about light pollution and ended up getting very few stars in my shots. I learned the hard way that finding a good location is key. Once I moved to a more remote area, the difference was night and day!
Remember to check the weather before heading out! Clear skies are essential for good night sky photography.
What settings do you recommend for beginners who are just starting with night sky photography? I’m a bit overwhelmed by all the options!
For beginners, start with an aperture of f/2.8, a shutter speed of 15-30 seconds, and an ISO around 800. These settings should help you capture clearer images while you learn to adjust for different conditions.
I've seen some people use full-frame cameras for night photography, while others swear by crop sensors. Are full-frame cameras that much better for capturing stars, or can a good crop sensor do the job?
Full-frame cameras generally perform better in low-light situations, but a good crop sensor can still produce great results, especially if you use a fast lens. It often depends on your specific equipment and technique.
I’ve heard mixed opinions about using a full-frame camera vs. a crop sensor for night sky photography. Does anyone have insights on which is better?
I think full-frame cameras are generally better for low-light situations, but crop sensors can work well too, especially if you're on a budget. It really depends on your needs and what lenses you have.
I've been trying to get good shots of the night sky for a while. I found that experimenting with shutter speed made a huge difference for me. At first, I was using 30 seconds, but my stars were all streaky. Dropping it to around 15 seconds really helped me freeze the stars in place. It was a game changer!
I disagree that you need a remote shutter release. I find that using the camera's timer function works perfectly fine for avoiding camera shake.
I went out last weekend to try some night sky photography after reading tips like these. I used a Canon DSLR with a 18-55mm lens. The shots turned out better than I expected! I found a spot a bit away from city lights, but I still had some issues with light pollution. Next time, I’ll plan around the new moon for darker skies. Thanks for the advice!
I'm new to astrophotography and wondering how long I should keep the shutter open for beginners. Is 15 seconds too long?
Starting with 15 seconds is a great choice! It allows you to gather enough light without causing too much blur. You can experiment with shorter times if you find star trails starting to appear.
I disagree with the tip about using a tripod being essential. I’ve taken decent night sky shots without one, just bracing my camera against a wall. It takes some skill, but it can work!
While it’s possible to get some decent shots without a tripod, it can be tricky, especially during long exposures. A steady base usually leads to sharper images.