
 Carmen J. Moore
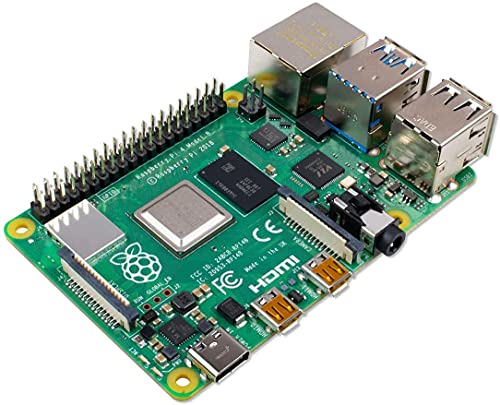
Are you looking to enhance the security of your home or office with a cost-effective solution? Setting up a Raspberry Pi security camera live stream might be the perfect option for you. Raspberry Pi, a small and affordable computer, can be transformed into a powerful security camera with the right setup.


By following a few simple steps, you can create a live stream from your Raspberry Pi camera that allows you to monitor your space remotely. This DIY project not only helps you keep an eye on your surroundings but also provides a fun and educational experience in setting up a technological solution.
In this article, we will guide you through the process of setting up a Raspberry Pi security camera live stream. From choosing the right components to configuring the software, you will learn everything you need to know to create your own surveillance system using Raspberry Pi.
Step-by-step guide to setting up a Raspberry Pi security camera live stream:
1. Set up your Raspberry Pi:
- Download the latest Raspbian OS and install it on your Raspberry Pi.
- Update the system by running sudo apt-get update and sudo apt-get upgrade.
2. Install the necessary software:
- Install the motion package by running sudo apt-get install motion.
- Edit the motion configuration file by running sudo nano /etc/motion/motion.conf and customize the settings according to your needs.
3. Configure the camera:
- Connect your camera module to the Raspberry Pi.
- Enable the camera by running sudo raspi-config and selecting the camera option.
4. Start the motion service:
- Start the motion service by running sudo service motion start.
- Access the live stream by opening a web browser and entering http://:8081.
Choose the right Raspberry Pi model
When setting up a security camera live stream using a Raspberry Pi, it’s important to choose the right model that fits your needs. There are several Raspberry Pi models available, each with different specifications and capabilities. Here are a few factors to consider when selecting a Raspberry Pi model:
- Processing power: Choose a model with sufficient processing power to handle the video streaming and encoding tasks. Models like Raspberry Pi 4 offer higher processing power compared to earlier versions.
- Memory: Consider the amount of RAM available on the Raspberry Pi model. More RAM can help in smooth video processing and streaming.
- Connectivity: Look for models with built-in Wi-Fi and Bluetooth capabilities if you plan to connect your security camera wirelessly.
By choosing the right Raspberry Pi model based on your requirements, you can ensure a stable and efficient security camera live stream setup.
Install the operating system on your Raspberry Pi
Step 1: Download the Raspberry Pi OS image from the official website.
Step 2: Use a tool like Etcher to flash the OS image onto a microSD card.
Step 3: Insert the microSD card into your Raspberry Pi and power it on.
Step 4: Follow the on-screen instructions to set up the operating system.
Step 5: Make sure your Raspberry Pi is connected to the internet for updates and additional software installations.
Step 6: Your Raspberry Pi is now ready for setting up the security camera live stream.
Connect the camera module to your Raspberry Pi
Before setting up the live stream, you need to connect the camera module to your Raspberry Pi. Follow these steps:
- Make sure your Raspberry Pi is turned off.
- Locate the camera connector on the Raspberry Pi board.
- Take the camera module and gently insert it into the camera connector, making sure the contacts align properly.
- Secure the camera module in place by gently pressing down on the connector.
- Once the camera module is connected, you can proceed with setting up the software for the live stream.
Install and configure the necessary software
Before setting up your Raspberry Pi security camera live stream, you need to install and configure the necessary software. Here’s how:
- Download and install Raspbian OS on your Raspberry Pi.
- Update the system using the following commands:
sudo apt-get updatesudo apt-get upgrade
- Install the motion software for capturing and streaming video:
sudo apt-get install motion
- Edit the motion configuration file to customize the settings:
sudo nano /etc/motion/motion.conf
- Configure the motion software to start automatically on boot:
sudo systemctl enable motion
Set up the live streaming service
Now that you have your Raspberry Pi security camera set up and recording video, it’s time to set up the live streaming service so you can view the video feed remotely. Here’s how you can do it:
Step 1: Install a streaming server
You can use software like OBS Studio or VLC Media Player to set up a streaming server on your Raspberry Pi. Install the software and configure it to stream the video feed from your camera.
Step 2: Configure the streaming settings
Once the streaming server is set up, configure the streaming settings such as the bitrate, resolution, and frame rate to optimize the video quality and performance. Make sure to set up security measures like authentication to protect your live stream.
Secure your Raspberry Pi and camera stream
Securing your Raspberry Pi and camera stream is essential to protect your privacy and data. Here are some tips to enhance security:
1. Change default passwords
Make sure to change the default login credentials for your Raspberry Pi and camera. Use strong, unique passwords to prevent unauthorized access.
2. Update software regularly
Keep your Raspberry Pi’s operating system and camera software up to date to patch any security vulnerabilities. Set up automatic updates for added convenience.
3. Use encryption
Enable encryption for your camera stream to prevent eavesdropping and data interception. Use protocols like HTTPS or SSH for secure communication.
By following these security measures, you can ensure that your Raspberry Pi security camera live stream remains protected from potential threats.
Access your live stream remotely
To access your live stream remotely, you will need to set up port forwarding on your router. This will allow you to access your Raspberry Pi security camera from anywhere with an internet connection.
Step 1: Find your Raspberry Pi’s IP address
First, you will need to find the IP address of your Raspberry Pi on your local network. You can do this by logging into your router’s admin panel and looking for connected devices or by using a network scanning tool.
Step 2: Set up port forwarding
Next, log into your router’s admin panel and navigate to the port forwarding section. Here, you will need to create a new port forwarding rule for port 80 (or any other port you have set up for your camera stream) to the local IP address of your Raspberry Pi. Save the settings.
Once port forwarding is set up, you can access your live stream by entering your public IP address (which you can find by searching “what is my IP” on Google) followed by the port number in a web browser.


How does the Raspberry Pi camera setup compare to a traditional security camera system in terms of cost and functionality?
What kind of camera module do I need for the Raspberry Pi? Are there specific models that work better than others?
In the article, it mentions changing default passwords for security. Could you explain a bit about the best practices for creating strong passwords?
I recently set up my Raspberry Pi security camera using this guide and it was way easier than I expected! I followed all the steps, and now I can check in on my pets while I'm at work. The only hiccup I had was with the port forwarding, but once I figured that out, it worked like a charm. Highly recommend this setup for anyone looking for an affordable solution!
Make sure your Raspberry Pi has adequate cooling if you're using it for streaming. It can get hot!
I’m not sure this setup is really secure enough for serious surveillance. Wouldn’t a professional system be better?