
 Carmen J. Moore
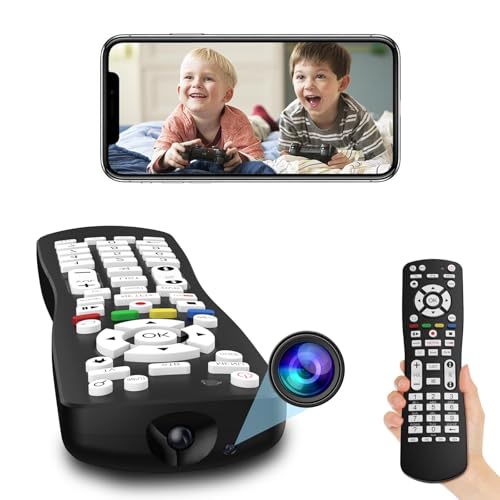
Security cameras are an essential tool for monitoring your home or business, but accessing the footage remotely can be a challenge. Setting up remote access to your security cameras allows you to view live video feeds and recordings from anywhere in the world, using your smartphone, tablet, or computer.
Step 1: Choose the Right Security Camera System


Before setting up remote access, make sure you have a security camera system that supports remote viewing. Look for cameras that offer mobile apps or web portals for remote access.
Step 2: Connect Your Cameras to the Internet
Next, you’ll need to connect your security cameras to the internet. This can usually be done by connecting the cameras to your home or business network using an Ethernet cable or Wi-Fi.
Step-by-Step Guide to Setting up Security Camera Remote Access
Setting up remote access for your security cameras allows you to monitor your property from anywhere in the world. Follow these steps to ensure a secure and seamless connection:
- Choose a reliable security camera system that supports remote access.
- Install the security cameras in strategic locations around your property.
- Connect the security cameras to your home network using Ethernet cables or Wi-Fi.
- Access the camera’s settings through the manufacturer’s app or web portal.
- Create a unique username and strong password for your camera system.
- Enable remote access features on the camera system, such as port forwarding or cloud storage.
- Configure your router to allow remote access to the camera system by opening the necessary ports.
- Test the remote access connection by accessing the camera feed from a different network.
- Regularly update the firmware of your security cameras to ensure they are protected against security vulnerabilities.
Choose the Right Security Camera System
When setting up security camera remote access, it is crucial to choose the right security camera system that suits your needs. Here are some factors to consider:
1. Type of Cameras
Decide whether you need wired or wireless cameras based on your infrastructure and preferences. Wireless cameras offer flexibility in installation, while wired cameras provide a more stable connection.
2. Resolution and Quality
Choose cameras with high resolution and quality to ensure clear and detailed footage. Consider features like night vision, motion detection, and weatherproofing for enhanced security.
| Feature | Considerations |
|---|---|
| Night Vision | Ensure cameras have infrared LEDs for clear night vision. |
| Motion Detection | Look for cameras with motion sensors to trigger alerts. |
| Weatherproofing | Choose cameras suitable for outdoor use with weatherproof housing. |
Install the Security Cameras at Strategic Locations
Before setting up remote access for your security cameras, it’s crucial to install the cameras at strategic locations around your property. Consider the areas that are most vulnerable to break-ins or unauthorized access, such as entry points, windows, and blind spots. Make sure the cameras have a clear line of sight and are positioned to capture important details.
When installing the cameras, ensure they are placed at a height that is out of reach from potential intruders. This will help prevent tampering and ensure the cameras remain functional. Additionally, consider the lighting conditions in each location and adjust the camera settings accordingly to optimize visibility.
By strategically placing your security cameras, you can maximize their effectiveness and enhance the overall security of your property.
Connect the Cameras to a Network Video Recorder (NVR)
Once you have set up your security cameras, the next step is to connect them to a Network Video Recorder (NVR). The NVR acts as the central hub for your security system, allowing you to store and access recorded footage from your cameras.
To connect the cameras to the NVR, you will need to run Ethernet cables from each camera to the NVR. Make sure to follow the manufacturer’s instructions for connecting the cameras properly. Once the cameras are connected, you can access the NVR remotely to view live footage and recordings from your security cameras.
Configure the NVR for Remote Access
After setting up your security cameras, the next step is to configure the Network Video Recorder (NVR) for remote access. Follow these steps to ensure that you can access your security camera footage from anywhere:
Step 1: Set up Port Forwarding
Log in to your router’s settings and set up port forwarding for the NVR. Port forwarding allows external devices to connect to your NVR through the internet. Consult your router’s manual for instructions on how to set up port forwarding.
Step 2: Obtain a Static IP Address
It is recommended to obtain a static IP address from your Internet Service Provider (ISP) for the NVR. A static IP address ensures that the NVR’s IP address remains constant, making it easier to access remotely. Contact your ISP for more information on obtaining a static IP address.
| Port | Protocol | Description |
|---|---|---|
| 80 | HTTP | Web access to NVR |
| 554 | RTSP | Video streaming |
| 8000 | HTTP | Mobile access to NVR |
Set up Port Forwarding on Your Router
Port forwarding is essential to allow remote access to your security camera system. Follow these steps to set it up on your router:
- Access your router’s settings by typing its IP address into your web browser.
- Locate the port forwarding section in the router settings.
- Create a new port forwarding rule for the specific port your security camera system uses (usually port 80 or 554).
- Enter the IP address of your security camera system in the appropriate field.
- Save the changes and restart your router to apply the new settings.
With port forwarding set up correctly, you should now be able to access your security camera system remotely from anywhere with an internet connection.
Obtain a Dynamic DNS (DDNS) Service
In order to access your security camera remotely, you will need to set up a Dynamic DNS (DDNS) service. DDNS allows you to assign a fixed domain name to your dynamic IP address, making it easier to access your camera from anywhere.
There are several DDNS service providers available, such as No-IP, DynDNS, and DuckDNS. You will need to create an account with one of these providers and set up a hostname for your camera. This hostname will be used to access your camera remotely.
Install a Mobile App for Remote Viewing
One of the easiest ways to access your security camera remotely is by installing a mobile app on your smartphone or tablet. Many security camera systems offer dedicated apps that allow you to view live footage, receive alerts, and control your cameras from anywhere with an internet connection.
First, download the app from the App Store (for iOS devices) or Google Play Store (for Android devices). Make sure to choose the app that is compatible with your security camera system. Once downloaded, open the app and follow the on-screen instructions to set up your cameras for remote viewing.
After the initial setup, you can log in to the app using your credentials to access your cameras remotely. You can view live footage, playback recordings, adjust camera settings, and receive notifications of any detected motion or events. Having a mobile app for remote access adds convenience and flexibility to monitor your property from anywhere at any time.
Test the Remote Access Connection
Once you have set up remote access to your security camera system, it is important to test the connection to ensure that everything is working properly. Here are some steps to follow:
- Access the remote viewing platform or app on your smartphone, tablet, or computer.
- Enter your login credentials to access the camera feed.
- Check the live feed to see if you can view the camera footage in real-time.
- Test the remote access features such as zooming in/out, panning, and tilting the camera (if applicable).
- Ensure that you can access recorded footage from the past.
By following these steps and testing the remote access connection, you can ensure that your security camera system is set up correctly and that you can monitor your property effectively from anywhere.
Secure Your Remote Access with Strong Passwords and Encryption
Setting up remote access to your security cameras is convenient, but it can also pose a security risk if not done properly. To ensure the safety of your camera feed and data, it’s essential to use strong passwords and encryption.
Here are some tips to secure your remote access:
- Choose a strong, unique password for your camera system. Avoid using default passwords or easily guessable combinations.
- Enable two-factor authentication if your camera system supports it. This adds an extra layer of security by requiring a second form of verification.
- Use encryption protocols such as SSL/TLS to secure the communication between your camera system and remote access devices.
- Regularly update your camera system’s firmware to patch any security vulnerabilities.
- Avoid sharing login credentials for your camera system and change passwords regularly.
By following these best practices, you can help protect your security camera system from unauthorized access and safeguard your privacy and data.


What if my security camera system doesn’t have a mobile app? Can I still set up remote access?
I recently set up remote access for my security cameras using an NVR. It was a bit tricky getting the port forwarding right, but once I did, it worked like a charm. I can now check on my home from anywhere, and the peace of mind is worth the effort!
When you say to get a static IP address, does that mean I have to contact my ISP?
I think it's better to use wireless cameras for easier installation. Wired setups can be a hassle with all the cables. What do you all think?
I see your point, but wired cameras tend to be more reliable. They don’t rely on Wi-Fi signals which can sometimes drop.