
 Carmen J. Moore
Setting up a security camera system is an important step in protecting your home or business. One crucial aspect of this process is properly running the wiring for your cameras.
Running security camera wiring can be a daunting task, but with the right tools and knowledge, you can do it efficiently and effectively. In this guide, we will walk you through the steps to run security camera wiring in a professional and tidy manner.


From planning the layout to choosing the right cables and connectors, we will cover everything you need to know to ensure a seamless installation of your security camera system.
Step-by-step guide on running security camera wiring
Running security camera wiring is a crucial step in setting up a surveillance system for your home or business. Properly installing the wiring ensures that your cameras are powered and connected to your recording device effectively. Here is a step-by-step guide to help you run security camera wiring:
Materials Needed:
Before you begin running the wiring, gather the following materials:
| 1. Security camera cables |
| 2. Power adapter |
| 3. Drill |
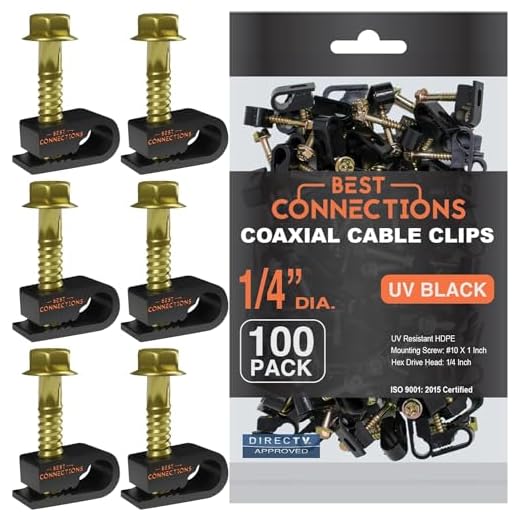
| 4. Cable clips |
| 5. Screwdriver |
Step 1: Plan the Camera Placement
Decide where you want to install your security cameras and plan the wiring route accordingly. Consider the distance from the cameras to the recording device and power source.
Step 2: Measure and Cut the Cables
Measure the required length of the security camera cables and cut them accordingly. Make sure to leave some extra length for flexibility during installation.
Step 3: Run the Cables
Use cable clips to secure the cables along the planned route. Drill holes if necessary to pass the cables through walls or ceilings. Make sure the cables are hidden and protected from the elements.
Step 4: Connect the Cameras
Connect the cables to the cameras and power source using the appropriate connectors. Ensure a secure connection to prevent any signal loss or power interruptions.
Step 5: Test the Cameras
After running the wiring, test each camera to ensure they are functioning correctly and capturing the desired footage. Adjust the positioning if needed for optimal coverage.
By following these steps, you can effectively run security camera wiring for your surveillance system. Proper installation of the wiring is essential for the overall performance and reliability of your security cameras.
Planning the camera locations
Before you start running security camera wiring, it’s crucial to plan the locations where you want to install the cameras. Consider the areas you want to monitor and the best vantage points for each camera. Think about potential blind spots and obstacles that may obstruct the camera’s view.
Key considerations:
1. Evaluate the layout of your property and identify vulnerable areas that require surveillance.
2. Determine the optimal height and angle for each camera to capture the desired footage.
Choosing the right type of cable
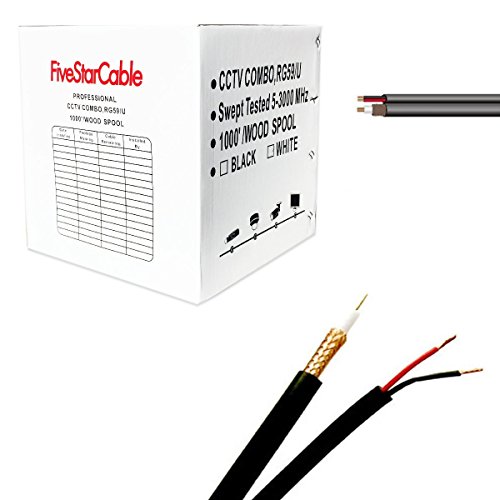
When it comes to running security camera wiring, choosing the right type of cable is crucial for ensuring a reliable and secure connection. There are several types of cables commonly used for security camera installations, each with its own advantages and disadvantages. Here are some of the most common types of cables used for security camera wiring:
| Cable Type | Advantages | Disadvantages |
|---|---|---|
| Siamese Cable | Convenient for both power and video transmission | Can be more expensive |
| Cat5e/Cat6 Cable | High-speed data transmission | May require additional power cables |
| RG59 Coaxial Cable | Good for longer distances | More susceptible to interference |
Factors to consider
When choosing the right type of cable for your security camera installation, consider factors such as the distance between the camera and the recording device, the power requirements of the camera, and the level of interference in the environment. It’s important to select a cable that can meet the specific needs of your security system to ensure optimal performance.
Gathering Necessary Tools and Materials
Before you start running security camera wiring, make sure you have all the necessary tools and materials on hand. Here is a list of items you will need:
- Security camera cables: Make sure you have enough high-quality cables to run from your cameras to the recording device.
- Power supply: Ensure you have a reliable power source to connect your cameras.
- Drill and drill bits: You will need a drill to create holes for running the wiring.
- Screwdriver: A screwdriver will be needed to secure the cameras in place.
- Cable clips or staples: Use cable clips or staples to neatly secure the wiring along the installation route.
- Tape measure: Measure the distance between cameras and the recording device for accurate cable lengths.
- Ladder: Depending on the installation height, you may need a ladder to reach the cameras.
- Helper: Having an extra set of hands can make the installation process smoother.
By gathering these tools and materials beforehand, you can ensure a more efficient and successful security camera wiring installation.
Preparing the installation area
Before you start running security camera wiring, it is important to properly prepare the installation area. Here are some key steps to follow:
- Plan the camera placement: Determine where you want to install the security cameras and make sure the locations provide optimal coverage of the area you want to monitor.
- Check the power source: Ensure that there is a nearby power source where you can connect the camera’s power supply.
- Inspect the wiring route: Identify the best route for running the camera wiring, considering factors such as distance, obstacles, and accessibility.
- Gather necessary tools: Make sure you have all the tools and materials required for the installation, such as a drill, screws, cable clips, and a cable tester.
- Prepare the mounting surface: Clean and prepare the surface where you will mount the cameras to ensure a secure and stable installation.
By properly preparing the installation area, you can ensure a smooth and successful security camera wiring installation process.
Running the wiring through walls and ceilings
When running security camera wiring through walls and ceilings, it is important to plan the route carefully to ensure a clean and professional installation. Here are some tips to help you do it right:
| 1. Plan the route: | Before you start running the wiring, plan the route carefully to avoid obstacles such as electrical wires, pipes, and ductwork. Choose the most direct path from the camera to the recording device. |
| 2. Use conduit: | For added protection, consider using conduit to run the wiring through walls and ceilings. Conduit can help prevent damage to the wiring and make it easier to replace or upgrade in the future. |
| 3. Drill holes: | When running wiring through walls, use a drill to create neat, clean holes for the wiring to pass through. Be sure to seal the holes with fire-resistant foam or caulk to prevent drafts and maintain the integrity of the wall. |
| 4. Secure the wiring: | Use cable clips or staples to secure the wiring along the route and prevent it from sagging or getting tangled. Make sure the wiring is not under tension and has some slack to allow for movement. |
| 5. Test the connection: | Once the wiring is in place, test the connection to ensure it is working properly. Check for any interference or signal loss and make any necessary adjustments before finalizing the installation. |
Connecting the cameras to the DVR or NVR
Once you have run the wiring for your security cameras, the next step is to connect them to the DVR or NVR. Follow these steps:
- Locate the BNC connectors on the back of the DVR or NVR.
- Take the coaxial cables from each camera and plug them into the corresponding BNC connectors on the DVR or NVR.
- Ensure that each camera is securely connected and that the cables are not loose.
- Connect the power adapter to each camera and plug them into a power source.
- Power on the DVR or NVR and wait for it to boot up.
- Check the monitor connected to the DVR or NVR to ensure that the cameras are displaying video feed.
- If you have multiple cameras, you can now configure the settings on the DVR or NVR to view all the camera feeds simultaneously.
By following these steps, you will have successfully connected your security cameras to the DVR or NVR, allowing you to monitor your property effectively.
Testing the camera system for proper functionality
After completing the wiring installation, it is essential to test the security camera system to ensure it is functioning correctly. Here are the steps to test the camera system:
| 1 | Power on the camera system and monitor to check for any power issues. |
| 2 | Verify that each camera is properly connected to the DVR or NVR. |
| 3 | Adjust the camera angles and focus to ensure clear images are captured. |
| 4 | Test the night vision capabilities of the cameras in low-light conditions. |
| 5 | Check the motion detection settings to ensure they are working as intended. |
| 6 | View the camera feeds on the monitor to confirm proper functionality and coverage. |
By following these steps, you can ensure that your security camera system is properly installed and functioning to protect your property effectively.



I think using a drill to make holes can be risky if you're not careful. I prefer to use surface-mounted raceways instead to avoid any potential damage to existing structures.
I recently installed a security camera system using RG59 coaxial cables. The process took a while, especially running the wires through walls, but the quality is excellent. I recommend testing each camera after installation to ensure everything is working before sealing up walls. It saved me a lot of hassle later on!
I’m debating between Siamese cables and Cat5e for my setup. I’ve heard Siamese is good for analog systems, but Cat5e is better for IP cameras. Is that true? Which one should I go for?
Yes, that's correct! Siamese cables are suitable for analog systems as they provide both power and video. For IP cameras, Cat5e or Cat6 cables are better due to their ability to handle higher data speeds.
What type of cable do you recommend for a home security camera setup? I have several cameras to install, and I want to make sure I choose the right one.
For most home security setups, Siamese cables are a popular choice as they combine power and video transmission in one cable. However, if you need high-speed data transmission for IP cameras, consider using Cat5e or Cat6 cables.
Don't forget to use cable clips! They really help in keeping everything neat and tidy.