
 Carmen J. Moore

When it comes to securing your property, installing a security camera can be a great investment. One popular location for mounting a security camera is on a chimney. This elevated position provides a wider field of view and can deter potential intruders.
However, mounting a security camera on a chimney requires careful planning and proper installation to ensure it is secure and functions correctly. In this guide, we will walk you through the steps to safely mount a security camera on your chimney, so you can enjoy peace of mind knowing your property is protected.


Step-by-step guide for installing a security camera on a chimney
Mounting a security camera on a chimney can provide a strategic vantage point for monitoring your property. Follow these steps to install a security camera on a chimney:
| Step 1: | Choose the right location on the chimney for optimal coverage and visibility. |
| Step 2: | Ensure the chimney surface is clean and free of debris before mounting the camera. |
| Step 3: | Securely attach the mounting bracket to the chimney using appropriate screws or anchors. |
| Step 4: | Mount the security camera onto the bracket and adjust the angle for the desired view. |
| Step 5: | Connect the camera to a power source and test the functionality before finalizing the installation. |
| Step 6: | Secure any exposed cables and make sure the camera is weatherproof to withstand outdoor conditions. |
| Step 7: | Regularly check and maintain the camera to ensure it continues to provide reliable surveillance. |
Choose the right security camera for your needs
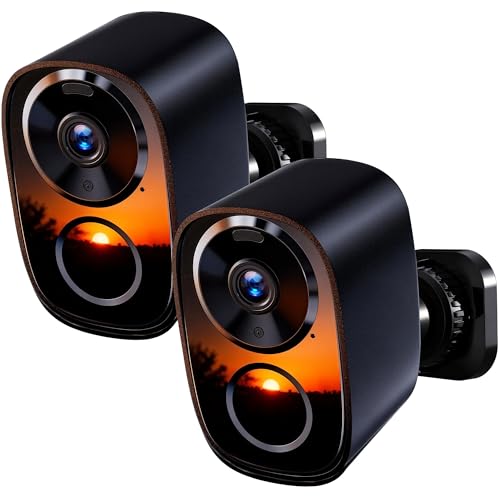
When selecting a security camera to mount on your chimney, it’s important to consider a few key factors to ensure you choose the right one for your specific needs. Here are some things to keep in mind:
Resolution
Make sure to choose a camera with a high resolution to capture clear and detailed footage. Look for cameras with at least 1080p resolution for optimal clarity.
Weatherproofing
Since the camera will be mounted outdoors on your chimney, it’s crucial to select a weatherproof camera that can withstand various weather conditions, such as rain, snow, and extreme temperatures.
| Feature | Consideration |
| Night vision | Choose a camera with infrared night vision capabilities for around-the-clock surveillance. |
| Remote access | Opt for a camera that offers remote access via a mobile app or computer for convenient monitoring. |
| Motion detection | Look for cameras with motion detection technology that can alert you to any suspicious activity. |
Prepare the necessary tools and equipment
Before you start mounting your security camera on a chimney, make sure you have all the necessary tools and equipment ready. Here is a list of items you will need:
- Ladder: Ensure you have a stable ladder that reaches the height of your chimney.
- Security camera: Choose a suitable security camera that is designed for outdoor use and can withstand various weather conditions.
- Mounting bracket: Get a mounting bracket that is compatible with your security camera and chimney surface.
- Screws and anchors: Have the right screws and anchors to securely attach the mounting bracket to the chimney.
- Drill and drill bits: Use a drill and appropriate drill bits to create holes for mounting the bracket.
- Power source: Make sure you have a nearby power source for the security camera.
Having these tools and equipment ready will help you complete the installation process smoothly and efficiently.
Check the location and stability of the chimney
Before mounting a security camera on the chimney, it is crucial to assess the location and stability of the chimney itself. Make sure the chimney is in good condition and can support the weight of the camera and any mounting equipment. Check for any cracks, loose bricks, or other structural issues that may compromise the integrity of the chimney. It is also important to consider the proximity of the chimney to any trees, branches, or other obstacles that could obstruct the camera’s view or pose a risk of damage. Ensure that the chimney is accessible and safe to work on before proceeding with the installation.
Securely mount the camera bracket on the chimney
Before mounting the security camera, make sure to securely attach the camera bracket to the chimney. Follow these steps to ensure a stable and safe installation:
Step 1: Choose the right location
Identify a suitable spot on the chimney where the camera can have a clear view of the area you want to monitor. Ensure there are no obstructions that may block the camera’s view.
Step 2: Position the bracket
Place the camera bracket against the chimney and mark the drill holes using a pencil. Make sure the bracket is level to ensure the camera will be properly positioned.
Tip: Use a level tool to ensure the bracket is straight.
Continue with the installation process, following the manufacturer’s instructions for mounting the camera securely on the chimney.
Adjust the camera angle for optimal coverage
Once the security camera is securely mounted on the chimney, it’s important to adjust the camera angle for optimal coverage. Follow these steps to ensure that your camera captures the best possible footage:
- Positioning: Ensure that the camera is facing the desired area to be monitored, such as the driveway or the entrance of your home.
- Angle adjustment: Tilt and pan the camera to cover the entire area of interest. Make sure there are no obstructions blocking the view.
- Test the view: Check the camera’s live feed to confirm that it is capturing the intended area and that there are no blind spots.
By adjusting the camera angle properly, you can maximize the security coverage of your property and ensure that the camera effectively captures any suspicious activity.
Connect the camera to a power source and test the system
Once the camera is securely mounted on the chimney, connect it to a power source using the appropriate cables. Make sure the power source is stable and provides a continuous power supply to the camera.
After connecting the camera to the power source, it’s time to test the system. Check the camera’s view angle and adjust it if necessary. Ensure that the camera is capturing clear footage and that the video feed is reaching the monitoring device.
Test the camera’s night vision capabilities if it has that feature, and make sure it functions properly in low light conditions. Additionally, check the camera’s motion detection settings and ensure they are configured correctly.
If everything is working as expected, your security camera installation on the chimney is complete. You can now monitor the area around your property with peace of mind.
Ensure proper weatherproofing and cable management
Once the security camera is securely mounted on the chimney, it is essential to ensure proper weatherproofing to protect it from the elements. Use weatherproof sealant around the base of the camera to prevent water from seeping in.
Additionally, manage the cables carefully to prevent them from getting damaged or exposed to the weather. Use cable clips or conduits to secure and protect the cables, ensuring a neat and professional installation.
Monitor the camera feed and adjust settings as needed
Once the security camera is mounted on the chimney, it is crucial to regularly monitor the camera feed to ensure that it is functioning properly and capturing the desired footage. You can access the camera feed through a mobile app or a computer software provided by the camera manufacturer.
Make sure to check the camera angle and adjust it if necessary to capture the desired area effectively. Additionally, adjust the camera settings such as motion detection sensitivity, recording schedule, and video quality to optimize the camera’s performance based on your specific needs.
Maintain and clean your security camera regularly
Regular maintenance and cleaning of your security camera are essential to ensure optimal performance and longevity. Here are some tips to help you keep your security camera in top condition:
1. Check for debris and obstructions
Regularly inspect your security camera for any debris, dust, or other obstructions that may obstruct the view or affect the image quality. Clean the lens and housing with a soft, dry cloth to remove any dirt or grime.
2. Test the camera periodically
Perform regular testing of your security camera to ensure that it is functioning properly. Check the camera’s field of view, image quality, and motion detection capabilities. Make any necessary adjustments or repairs as needed.





Thanks for the detailed guide! I never thought about checking the chimney's stability before mounting the camera.
I mounted a camera on my chimney last month. I used a 1080p camera with night vision, and it works great! The installation was pretty straightforward, but I had to use a really sturdy ladder to reach the top safely. Just make sure to check the stability of your chimney beforehand; mine had a few loose bricks that I had to address first.
Don't forget to regularly clean the camera lens. My footage was getting foggy until I started doing that!
What tools do I really need to mount a camera on the chimney? Can I do it alone, or is it better to have someone help?
For tools, you'll need a ladder, drill, screws, anchors, and a mounting bracket. It's always safer to have someone assist you, especially when working at heights.
Does the camera need to be weatherproof if it's already under a roof? What if it’s not exposed directly to rain?
Even if it's under a roof, weatherproofing is important. Humidity, temperature changes, and occasional splashes can affect a non-weatherproof camera over time.
I think mounting a camera on a chimney can be risky. What if it gets blown off in a storm or if the chimney is old and weak?
I recently mounted a camera on my chimney, and it’s been great. I chose a model with night vision, and it works well even in low light. I did have to adjust the angle a few times to avoid some tree branches, but overall the installation was straightforward.
I think mounting a camera on a chimney isn’t the best idea. It could be risky if the chimney isn't stable or if there are too many overhanging branches. I'd recommend mounting it lower on the house for better accessibility and stability.
What type of security camera is best for mounting on a chimney? Should I prioritize night vision or resolution?
Can anyone explain how to ensure the camera is weatherproof? What should I look for?
What tools do I really need to mount a security camera on a chimney? I have a ladder, but not sure about the other stuff.
You definitely need a drill and the proper screws/anchors. I also recommend a level tool to make sure everything is straight.