
 Carmen J. Moore

Installing a dome security camera can enhance the security of your home or business premises. These cameras are discreet and effective in monitoring your property. However, mounting them correctly is crucial to ensure maximum coverage and functionality. In this guide, we will walk you through the steps to mount a dome security camera.
Step 1: Choose the location
Before mounting the camera, carefully select the location where you want to install it. Make sure it offers a clear view of the area you want to monitor and is out of reach of potential intruders.
Step 2: Mark the drilling points
Once you have chosen the location, use a pencil to mark the drilling points for the mounting bracket. Ensure the marks are level and aligned correctly to avoid any issues during installation.
Step 3: Drill the holes
Use a drill to create holes at the marked points. Make sure the holes are deep enough to securely anchor the mounting bracket. Use anchors if necessary for added stability.

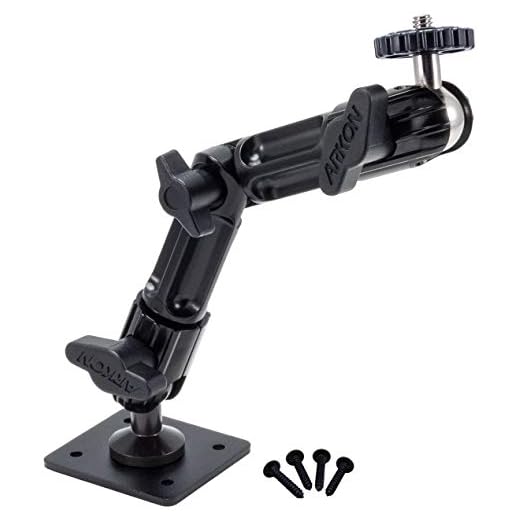
Step-by-step guide on mounting a dome security camera
Mounting a dome security camera is an essential step in setting up your home or business surveillance system. Follow these steps to correctly install your dome camera:
| Step 1: | Choose the right location for your dome camera. Make sure it has a clear view of the area you want to monitor. |
| Step 2: | Use a stud finder to locate a solid surface to mount the camera. Mark the drilling points with a pencil. |
| Step 3: | Drill holes into the marked spots and insert anchors if needed. Make sure the holes are aligned properly. |
| Step 4: | Attach the mounting bracket to the surface using screws. Ensure it is securely fastened. |
| Step 5: | Mount the dome camera onto the bracket, following the manufacturer’s instructions. Adjust the angle for the best view. |
| Step 6: | Connect the camera to the power source and the recording device. Test the camera to ensure it is working correctly. |
| Step 7: | Secure any loose cables and make sure the camera is protected from the elements. |
Choosing the right location
When mounting a dome security camera, choosing the right location is crucial for optimal performance. Here are some factors to consider:
1. Coverage area
Ensure that the camera is positioned to cover the area you want to monitor. Consider the field of view and angle of the camera to capture the desired footage.
2. Accessibility
Make sure the camera is easily accessible for maintenance and adjustments. Avoid placing it in hard-to-reach areas that may hinder regular upkeep.
Preparing the necessary tools
Before you start mounting your dome security camera, make sure you have all the necessary tools handy. Here is a list of tools you will need:
- Power drill: You will need a power drill to create holes for mounting the camera.
- Screwdriver: A screwdriver will be necessary to secure the camera in place.
- Tape measure: Use a tape measure to ensure precise placement of the camera.
- Pencil: You will need a pencil to mark the spots where you will drill holes.
- Ladder: Depending on the height of the installation, a ladder may be required for access.
- Safety goggles and gloves: To protect yourself while drilling and handling the camera.
Having these tools ready will make the installation process smoother and ensure a secure and professional mounting of your dome security camera.
Installing the mounting bracket
Before mounting the dome security camera, you need to install the mounting bracket. Follow these steps:
- Choose the location: Select a suitable location for mounting the camera where it has a clear view of the area you want to monitor.
- Mark the holes: Place the mounting bracket against the surface and mark the holes where you will secure it.
- Drill the holes: Use a drill to create the holes for mounting the bracket securely.
- Secure the bracket: Attach the mounting bracket to the surface using screws or bolts, making sure it is firmly in place.
Once the mounting bracket is securely installed, you can proceed to mount the dome security camera on it.
Adjusting the angle of the camera
Once the dome security camera is mounted in the desired location, it’s essential to adjust the angle for optimal coverage and visibility. Follow these steps to adjust the camera angle:
1. Loosen the mounting bracket:
Locate the screws on the mounting bracket that secure the camera in place. Use a screwdriver to gently loosen these screws to allow for movement.
2. Position the camera:
With the mounting bracket loosened, carefully adjust the angle of the camera to the desired position. Ensure that the camera is pointing in the direction you want to monitor.
Once you have positioned the camera correctly, tighten the screws on the mounting bracket to secure the camera in place. Double-check the angle and make any final adjustments as needed.
Connecting the cables
Step 1: Begin by identifying the power cable and the Ethernet cable that came with your dome security camera.
Step 2: Connect the power cable to the power input on the camera and plug the other end into a power outlet.
Step 3: Connect the Ethernet cable to the Ethernet port on the camera and connect the other end to your router or network switch.
Step 4: Make sure both cables are securely connected to avoid any connection issues.
Step 5: Once the cables are connected, you can proceed with the installation and setup of your dome security camera.
Securing the camera in place
After mounting the dome security camera in the desired location, it is crucial to secure it properly to ensure stability and reliability.
1. Use screws and anchors
Most dome cameras come with mounting hardware, including screws and anchors. Make sure to use the appropriate size and type of screws to securely fasten the camera to the mounting surface.
2. Adjust the tilt and rotation
Before tightening the screws completely, adjust the tilt and rotation of the camera to ensure it is pointing in the desired direction. Once the camera is positioned correctly, tighten the screws to secure it in place.
Testing the camera’s functionality
Once the dome security camera is mounted securely, it is important to test its functionality to ensure it is working properly. Follow these steps to test the camera:
- Power on the camera by connecting it to a power source.
- Check the camera’s connection to the monitoring system or recording device.
- Adjust the camera’s angle and settings to get the desired view.
- Test the camera’s night vision capabilities in low-light conditions.
- Verify that the camera is capturing clear and sharp images.
- Check the camera’s motion detection and alarm features if applicable.
- Ensure that the camera is transmitting video feed to the intended monitoring system.
By following these steps, you can confirm that the dome security camera is functioning correctly and providing the necessary surveillance for your property.


I recently mounted a dome camera and followed similar steps. Choosing the right location was key for me. I opted for a corner of my porch which had a clear view of the driveway and street. It took a bit of trial and error to get the angle right, but now it covers the entire area effectively. Just make sure you secure the cables well to avoid any issues with tripping hazards.
Is it necessary to use anchors when mounting the camera, or can I just screw it directly into the wall?
What tools do I really need to mount a dome security camera? Is a power drill absolutely necessary?
I think the article underestimates the importance of testing the camera after installation. It’s crucial to check not just the angles but also the connectivity; I had issues after mounting because I didn’t test it right away.