
 Carmen J. Moore

Are you looking to enhance the security of your home or business by installing a wireless IP security camera outside? With advancements in technology, setting up a surveillance system has become easier and more convenient than ever. In this guide, we will walk you through the process of installing a wireless IP security camera outside your property to keep an eye on your surroundings and ensure peace of mind.
Wireless IP cameras offer flexibility and convenience, allowing you to monitor your property remotely from your smartphone or computer. Whether you want to deter potential intruders, keep an eye on your pets, or simply enhance the security of your premises, installing a wireless IP security camera can provide you with the peace of mind you deserve.


Step-by-step Guide to Installing Wireless IP Security Camera Outdoors
Installing a wireless IP security camera outdoors can provide you with peace of mind and added security for your property. Follow these steps to ensure a successful installation:
| Step 1: | Choose the location for your camera. Make sure it is within the range of your Wi-Fi signal and has a clear view of the area you want to monitor. |
| Step 2: | Mount the camera securely using the appropriate mounting hardware. Ensure it is positioned at the right angle for optimal coverage. |
| Step 3: | Connect the camera to a power source. Use a weatherproof power adapter if the camera will be exposed to the elements. |
| Step 4: | Set up the camera’s Wi-Fi connection. Follow the manufacturer’s instructions to connect the camera to your home network. |
| Step 5: | Install the camera’s mobile app on your smartphone or tablet. This will allow you to view the camera’s feed remotely. |
| Step 6: | Configure the camera’s settings, such as motion detection and recording options, to suit your preferences. |
| Step 7: | Test the camera to ensure it is functioning correctly. Check the live feed and adjust any settings as needed. |
| Step 8: | Regularly maintain the camera by cleaning the lens and checking for any obstructions that may affect its performance. |
Choose the Right Camera
When installing a wireless IP security camera outside, it’s crucial to choose the right camera for your specific needs. Look for a camera that is weatherproof and designed for outdoor use. The camera should have a high resolution and a wide field of view to capture clear images of the surrounding area. Additionally, consider features such as night vision, motion detection, and two-way audio communication for added security and convenience.
Find the Perfect Spot
When installing a wireless IP security camera outside, it is crucial to find the perfect spot to ensure optimal coverage and security. Here are some tips to help you find the ideal location:
Consider the Field of View
Make sure to choose a spot that provides a clear view of the area you want to monitor. Avoid obstructions such as trees, bushes, or walls that could block the camera’s view.
Ensure Good Wi-Fi Signal
Check the Wi-Fi signal strength at the chosen location to ensure a stable connection. Position the camera within range of your Wi-Fi network for reliable performance.
Prepare the Necessary Tools
Before starting the installation process, gather all the necessary tools and equipment to ensure a smooth setup. Here are the essential tools you will need:
1. Wireless IP security camera kit:
Make sure you have the wireless IP security camera kit that includes the camera, mounting hardware, power adapter, and any additional accessories.
2. Power drill and screws:
You will need a power drill and screws to securely mount the camera on the exterior wall or surface.
Other tools: Additionally, you may need a ladder, screwdriver, measuring tape, and a smartphone or computer to set up and configure the camera.
Mount the Camera
Once you have found the perfect location for your wireless IP security camera, it’s time to mount it securely. Follow these steps to mount the camera:
Step 1: Attach the Mounting Bracket
Begin by attaching the mounting bracket to the desired surface using screws. Make sure the bracket is securely fastened to prevent any movement.
Step 2: Secure the Camera
Next, mount the camera onto the bracket and ensure it is securely in place. Adjust the angle of the camera to capture the desired field of view.
By following these steps, you can securely mount your wireless IP security camera outside and ensure optimal surveillance coverage.
Connect to Power Source
Once you have found the ideal location for your wireless IP security camera outside, it’s time to connect it to a power source. Most outdoor cameras come with a power adapter that needs to be plugged into a nearby power outlet. Make sure to use weatherproof cable connectors or enclosures to protect the power connection from the elements.
Alternatively, you can opt for a battery-powered camera or a solar-powered camera if you want to avoid dealing with cables and power outlets. These options offer flexibility and convenience, especially in areas where accessing a power source may be challenging.
Set Up the Camera Software
After mounting your wireless IP security camera outside, the next step is to set up the camera software. This typically involves connecting the camera to your home network and configuring the settings through a web browser or a dedicated app.
1. Connect the camera to your home network using the provided instructions. This usually involves connecting the camera to your router via an Ethernet cable or using Wi-Fi.
2. Access the camera’s settings by entering its IP address in a web browser. The IP address can usually be found in the camera’s manual or on the camera itself.
3. Follow the on-screen instructions to set up the camera’s Wi-Fi connection, adjust video quality settings, and configure any additional features like motion detection or remote access.
4. Download any necessary software or apps to view the camera feed on your computer or mobile device. Make sure to set up any alerts or notifications for motion detection if desired.
5. Test the camera to ensure it is functioning properly and that you can access the feed from your desired devices. Make any necessary adjustments to the settings to optimize performance.
Test the Camera
Before mounting the camera permanently, it’s important to test it to ensure it is working properly. Follow these steps to test your wireless IP security camera:
- Power on the camera and connect it to your Wi-Fi network according to the manufacturer’s instructions.
- Access the camera’s live feed on your smartphone or computer to check the video quality and ensure the camera is capturing the desired area.
- Test the camera’s motion detection and night vision features to make sure they are functioning correctly.
Adjust Camera Settings
If necessary, adjust the camera settings such as motion sensitivity, recording schedule, and alerts to customize its performance to your needs.
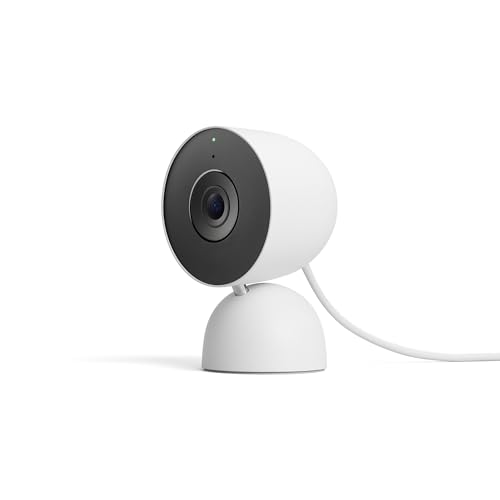


Can anyone clarify what 'weatherproof' actually means for these cameras? Does that mean they can withstand heavy rain?
'Weatherproof' typically means the camera can handle various outdoor conditions, including rain and dust. However, it's always good to check the specific IP rating for each model to understand its resistance level.
What types of wireless IP security cameras are best for outdoor use? Do they all have weatherproof features?
I recently installed a wireless IP security camera outside my home, but I had a bit of trouble with the Wi-Fi connection. I had to reposition it a few times to get a strong signal. Once I found the right spot, everything worked great. The mobile app is super convenient for checking the live feed!
Make sure to check local laws about security cameras before installing. Some places have rules about privacy!
I don't think battery-powered cameras are as reliable as wired ones. They can run out of power unexpectedly, and you might not notice until it's too late. I'd stick with wired if possible.
You raise a valid point. Battery-powered cameras do require regular maintenance, but they offer flexibility where running wires isn't feasible. It's all about finding the right balance for your specific situation.