
 Carmen J. Moore

When it comes to keeping your home secure, installing a security camera can be a great option. However, if your home has vinyl siding, you may be wondering how to properly install a security camera without damaging the siding. With the right tools and techniques, you can easily mount a security camera on your vinyl siding to enhance the safety of your home.
Before you begin the installation process, it’s important to choose the right location for your security camera. Look for a spot that provides a clear view of the area you want to monitor, such as your front door or driveway. Make sure the location is also within reach of a power source and Wi-Fi signal for easy connectivity.
Once you’ve selected the ideal location, you’ll need to gather the necessary tools and materials, including a drill, screws, a mounting bracket, and a power drill. Follow these step-by-step instructions to securely install your security camera on vinyl siding and enjoy added peace of mind knowing your home is protected.


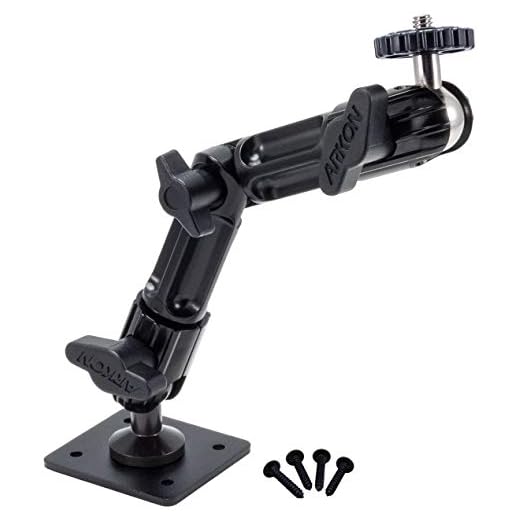
Step-by-Step Guide to Installing Security Camera on Vinyl Siding
Step 1: Choose the location for your security camera on the vinyl siding that provides a clear view of the area you want to monitor.
Step 2: Use a stud finder to locate the studs behind the vinyl siding where you plan to mount the camera. Mark the stud locations with a pencil.
Step 3: Drill a pilot hole into the marked stud locations using a drill bit that is slightly smaller than the screws provided with the camera.
Step 4: Attach the mounting bracket of the security camera to the vinyl siding using the screws provided. Make sure the bracket is securely attached to the studs for stability.
Step 5: Connect the camera to the bracket according to the manufacturer’s instructions. Ensure the camera is level and pointing in the desired direction.
Step 6: Run the camera’s power and video cables along the vinyl siding to a power source and recording device. Use cable clips to secure the cables in place.
Step 7: Test the security camera to ensure it is functioning properly and adjust the angle if needed for optimal surveillance coverage.
Step 8: Regularly maintain and clean the camera to ensure clear footage and reliable performance over time.
Choose the Right Camera
When selecting a security camera to install on vinyl siding, there are a few key features to consider:
- Weatherproofing: Look for a camera that is specifically designed to withstand outdoor elements such as rain, wind, and extreme temperatures.
- Mounting Options: Choose a camera that comes with a mounting bracket suitable for vinyl siding installation. Some cameras may require additional mounting hardware.
- Power Source: Decide whether you want a wired or wireless camera. For vinyl siding installation, a wireless camera may be easier to install without having to run wires through the siding.
- Resolution: Opt for a camera with high-resolution video capabilities to ensure clear and detailed footage.
- Night Vision: Consider a camera with infrared night vision for around-the-clock surveillance.
Prepare the Necessary Tools
Before you start the installation process, make sure you have all the necessary tools and equipment ready. Here is a list of tools you may need:
Tools:
- Screwdriver
- Drill
- Level
- Tape measure
- Pencil
Having these tools on hand will make the installation process smoother and more efficient.
Determine the Ideal Location
Before installing a security camera on vinyl siding, it’s important to determine the ideal location for the camera. Consider the following factors:
1. Coverage Area
Decide on the area you want the camera to cover. Make sure the camera has a clear line of sight and covers the desired field of view.
2. Accessibility
Choose a location that is easily accessible for maintenance and adjustments. Avoid placing the camera too high or in hard-to-reach areas.
| Location Factors | Considerations |
|---|---|
| Lighting | Ensure there is adequate lighting for the camera to capture clear footage. |
| Weather Protection | Choose a spot that provides protection from harsh weather conditions to prolong the camera’s lifespan. |
| Visibility | Avoid placing the camera in a highly visible or easily accessible location to deter potential tampering. |
Mounting the Camera
Before mounting the security camera on your vinyl siding, make sure to choose a location that provides a clear view of the area you want to monitor. It should also be near a power source for easy installation.
Steps to Mount the Camera:
- Use a pencil to mark the screw holes on the siding where you want to mount the camera.
- Drill pilot holes into the siding at the marked locations to make it easier to screw in the mounting bracket.
- Attach the mounting bracket to the siding using screws or mounting hardware provided with the camera.
- Securely attach the security camera to the mounting bracket according to the manufacturer’s instructions.
- Adjust the angle of the camera to ensure it captures the desired area and tighten any screws to lock the position in place.
Once the camera is securely mounted, connect it to a power source and configure any settings or connect it to your monitoring system as needed.
Connect the Camera to Power Source
Once the security camera is securely mounted on the vinyl siding, you need to connect it to a power source. Here’s how:
- Locate a nearby power outlet: Find a power outlet within reach of the camera’s power cord. If there isn’t one nearby, you may need to use an extension cord or hire an electrician to install one.
- Plug in the power adapter: Connect the camera’s power adapter to the power outlet. Make sure the connection is secure.
- Connect the camera: Plug the other end of the power adapter into the camera’s power input port. Ensure the connection is tight and the camera is receiving power.
- Test the camera: Turn on the power to the camera and check if it’s functioning properly. You may need to adjust the camera angle or settings to get the desired view.
By following these steps, you’ll have successfully connected your security camera to a power source and can now monitor your property with ease.
Test and Adjust the Camera
After installing the security camera on your vinyl siding, it’s important to test and adjust it to ensure it’s capturing the desired area and functioning properly. Follow these steps to test and adjust the camera:
- Connect the camera to a power source and monitor to test the video feed.
- Adjust the camera angle and position to capture the desired area. Make sure it’s not obstructed by any objects.
- Check the camera’s night vision capabilities by testing it in low-light conditions.
- Test the camera’s motion detection feature to ensure it’s triggering alerts accurately.
Final Check
Once you’ve tested and adjusted the camera, do a final check to ensure it’s securely mounted and functioning correctly. Monitor the video feed over a period of time to verify its performance and make any necessary adjustments.

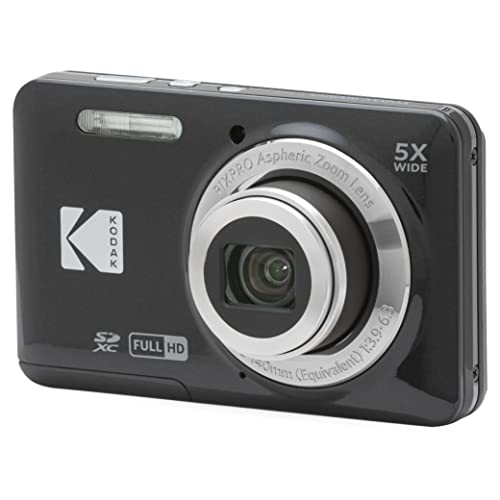


I installed my security camera on vinyl siding last month. It was easier than I thought! Just make sure to double-check the level before securing everything.
I think wireless cameras are overrated. Having a wired connection is much more reliable for video quality and won't run into battery issues. I would recommend going wired if possible, especially for outdoor setups.
What type of drill bit should I use for vinyl siding?
You should use a drill bit that is slightly smaller than the screws you'll be using. A standard high-speed steel bit works well for vinyl siding.