
 Carmen J. Moore
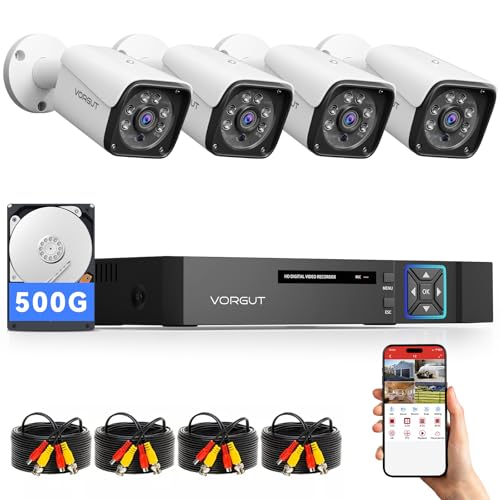
Setting up a Hikvision security camera can greatly enhance the safety and security of your home or business premises. These cameras offer high-quality video surveillance and advanced features, making them a popular choice for many users.
Before you begin the installation process, it’s essential to familiarize yourself with the camera’s specifications and requirements. This guide will walk you through the steps to install your Hikvision security camera effectively and ensure it functions optimally.
Whether you’re a DIY enthusiast or seeking professional help, following these instructions will help you set up your Hikvision camera system efficiently and enjoy peace of mind knowing your property is well-protected.
Step-by-Step Guide: Installing Hikvision Security Camera
Installing a Hikvision security camera is a straightforward process that can enhance the security of your property. Follow these steps to set up your camera:


Step 1: Choose the Installation Location
Decide where you want to place your security camera. Make sure it has a clear view of the area you want to monitor.
Step 2: Mount the Camera
Use the mounting kit provided with your Hikvision camera to securely attach it to the chosen location. Ensure it is fixed properly to prevent any movement.
Tip: Consider the camera’s field of view and angle to maximize its effectiveness.
Step 3: Connect the Camera
Connect the camera to a power source and your network using the supplied cables. Follow the manufacturer’s instructions for the correct connections.
Note: Some Hikvision cameras support wireless connectivity for a cable-free setup.
By following these steps, you can successfully install your Hikvision security camera and start monitoring your property with ease.
Choose the Right Location
When installing your Hikvision security camera, it is crucial to choose the right location for optimal performance. Consider the following factors:
1. Coverage Area
Determine the areas you want to monitor and choose a location that provides the best coverage. Make sure the camera is positioned to capture the desired angles and views.
2. Power Source
Ensure the camera is located near a power source or consider using a power-over-ethernet (PoE) connection for convenient power supply.
Check Camera Components
Before installing your Hikvision security camera, it’s important to check all the components that come with the camera package. Here are the components you should have:
- Security camera
- Mounting bracket
- Power adapter
- Network cable
- Quick start guide
- Installation screws and anchors
Make sure you have all the necessary components before you start the installation process to avoid any delays or issues.
Prepare Necessary Tools
Before you start installing your Hikvision security camera, make sure you have all the necessary tools and equipment ready. Here is a list of tools you will need:
Tools:
- Screwdriver (Phillips and flathead)
- Drill and drill bits
- Tape measure
- Ladder
- Cable tester
Equipment:
- Hikvision security camera
- Mounting brackets
- Power adapter
- Network cable
- Monitor or recording device
Having these tools and equipment ready will make the installation process smoother and more efficient.
Mount the Camera Bracket
Before mounting the camera bracket, make sure to select a suitable location for your Hikvision security camera. The location should provide a clear view of the area you want to monitor.
- Use a pencil to mark the placement of the screws on the wall or ceiling.
- Drill pilot holes for the screws using a drill and the appropriate drill bit size.
- Attach the camera bracket to the wall or ceiling using the screws provided in the Hikvision camera kit.
- Make sure the bracket is securely fastened to the surface to prevent the camera from falling.
Connect Power Supply
Before mounting the Hikvision security camera, ensure that you have connected the power supply correctly. Follow these steps:
1. Power Adapter
Plug the power adapter into a nearby power outlet.
2. Camera Connection
Connect the power adapter to the power input port on the security camera. Make sure the connection is secure.
Configure Network Settings
After physically installing the Hikvision security camera, the next step is to configure the network settings to ensure proper connectivity. Follow these steps:
1. Access the Camera’s Web Interface
Open a web browser on your computer and enter the IP address of the camera in the address bar. You will be prompted to enter the default username and password (usually admin/admin).
2. Configure Network Settings
| Setting | Description |
|---|---|
| IP Address | Set a static IP address for the camera within your network’s range. |
| Subnet Mask | Enter the subnet mask provided by your network administrator. |
| Gateway | Input the IP address of your network’s gateway. |
| DNS | Enter the DNS server’s IP address for domain name resolution. |
Save the settings and restart the camera to apply the changes. Your Hikvision security camera is now configured with the correct network settings for seamless operation.
Install Surveillance Software
Once you have successfully set up your Hikvision security camera hardware, the next step is to install the surveillance software on your computer or mobile device. Here is a step-by-step guide to help you with the installation process:
- Download the Hikvision surveillance software from the official website or app store.
- Follow the on-screen instructions to install the software on your device.
- Launch the software and create an account if required.
- Connect your security camera to the software by entering the camera’s IP address and login credentials.
- Once connected, you can start monitoring your camera feeds, adjusting settings, and accessing recorded footage.
Make sure to update the software regularly to ensure optimal performance and security of your surveillance system.
Test Camera Functionality
After completing the installation process, it is important to test the functionality of your Hikvision security camera to ensure it is working properly. Here are the steps to test the camera:
- Power On: Make sure the camera is properly powered on and receiving power.
- Network Connection: Check if the camera is connected to the network and has a stable internet connection.
- Access the Camera: Use the Hikvision software or app to access the camera feed and make sure you can view the live footage.
- Adjust Settings: Test the camera settings such as motion detection, recording, and alerts to ensure they are functioning correctly.
- Check Image Quality: Verify the image quality of the camera by checking for clarity, color accuracy, and resolution.
By following these steps, you can ensure that your Hikvision security camera is properly installed and functioning as intended.
Adjust Camera Position
Once the Hikvision security camera is installed, it’s important to adjust its position for optimal coverage. Follow these steps to adjust the camera position:
1. Angle Adjustment:
Use the mounting bracket to adjust the angle of the camera. Ensure that the camera is pointing in the desired direction to cover the intended area.
2. Height Adjustment:
Adjust the height of the camera to get the best view of the area you want to monitor. Make sure the camera is positioned at the right height to capture clear images.


I disagree that this camera is easy to install. I had a lot of trouble with the network settings. It might be simple for some, but definitely not for everyone.
I found the setup tricky too. It took me a couple of tries to get the network settings right.
I installed my Hikvision camera last week, and it was easier than I expected. Just make sure to check the power source first. I initially placed mine too far from an outlet.
What tools do I really need for the installation?
Just a reminder to secure your camera with a strong password after installation!
I was looking at Hikvision vs. other brands like Nest and Ring. Hikvision seems to offer better video quality for the price, but how does the software compare? Can anyone share their experience?
Can you clarify what 'static IP address' means? I'm not very tech-savvy.
A static IP address is a permanent IP address assigned to your camera that doesn’t change. This makes it easier to access your camera consistently.