
 Carmen J. Moore
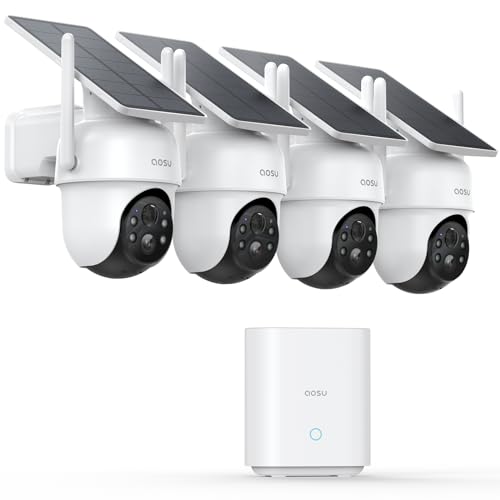
Installing a camera security system at home is a crucial step towards ensuring the safety and security of your family and property. With advancements in technology, setting up a camera security system has become more accessible and affordable than ever before. Whether you want to monitor your home while you’re away or deter potential intruders, a camera security system is an effective solution.
In this guide, we will walk you through the steps to install a camera security system for your home, providing you with peace of mind and a sense of security.


Guide to Installing Camera Security System
Installing a camera security system is a great way to enhance the safety and security of your home. Follow these steps to ensure a successful installation:
- Choose the right location for your cameras. Place them in areas that provide optimal coverage of your property.
- Mount the cameras securely. Make sure they are positioned at the right angle to capture clear footage.
- Connect the cameras to a power source. Most cameras come with a power adapter that can be plugged into a nearby outlet.
- Set up the camera system’s recorder. This can be a DVR or NVR that will store the footage captured by the cameras.
- Configure the camera system. Follow the manufacturer’s instructions to set up the system and adjust the settings as needed.
- Test the system. Make sure all cameras are functioning properly and that the footage is being recorded correctly.
- Monitor the system regularly. Check the footage periodically to ensure that your camera security system is working effectively.
Choosing the Right Camera System
When selecting a camera security system for your home, it is important to consider several key factors to ensure you choose the right one for your needs:
- Indoor vs. Outdoor: Determine whether you need cameras for indoor monitoring, outdoor surveillance, or both.
- Resolution: Look for cameras with high resolution (1080p or higher) for clearer images and better video quality.
- Night Vision: Opt for cameras with infrared night vision capabilities to monitor your property in low-light conditions.
- Weather Resistance: If you plan to install outdoor cameras, make sure they are weatherproof and can withstand various weather conditions.
- Remote Viewing: Choose a system that offers remote viewing capabilities through a mobile app or web browser for easy access to live footage.
- Storage: Consider whether you prefer a system with local storage (DVR/NVR) or cloud storage for your video recordings.
- Budget: Set a budget for your camera system and compare different options to find one that fits your budget while meeting your security needs.
By carefully considering these factors, you can select the right camera security system to protect your home and give yourself peace of mind.
Planning the Camera Placement
Deciding where to place your security cameras is a crucial step in setting up your camera security system. Here are some tips to help you plan the camera placement:
1. Identify vulnerable areas: Walk around your home and identify areas that are vulnerable to break-ins or suspicious activities. These could include entry points like doors and windows, as well as blind spots where intruders can hide.
2. Consider the camera’s field of view: Make sure the cameras have a clear view of the areas you want to monitor. Position them at angles that cover as much of the area as possible without obstructions.
3. Opt for strategic locations: Place cameras at strategic locations that provide maximum coverage, such as corners of the house, near the garage, or overlooking the driveway.
4. Keep cameras out of reach: Install cameras high enough to prevent tampering or vandalism. This will ensure that the cameras remain functional and capture clear footage.
5. Consider lighting conditions: Choose locations with good lighting for clearer footage. Avoid placing cameras directly facing bright lights or in areas with extreme glare.
By carefully planning the placement of your security cameras, you can enhance the effectiveness of your camera security system and better protect your home.
Gathering the Necessary Tools
Before you begin the installation process, make sure you have all the necessary tools handy. Here is a list of essential tools you will need:
- Security Cameras: Make sure you have the cameras you plan to install.
- DVR or NVR: Ensure you have the recording device for your security system.
- Power Supply: Make sure you have the appropriate power supply for your cameras.
- Cables: Have the necessary cables for connecting the cameras to the DVR/NVR and power source.
- Drill and Screws: You will need these to mount the cameras securely.
- Screwdriver: To assist with installing and securing the cameras and cables.
- Monitor: A monitor to set up and configure your security system.
- Internet Connection: Ensure you have a stable internet connection for remote viewing and monitoring.
Having these tools ready before you start the installation will help streamline the process and ensure a successful setup of your camera security system.
Installing the Cameras
Once you have determined the best locations for your security cameras, it’s time to install them. Follow these steps to ensure a successful installation:
Step 1: Mounting the Cameras
Start by mounting the cameras in the chosen locations. Use the mounting brackets and screws included with your camera system. Make sure the cameras are securely attached to the wall or ceiling to prevent them from falling.
Step 2: Connecting the Cameras
Next, connect the cameras to the power source and to the recording device or monitor. Follow the manufacturer’s instructions for each camera to ensure proper connectivity. Test each camera to make sure it is functioning correctly.
By following these steps, you can ensure that your security cameras are properly installed and ready to protect your home.
Mounting the Cameras
When mounting your security cameras, it is important to choose strategic locations that provide optimal coverage of your property. Here are some key tips to keep in mind:
1. Choose the Right Height
Mount your cameras at a height of 9-10 feet for the best angle and coverage. This height allows the camera to capture faces and other details without being easily tampered with.
2. Avoid Obstructions
Make sure there are no obstructions like trees, bushes, or walls blocking the camera’s view. Clear the area around the camera to ensure a clear line of sight.
Follow these tips to ensure that your security cameras are mounted in the best possible positions to protect your home.
Setting Up the Monitoring System
Once you have installed the cameras and connected them to the recording device, it’s time to set up the monitoring system. Follow these steps to ensure your camera security system is up and running:
1. Access the System Interface
Log in to the system using the provided username and password. This will give you access to the camera feeds and settings.
2. Configure Camera Settings
Adjust the camera settings such as resolution, frame rate, motion detection, and recording schedule to meet your specific needs. Make sure to save the changes after configuring each camera.
By following these steps, you can effectively set up the monitoring system for your camera security system and enhance the security of your home.
Testing the Camera System
Once you have completed the installation of your camera security system, it is important to test the system to ensure that it is working correctly. Testing the camera system will help you identify any potential issues and make any necessary adjustments before relying on it for security purposes.
Testing Steps:
Here are some steps you can follow to test your camera system:
| 1. | Check camera views: | Make sure each camera is capturing the desired area and that there are no obstructions blocking the view. |
| 2. | Check camera angles: | Adjust camera angles if needed to ensure optimal coverage of the area you want to monitor. |
| 3. | Test recording: | Initiate a recording test to verify that the cameras are recording properly and that the footage is clear. |
| 4. | Test motion detection: | Walk in front of each camera to ensure that the motion detection feature is working correctly and capturing movement. |
| 5. | Check remote viewing: | Access the camera feed remotely on your smartphone or computer to confirm that you can view the live footage from anywhere. |
By following these testing steps, you can ensure that your camera security system is properly installed and functioning as intended to provide you with the security and peace of mind you need for your home.
Maintaining Your Security Cameras
Proper maintenance of your security cameras is essential to ensure they function correctly and provide you with reliable surveillance. Here are a few tips to help you maintain your security cameras:
Regular Cleaning
Regularly clean the lenses of your security cameras to ensure clear footage. Use a soft, lint-free cloth to gently wipe away dust and dirt. Avoid using harsh cleaning chemicals that could damage the lenses.
Check Connections
Periodically check the connections of your security cameras to make sure they are secure. Loose connections can lead to signal loss or poor video quality. Tighten any loose connections to maintain a reliable surveillance system.
| Task | Frequency |
|---|---|
| Check camera angles | Monthly |
| Inspect cables for damage | Quarterly |
| Update camera firmware | Annually |


I installed a system last month, and it was easier than I thought. The step on camera placement was super helpful; I positioned mine near the entry points and it’s comforting knowing I can monitor them from my phone.
Thanks for sharing your experience! It's great to hear that the placement tips were helpful. Monitoring via mobile apps is definitely a game changer.
Just a heads up: make sure to check the weather resistance of outdoor cameras! It really makes a difference in durability.
I’m not sure I agree that outdoor cameras need to be super high. Sometimes, a lower mounted camera can capture better detail and faces.
Can you clarify what types of cables I need for the installation? Are there specific recommendations?
You'll typically need power cables for the cameras and coaxial or Ethernet cables to connect them to the DVR/NVR. Make sure to check your camera's specifications for the exact requirements.
I'm torn between getting a cloud storage system versus a DVR. What are the pros and cons of each?
Cloud storage offers remote access and no need for physical hardware, but you might pay monthly fees. DVR systems can have large storage without ongoing costs, but you can only access footage on-site.
What types of cameras do you recommend for indoor use? I want something that won't be too intrusive but still effective.
I recently installed some small indoor cameras with 1080p resolution. They blend in well and offer good footage. Look for ones with night vision.