
 Carmen J. Moore

Are you looking to boost the security of your home without the hassle of installing complex surveillance systems? A light bulb security camera could be the perfect solution for you. This innovative device combines the functionality of a standard light bulb with the surveillance capabilities of a camera, allowing you to keep an eye on your property discreetly.
Installing a light bulb security camera is easier than you might think. With just a few simple steps, you can have a powerful security tool up and running in no time. In this guide, we’ll walk you through the process of setting up a light bulb security camera in your home, so you can enjoy peace of mind knowing that your property is protected.

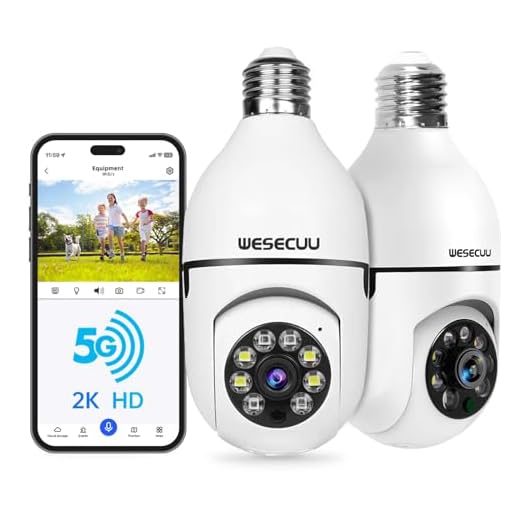

Whether you’re a tech-savvy homeowner or a novice DIY enthusiast, installing a light bulb security camera is a straightforward task that doesn’t require any special skills or tools. Read on to discover how you can take advantage of this cutting-edge technology to enhance your home security.
Step-by-step guide to installing a light bulb security camera
Installing a light bulb security camera can enhance the security of your home or office. Follow these steps to set up your camera:
Step 1: Choose the right location
Decide where you want to install the light bulb security camera. Make sure it offers a clear view of the area you want to monitor.
Step 2: Screw in the camera
Turn off the power to the light fixture. Remove the existing bulb and screw in the light bulb security camera. Ensure it is securely in place.
Continue with the setup process as per the manufacturer’s instructions to connect the camera to your Wi-Fi network and configure any settings.
Choose a Suitable Location
When installing a light bulb security camera, it is crucial to choose a suitable location that provides optimal coverage and visibility. Here are some tips to help you select the right spot:
- Height: Mount the camera at a height that allows it to capture a clear view of the area you want to monitor. Ensure that it is out of reach from potential intruders.
- Position: Place the camera in a position that offers a wide-angle view of the surroundings without any obstructions. This will help maximize its coverage.
- Lighting: Consider the lighting conditions in the area where you plan to install the camera. Ensure that the location has adequate lighting for clear video recordings.
By carefully selecting the location for your light bulb security camera, you can enhance its effectiveness in monitoring your property and deterring potential threats.
Turn off the power
Before installing the light bulb security camera, it is crucial to turn off the power to the light fixture where the camera will be installed. This step is essential for your safety and to avoid any electrical accidents. Locate the circuit breaker or fuse box that controls the power to the light fixture and switch it off.
Remove the existing light bulb
Before installing the light bulb security camera, you need to remove the existing light bulb from the socket. Make sure the power to the light fixture is turned off before you begin. Wait for the bulb to cool down if it was recently on.
Using a gentle twisting motion, unscrew the light bulb counterclockwise until it comes out of the socket. Be careful not to break the bulb or damage the socket during this process.
Install the camera bulb
Once you have selected the right location for your light bulb security camera, it’s time to install it. Follow these steps:
- Turn off the power: Before you begin, make sure to turn off the power to the socket where you will be installing the camera bulb to avoid any accidents.
- Remove the existing bulb: Unscrew and remove the existing light bulb from the socket.
- Install the camera bulb: Screw the camera bulb into the socket just like you would with a regular light bulb. Make sure it is securely in place.
- Connect to Wi-Fi: Follow the manufacturer’s instructions to connect the camera bulb to your Wi-Fi network.
- Secure the camera: Adjust the angle of the camera to ensure optimal coverage of the area you want to monitor.
- Test the camera: Turn on the power and test the camera to make sure it is functioning properly.
Connect to Wi-Fi
Once the light bulb security camera is installed in the socket, you need to connect it to your Wi-Fi network for remote access and monitoring. Follow these steps to connect your camera to Wi-Fi:
- Download and install the companion app on your smartphone or tablet.
- Open the app and create an account if required.
- Follow the on-screen instructions to add a new device.
- Scan the QR code on the camera or enter the device ID manually.
- Select your Wi-Fi network and enter the password to connect the camera.
- Wait for the camera to connect to the Wi-Fi network, which may take a few minutes.
Once the camera is successfully connected to your Wi-Fi network, you can access live video feeds, set up alerts, and customize settings through the app on your mobile device or computer.
“`html
Download the app
Before you can start using your light bulb security camera, you need to download the corresponding app on your smartphone or tablet. The app is essential for setting up and controlling your camera, as well as accessing its live feed and recordings.
You can find the app in the App Store or Google Play Store by searching for the name of the camera or the manufacturer. Once you have found the app, simply click on the download button and wait for it to install on your device.
Set up the camera
Once you have securely installed the light bulb security camera in the socket, it’s time to set it up. Follow these steps to configure the camera:
- Download the corresponding mobile app for the camera model from the App Store or Google Play Store.
- Create an account or log in to your existing account within the app.
- Follow the on-screen instructions to connect the camera to your home Wi-Fi network.
- Make sure the camera is positioned correctly to capture the desired area and adjust its angle if needed.
- Set up any additional features such as motion detection, alerts, and storage options within the app.
- Test the camera to ensure it is functioning properly and that you are receiving live feeds on your mobile device.
Test the camera
Before fully installing the light bulb security camera, it’s important to test it to ensure it’s functioning correctly. Follow these steps to test the camera:
- Power on the camera: Screw the light bulb security camera into a socket and turn on the power.
- Check the connection: Use the manufacturer’s app to connect to the camera and verify that the live feed is working.
- Test the motion detection: Move in front of the camera to check if the motion detection feature is working properly.
Once you have tested the camera and confirmed that it’s working as expected, you can proceed with the full installation process.


Remember to choose a height that’s out of reach but still allows for a good view. Avoid areas with too many obstructions!
Does the camera work well in low light conditions? I'm considering it for my porch, which doesn't get a lot of light at night.
I installed one of these cameras last week. The setup was pretty straightforward. Just be sure to follow the manufacturer's instructions closely, especially when connecting to Wi-Fi. I had to reposition mine a couple of times to get the best view, but overall, I'm pleased with the results!
Thanks for sharing your experience! Did you face any issues with the app during setup?
Can I use a light bulb security camera if I already have an existing smart home setup?
Yes, many light bulb security cameras can integrate with smart home systems, but it's best to check compatibility with your specific setup.
I’m not sure these are as reliable as traditional cameras. I worry about the quality of video and whether they can handle the weather.