
 Carmen J. Moore

Security cameras are crucial for keeping your home safe and secure. With advancements in technology, setting up a security camera at home has become easier than ever. In this guide, we will walk you through the steps to set up a security camera effortlessly.
Firstly, choose a suitable location for your security camera. It should cover the areas you want to monitor, such as entry points, windows, or the front yard. Make sure the camera is positioned at a height where it can capture clear footage without being easily tampered with.


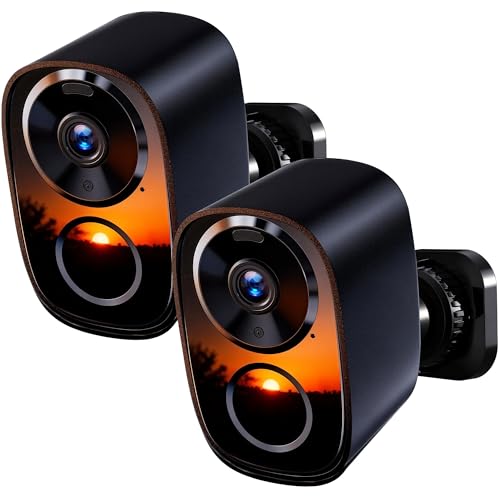
Next, install the camera mounting bracket securely on the chosen location. Ensure that the bracket is stable and can support the weight of the camera. Follow the manufacturer’s instructions for mounting the camera onto the bracket.
Simple Steps to Install a Home Security Camera
Installing a home security camera is a great way to enhance the safety and security of your property. Follow these simple steps to set up your security camera:
| 1. | Choose a suitable location for your camera that provides a clear view of the area you want to monitor. |
| 2. | Mount the camera securely using the appropriate mounting hardware. |
| 3. | Connect the camera to a power source using the included power adapter. |
| 4. | Connect the camera to your home Wi-Fi network following the manufacturer’s instructions. |
| 5. | Download and install the camera’s mobile app on your smartphone or tablet. |
| 6. | Set up the camera’s settings, including motion detection and alerts, through the app. |
| 7. | Test the camera to ensure it is functioning properly and adjust the positioning if needed. |
| 8. | Enjoy the peace of mind that comes with knowing your home is protected by a security camera. |
Selecting the Right Camera for Your Needs
When choosing a security camera for your home, it’s important to consider your specific needs and requirements. Here are some factors to keep in mind:
- Indoor vs. Outdoor: Determine where you will be installing the camera – indoors or outdoors. Outdoor cameras are weatherproof and designed to withstand the elements.
- Resolution: Higher resolution cameras provide clearer images but may come at a higher cost. Consider the level of detail you need.
- Field of View: Cameras with a wider field of view can cover more area, while cameras with a narrower field of view offer more detail in a specific area.
- Night Vision: If you need surveillance at night, look for a camera with infrared night vision capabilities.
- Power Source: Decide whether you want a camera that is wired or wireless. Wired cameras require a power source, while wireless cameras run on batteries or solar power.
- Remote Access: Consider if you want to be able to access the camera feed remotely from your smartphone or computer.
Choosing the Best Location for Installation
When installing a security camera at home, it is crucial to choose the best location to ensure optimal coverage and effectiveness. Here are some key factors to consider:
1. Consider the Area to Be Monitored
Identify the areas of your home that you want to monitor with the security camera. This could be the front door, backyard, garage, or any other vulnerable spots. Make sure the camera is placed in a position that provides a clear view of these areas.
2. Evaluate Lighting Conditions
Take into account the lighting conditions in the area where you plan to install the camera. Ensure that the camera is not facing directly into bright lights or direct sunlight, as this can affect the image quality. Additionally, consider using a camera with night vision capabilities for areas that are poorly lit at night.
| Location | Pros | Cons |
|---|---|---|
| Front Door | Provides clear view of visitors | May be vulnerable to tampering |
| Backyard | Covers outdoor space | Requires weatherproof camera |
| Garage | Secures valuable items | May require additional lighting |
Setting Up the Camera System
Once you have selected the right location for your security camera and have mounted it securely, it’s time to set up the camera system. Follow these steps to ensure a smooth installation:
- Connect the camera to a power source using the provided power adapter.
- Connect the camera to your home Wi-Fi network by following the instructions in the manual.
- Download the corresponding app on your smartphone or tablet to access the camera feed remotely.
- Adjust the camera settings such as motion detection, recording schedule, and notifications to customize your security system.
- Test the camera by monitoring the live feed and adjusting the angle if necessary to capture the desired area.
By following these steps, you can easily set up your security camera system at home and enhance the safety of your property.
Connecting the Camera to Power and Wi-Fi
Before you can start using your security camera, you need to connect it to power and Wi-Fi. Here’s how you can do it:
1. Power Connection:
- Locate a power outlet near the area where you want to install the camera.
- Plug in the power adapter into the camera’s power input.
- Connect the other end of the power adapter to the power outlet.
2. Wi-Fi Connection:
- Open the camera’s settings menu and locate the Wi-Fi settings.
- Choose your home Wi-Fi network from the list of available networks.
- Enter your Wi-Fi password to connect the camera to your network.
Once the camera is connected to power and Wi-Fi, you can proceed with the setup and configuration process to start monitoring your home.
Configuring the Camera Settings
Once you have connected your security camera to your home network, it’s time to configure the camera settings to suit your needs. Follow these steps to set up your camera:
1. Access the Camera’s Web Interface
Open a web browser on a computer or mobile device connected to the same network as the camera. Enter the camera’s IP address in the browser’s address bar to access the camera’s web interface.
2. Login and Customize Settings
Log in to the camera’s interface using the default username and password provided by the manufacturer. Once logged in, you can customize settings such as motion detection, recording schedule, image quality, and more.
Tip: It is recommended to change the default username and password for added security.
Testing the Camera Functionality
Before mounting the security camera in its final location, it’s important to test its functionality to ensure it’s working properly. Follow these steps to test the camera:
- Connect the camera to a power source and ensure it’s properly powered on.
- Access the camera’s settings and configure it according to your preferences.
- Check the camera’s view and adjust its angle if needed to capture the desired area.
- Test the camera’s recording capabilities by moving in front of it and checking the live feed.
- Check the night vision mode (if available) to ensure it works in low-light conditions.
By following these steps, you can ensure that your security camera is functioning correctly before installing it permanently.
Monitoring and Maintaining Your Security Camera
Once you have successfully set up your security camera, it is important to regularly monitor and maintain it to ensure optimal performance. Here are some tips:
1. Check the camera feed regularly to ensure it is functioning properly and capturing clear footage.
2. Clean the camera lens periodically to remove any dust or dirt that may affect the quality of the video.
3. Make sure the camera is securely mounted and positioned to capture the desired area effectively.
4. Keep the camera software up to date by installing any available firmware updates to enhance its security features.
5. Test the camera’s motion detection and alerts to ensure they are working as expected.
6. In case of any issues or malfunctions, troubleshoot the camera by following the manufacturer’s guidelines or seeking professional help.
By monitoring and maintaining your security camera regularly, you can ensure that your home remains secure and protected.





When connecting the camera to Wi-Fi, do I need to be near the camera? Should I set it up first and then move it to its final position?
Good question! You can set it up near your router for ease, but once connected, you can move it to the desired location as long as the Wi-Fi signal is strong enough.
What features should I look for in an outdoor security camera?
I recently installed a security camera at my front door and it was super easy. I followed the steps mentioned and everything worked perfectly. Just make sure to check the Wi-Fi signal strength in the area where you install it!
Thanks for sharing your experience! Wi-Fi connectivity is indeed crucial for optimum performance.
I believe having a wired camera is still better than wireless. It’s more reliable and doesn’t rely on battery life.
That's true, but I prefer wireless for easier installation and flexibility. It really depends on your needs!