
 Carmen J. Moore

Security cameras play a crucial role in keeping our homes and businesses safe. They provide us with a sense of security and peace of mind by monitoring our surroundings. However, to ensure that security cameras function effectively, it is essential to properly install and secure them in place. One of the key components of installing a security camera is fastening the bracket securely.
Fastening the security camera bracket correctly is essential to ensure that the camera stays in place and captures clear footage. A secure bracket also helps prevent tampering and theft of the camera. Whether you are installing a security camera for the first time or replacing an existing one, following the right steps to fasten the bracket is crucial.
In this article, we will guide you through the process of fastening a security camera bracket effectively. We will provide you with step-by-step instructions and tips to help you secure your security camera in place. By following these guidelines, you can ensure that your security camera remains stable and functions optimally.


Step-by-step guide to fastening security camera bracket
Installing a security camera bracket is essential for ensuring proper placement and stable support for your security camera. Follow these steps to securely fasten a security camera bracket:
Step 1: Choose the location
Decide on the best location for your security camera bracket. Ensure it offers a clear view of the area you want to monitor.
Step 2: Mark the drilling points
Hold the bracket against the surface and mark the drilling points using a pencil. Make sure the bracket is level and aligned properly.
Step 3: Drill pilot holes
Use a drill to create pilot holes at the marked points. Make sure the holes are deep enough to securely anchor the bracket.
Once the pilot holes are drilled, use screws to fasten the security camera bracket to the surface. Check the stability and adjust if needed. Your security camera bracket is now securely fastened and ready for mounting the camera.
Prepare necessary tools and materials
Before you start fastening the security camera bracket, make sure you have the following tools and materials ready:
- Security camera bracket
- Screws
- Wall anchors
- Drill
- Screwdriver
- Level
- Tape measure
- Pencil
Locate the ideal mounting spot
Before fastening the security camera bracket, it is crucial to find the perfect location to mount the camera. Consider factors such as the field of view, angle of coverage, and accessibility for maintenance. Choose a spot that provides a clear view of the area you want to monitor and is out of reach from potential tampering or vandalism.
| 1. | Survey the area to identify potential blind spots or obstructions that could impede the camera’s view. |
| 2. | Ensure the mounting spot is sturdy and can support the weight of the camera and bracket. |
| 3. | Consider the lighting conditions in the area to avoid glare or shadows that could affect the camera’s performance. |
| 4. | Test the camera’s view from different angles to determine the best position for optimal surveillance coverage. |
Mark the drilling spots accurately
Before drilling holes for the security camera bracket, it is crucial to mark the spots accurately. Use a pencil or a marker to mark the exact locations where you want to install the bracket. Make sure to measure and level the spots to ensure that the bracket will be installed securely and straight.
Tip: Use a level to ensure that the spots are perfectly aligned before marking them. This will help you avoid any misalignment or crooked installation of the security camera bracket.
Drill Holes for the Bracket
Before you can fasten the security camera bracket, you’ll need to drill holes for mounting. Use a drill and the appropriate size of drill bit to create holes in the desired location. Make sure the holes are aligned correctly and at the right distance apart to ensure a secure fit for the bracket.
Tip: Use a level to ensure that the holes are drilled straight and level for a professional installation.
Secure the bracket in place
Once you have positioned the security camera bracket in the desired location, use the provided screws and anchors to secure it in place. Make sure the bracket is level and aligned correctly before tightening the screws.
Step 1: Mark the drill holes
Using a pencil or marker, mark the drill holes on the wall or surface where you will be mounting the bracket. Make sure the marks are aligned with the pre-drilled holes on the bracket for a secure fit.
Step 2: Drill and insert anchors
Drill pilot holes at the marked locations and insert the anchors provided in the mounting kit. This will ensure a strong and stable hold for the security camera bracket.
Attach the security camera to the bracket
Once you have securely mounted the bracket to the desired location, it’s time to attach the security camera. Follow these steps:
- Align the screw holes on the camera with the holes on the bracket.
- Insert the screws provided with the camera into the holes and tighten them using a screwdriver.
- Make sure the camera is securely attached to the bracket to prevent any movement or loosening.
- Adjust the angle of the camera as needed to ensure the desired field of view.
Once the camera is securely attached and properly aligned, you can proceed to connect it to the power source and set up any necessary configurations for monitoring and recording.
Adjust the camera angle and position
Once the security camera bracket is securely fastened to the desired surface, you can adjust the camera angle and position to ensure optimal coverage of the area you want to monitor. Follow these steps to adjust the camera:
- Loosen the screws or bolts that hold the camera in place on the bracket.
- Rotate the camera to the desired angle or position.
- Tighten the screws or bolts to secure the camera in place.
Make sure the camera is pointing in the direction you want to monitor and that there are no obstructions blocking its view. Adjust the angle and position as needed until you are satisfied with the camera’s coverage.
Test the security camera functionality
Once you have securely fastened the security camera bracket, it is important to test the functionality of the camera to ensure proper installation. Here are some steps to help you test the security camera:
- Ensure that the camera is receiving power by checking the power source and connections.
- Access the camera’s settings and adjust the angle and focus as needed for optimal viewing.
- Test the camera by monitoring the live feed on a connected device or monitor.
- Check the camera’s recording capabilities by capturing footage and reviewing it for clarity and quality.
- Test the camera’s night vision if applicable by observing the quality of the footage in low-light conditions.
- Check the camera’s motion detection and alerts to ensure they are functioning properly.
By following these steps, you can verify that the security camera is correctly installed and functioning as intended to enhance your security monitoring capabilities.
Ensure the bracket is firmly fastened
After positioning the security camera bracket in the desired location, it is crucial to ensure that it is firmly fastened to the surface to prevent any movement or tampering.
Here are the steps to ensure the bracket is securely fastened:
| 1. | Use appropriate screws or bolts that are suitable for the surface material (wood, metal, concrete, etc.). |
| 2. | Pre-drill pilot holes to help guide the screws and prevent the surface from splitting or cracking. |
| 3. | Tighten the screws or bolts securely using a screwdriver, wrench, or appropriate tool to ensure the bracket is firmly attached. |
| 4. | Check the bracket for stability and make any necessary adjustments to ensure it is securely fastened. |
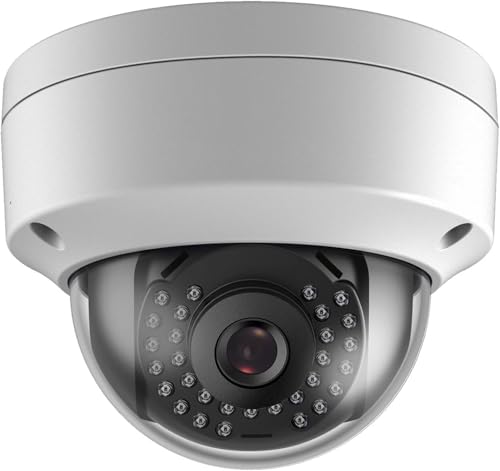


What kind of screws are best for attaching the security camera bracket if I'm mounting it on concrete? I want to make sure it stays put.
For concrete, I recommend using masonry screws or concrete anchors. They provide a secure hold. Make sure to drill the pilot holes a bit deeper for better stability.
I installed my security camera last month, and I followed these steps. Marking the drilling points accurately saved me a lot of time. I used a level to ensure everything was straight, which made a huge difference in the final look! I also tested the camera during the day and night, and I'm happy with the clarity of the footage. It’s crucial to make those adjustments after installation.
Could you clarify how deep the pilot holes should be? Is there a specific measurement that works best?