
 Carmen J. Moore

Wireless security cameras are a convenient and effective way to monitor your home or business remotely. However, to access the live feed and recordings from your camera, you need to connect it to the internet.
Connecting a wireless security camera to the internet may seem daunting, but with the right steps, it can be a straightforward process. In this guide, we will walk you through the steps to connect your wireless security camera to the internet.
From choosing the right camera to setting up your network, we will cover everything you need to know to ensure your wireless security camera is up and running smoothly. Let’s get started!


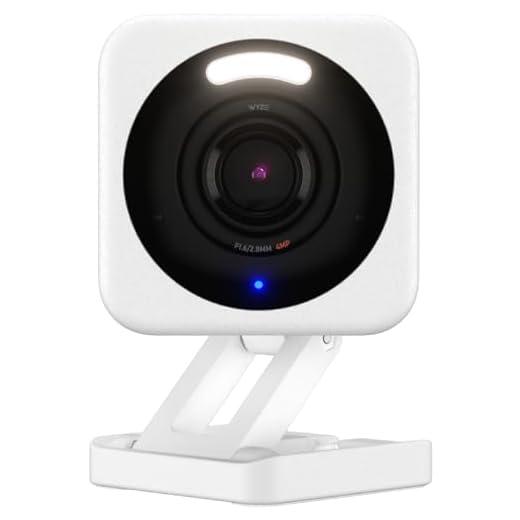
Step-by-step guide for connecting wireless security camera to internet
Setting up a wireless security camera to connect to the internet is essential for remote monitoring and surveillance. Follow these steps to ensure a successful connection:
Step 1: Choose a suitable location
Find a strategic location for your security camera where it can capture the desired area without any obstructions. Make sure it is within the range of your Wi-Fi signal for a stable connection.
Step 2: Power on the camera
Plug in the power adapter for the camera and wait for it to boot up. Most wireless security cameras have indicator lights that will show when they are ready for setup.
| Step 3: Install the camera software | Download the manufacturer’s app or software on your smartphone or computer. Follow the instructions to create an account and add the camera to your network. |
| Step 4: Connect the camera to Wi-Fi | Using the camera software, locate the Wi-Fi settings and enter your network credentials. Make sure to select the correct network and enter the password accurately. |
| Step 5: Test the connection | After connecting the camera to Wi-Fi, test the connection by accessing the live feed on your device. Make sure the camera is working properly and the video is streaming smoothly. |
Check camera compatibility with Wi-Fi networks
Before attempting to connect your wireless security camera to the internet, it is crucial to ensure that the camera is compatible with Wi-Fi networks. Check the specifications provided by the manufacturer to see if the camera supports the Wi-Fi standard (e.g., 802.11ac, 802.11n) and the frequency bands (2.4GHz or 5GHz) used by your Wi-Fi router.
Some cameras may only work with specific Wi-Fi networks or require a certain level of encryption (e.g., WPA2) for secure communication. Make sure that your router’s settings meet the camera’s requirements to establish a stable and secure connection.
Set up the wireless security camera hardware
Before connecting your wireless security camera to the internet, you need to set up the hardware properly. Follow these steps to ensure a smooth installation:
Step 1: Unbox and assemble the camera
Start by unboxing the wireless security camera and carefully assemble it according to the manufacturer’s instructions. Make sure all components are securely connected.
Step 2: Power on the camera
Plug the camera into a power source and turn it on. Wait for the camera to boot up and initialize. Some cameras may have a setup wizard that will guide you through the initial configuration.
| 1. Camera unit | 4. Mounting bracket |
| 2. Power adapter | 5. Antenna |
| 3. Ethernet cable | 6. User manual |
Download and Install the Camera’s Mobile App
Once you have connected your wireless security camera to your home network, the next step is to download and install the camera’s mobile app on your smartphone or tablet. Most modern security cameras come with a dedicated mobile app that allows you to access the camera’s live feed, adjust settings, and receive alerts.
To download the app, simply go to the App Store (for iOS devices) or Google Play Store (for Android devices) and search for the specific app associated with your camera model. Make sure to download the official app from the manufacturer to ensure compatibility and security.
After downloading the app, follow the on-screen instructions to install it on your device. Once installed, open the app and create an account or log in with your existing credentials. The app will guide you through the process of connecting your camera to the app, usually through a QR code or Wi-Fi setup.
Connect the camera to your home Wi-Fi network
Once you have powered on your wireless security camera and followed the initial setup instructions, it’s time to connect it to your home Wi-Fi network. Here’s how you can do it:
- Open the camera’s settings menu on the camera itself or through the accompanying mobile app.
- Look for the Wi-Fi settings or network settings option.
- Select your home Wi-Fi network from the list of available networks.
- Enter your Wi-Fi network’s password when prompted.
- Wait for the camera to connect to your Wi-Fi network. This may take a few moments.
- Once connected, you should see a confirmation message or indicator light on the camera.
- You can now access the camera remotely over the internet using the designated app or software.
Make sure your Wi-Fi network is stable and secure to ensure reliable and safe connectivity for your wireless security camera.
Configure camera settings for remote access
Once you have connected your wireless security camera to the internet, it is important to configure the camera settings to enable remote access. This will allow you to view the camera feed from anywhere using a computer or mobile device.
Step 1: Access the camera settings
First, you will need to access the camera settings through the camera’s web interface. This can usually be done by entering the camera’s IP address in a web browser.
Step 2: Enable remote access
Within the camera settings, look for an option to enable remote access or cloud connectivity. This will typically involve creating an account with the camera manufacturer and linking your camera to that account.
- Set up a strong password to secure your camera feed.
- Configure any additional settings, such as motion detection or recording schedules.
Once you have configured the camera settings for remote access, you should be able to view the camera feed from anywhere with an internet connection.
Test the camera’s internet connection and live stream
Once you have successfully connected your wireless security camera to the internet, it’s important to test the connection to ensure everything is working correctly.
Check the camera’s live stream on your smartphone or computer to make sure you can see the video feed in real-time. This will confirm that the camera is connected to the internet and transmitting data properly.
If you encounter any issues with the live stream, double-check the camera’s internet settings and connection to troubleshoot any potential issues. It’s essential to ensure a stable internet connection for reliable security monitoring.
Secure your wireless security camera network
When setting up a wireless security camera network, it’s crucial to prioritize security measures to protect your system from potential threats. Here are some essential steps to secure your wireless security camera network:
1. Change default passwords: Make sure to change the default passwords on your cameras and the network router to unique, strong passwords that are not easily guessable.
2. Enable encryption: Use WPA2 encryption for your Wi-Fi network to prevent unauthorized access to your cameras and data transmissions.
3. Keep firmware updated: Regularly check for firmware updates for your cameras and install them promptly to patch any security vulnerabilities.
4. Create a guest network: Separate your security camera network from your main network by creating a guest network specifically for your cameras to minimize the risk of unauthorized access.
5. Disable UPnP: Disable Universal Plug and Play (UPnP) on your router to prevent potential security risks associated with this feature.
6. Monitor network activity: Regularly monitor the network activity of your security cameras to detect any unusual or suspicious behavior that could indicate a security breach.
By following these security practices, you can enhance the protection of your wireless security camera network and ensure the privacy and security of your surveillance system.


Remember to keep your camera's firmware updated! It really helps with security and performance.
Great tip! Regular updates are essential for maintaining the security and functionality of your devices.
I'm a bit confused about the Wi-Fi settings. Do I need to choose 2.4GHz or 5GHz for my wireless security camera? Is there a significant difference?
Good question! Generally, 2.4GHz has a longer range but is slower, while 5GHz is faster but has a shorter range. It depends on your camera's placement and your internet speed.
I recently set up a wireless security camera following these steps, and I found the app installation part a bit challenging. I didn’t realize I had to download the correct app until after I tried a couple of wrong ones. Once I got the right app, it connected easily. Just be sure to check the model number first.