
 Carmen J. Moore
Security cameras are essential for monitoring and protecting your home or business. To ensure a reliable connection and high-quality video surveillance, it’s important to use the right cables.
Cat 6 cables are a popular choice for connecting security cameras due to their high bandwidth and fast data transfer speeds. If you’re looking to install a security camera system using Cat 6 cables, it’s important to follow the proper steps to ensure a successful connection.


In this guide, we’ll walk you through the process of connecting Cat 6 cables to your security camera system, including the tools you’ll need and the steps to follow for a secure and reliable connection.
Step-by-Step Guide on Connecting Cat 6 Cable to Security Camera
If you want to connect a Cat 6 cable to your security camera for a reliable and secure connection, follow these steps:
Step 1: Prepare the Tools
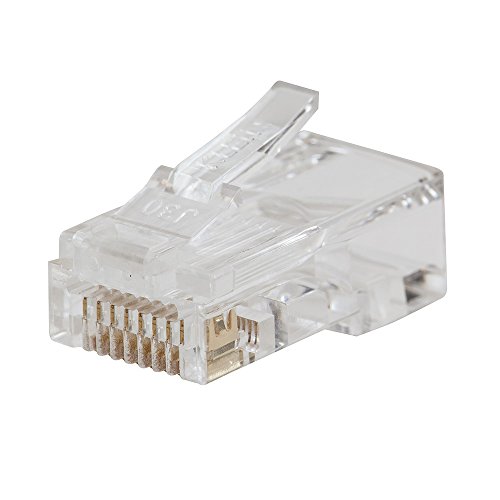
Before you begin, make sure you have the necessary tools on hand, including a Cat 6 cable, a crimping tool, RJ45 connectors, and a cable stripper.
Step 2: Strip and Prepare the Cable
Strip the outer jacket of the Cat 6 cable to expose the inner wires. Untwist the pairs of wires and arrange them according to the T568B wiring standard.
Note: Ensure the wires are properly aligned and not damaged.
Step 3: Crimp the RJ45 Connector
Insert the arranged wires into the RJ45 connector, making sure they reach the end of the connector. Use the crimping tool to secure the wires in place.
Tip: Double-check the wiring order before crimping to avoid connectivity issues.
Following these steps will help you successfully connect a Cat 6 cable to your security camera, providing a stable and high-speed connection for your surveillance needs.
Prepare Necessary Tools and Materials
Before connecting your CAT 6 cable to a security camera, make sure you have all the necessary tools and materials on hand. Here is a list of what you will need:
Tools:
– Wire cutters
– Wire strippers
– Crimping tool
– Screwdriver
Materials:
– CAT 6 cable
– RJ45 connectors
– Security camera
Make sure you have everything ready before you start the connection process to ensure a smooth installation.
Locate Ethernet Port on Security Camera
Before connecting your Cat 6 cable to the security camera, you need to locate the Ethernet port on the camera. The Ethernet port is where you will plug in the Cat 6 cable to establish a wired connection between the camera and your network.
Typically, the Ethernet port on a security camera is located on the back or bottom of the camera. It is usually a small rectangular port that looks similar to a phone jack but slightly larger. The port may be labeled “Ethernet,” “LAN,” or with a symbol that resembles three horizontal lines with a vertical line on the left side.
Strip the Cat 6 Cable
To connect your Cat 6 cable to a security camera, you will first need to strip the cable to expose the inner wires. Follow these steps to properly strip the Cat 6 cable:
- Gather your tools: You will need a cable stripper or a sharp utility knife to strip the outer jacket of the Cat 6 cable.
- Measure and mark: Measure about 1-1.5 inches from the end of the cable and mark the spot with a pen or marker. This is where you will begin stripping the outer jacket.
- Make an incision: Use the cable stripper or utility knife to make a shallow incision around the circumference of the cable at the marked spot. Be careful not to cut too deep to avoid damaging the inner wires.
- Peel off the jacket: Once you have made the incision, gently peel off the outer jacket of the Cat 6 cable. You should see four twisted pairs of wires inside.
- Trim the excess: Trim any excess jacket material to ensure a clean connection with the security camera.
By following these steps, you will be able to properly strip the Cat 6 cable and prepare it for connecting to your security camera.
Connect Cat 6 Cable to Security Camera
When connecting a Cat 6 cable to a security camera, it is essential to ensure a secure and reliable connection. Follow these steps to properly connect the Cat 6 cable:
Step 1: Begin by stripping the outer jacket of the Cat 6 cable to expose the inner wires.
Step 2: Separate the twisted pairs of wires and trim any excess length to ensure a clean connection.
Step 3: Use a crimping tool to attach an RJ45 connector to the Cat 6 cable. Make sure the wires are correctly aligned according to the T568B wiring standard.
Step 4: Connect the RJ45 connector to the Ethernet port on the security camera by firmly pushing it in until it clicks into place.
Step 5: Test the connection by checking for a stable network connection between the security camera and the monitoring system.
By following these steps, you can effectively connect a Cat 6 cable to a security camera for seamless and reliable surveillance monitoring.
Secure the Connection
After connecting the Cat 6 cable to your security camera, it is crucial to secure the connection to ensure reliable performance and data integrity. Here are some steps to help you secure the connection:
1. Use high-quality connectors: Invest in good quality RJ45 connectors to ensure a secure and stable connection between the Cat 6 cable and the security camera.
2. Properly crimp the connectors: Make sure that the connectors are crimped properly onto the Cat 6 cable to prevent any loose connections that can cause signal loss or interruptions.
3. Seal the connection: Use waterproof tape or sealant to protect the connection from moisture and dust, especially if the security camera is installed outdoors.
4. Test the connection: After securing the connection, test it to ensure that the data is transmitting properly and there are no issues with the connection.
By taking these steps to secure the connection, you can ensure that your Cat 6 cable is properly connected to your security camera and that it will provide reliable performance for your surveillance needs.
Test the Connection and Ensure Proper Functioning
Once you have successfully connected the Cat 6 cable to your security camera, it is important to test the connection to ensure everything is working properly. Here are the steps to follow:
| 1. | Power on your security camera and monitor. |
| 2. | Check the camera feed on the monitor to verify a clear image. |
| 3. | Move the camera around to ensure the feed remains stable and without interference. |
| 4. | Test the camera’s recording functionality by capturing a short video clip. |
| 5. | Verify that the video clip is saved properly and can be played back without issues. |
| 6. | If you encounter any problems during the testing process, double-check the Cat 6 connection and troubleshoot any issues accordingly. |




I recently installed a security camera system using Cat 6 cables and followed these steps. It was a bit tricky stripping the cable without damaging the wires, but once I got the hang of it, everything connected smoothly. The video quality has been great since! Just a tip: take your time with the crimping; it makes a difference.
What tools do I need to connect a Cat 6 cable to my security camera? Is there a specific order for using them?
You'll need a few essential tools: wire cutters, wire strippers, a crimping tool, and a screwdriver. Use the wire strippers first to prepare the cable, then the crimping tool to attach the RJ45 connector before connecting to the camera.