


Setting up a security camera system with a DVR (Digital Video Recorder) is a great way to monitor your property and keep it safe. One crucial step in the installation process is connecting the DVR to a wireless router, which allows you to access the camera feeds remotely. This guide will walk you through the steps to successfully connect your security camera DVR to a wireless router.
Before you begin, make sure you have a stable wireless network and the necessary equipment, including the DVR, security cameras, and a wireless router. Follow these steps carefully to ensure a smooth setup process and reliable connection.
By connecting your security camera DVR to a wireless router, you can access live feeds and recordings from your cameras on your smartphone, tablet, or computer, providing you with peace of mind and added convenience. Let’s get started!
Step-by-step guide on connecting a security camera DVR to a wireless router
Connecting a security camera DVR to a wireless router is essential for remote monitoring and access. Follow these steps to successfully set up the connection:

Step 1: Gather necessary equipment
Before you begin, make sure you have the following equipment ready:
| 1. Security camera DVR |
| 2. Wireless router with available Ethernet ports |
| 3. Ethernet cable |
Step 2: Connect DVR to router
Next, follow these steps to connect the security camera DVR to the wireless router:
- Locate the Ethernet port on the back of the DVR.
- Insert one end of the Ethernet cable into the DVR’s Ethernet port.
- Connect the other end of the Ethernet cable to an available Ethernet port on the wireless router.
Once the DVR is successfully connected to the wireless router, you can configure the network settings on the DVR to enable remote access and monitoring.
Gather necessary equipment
Before you start connecting your security camera DVR to a wireless router, make sure you have all the necessary equipment ready. Here’s what you’ll need:
1. Security camera DVR:
Make sure you have your security camera DVR ready and set up in the desired location.
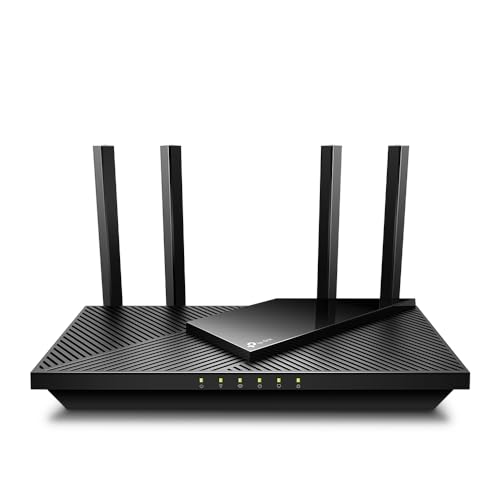
2. Wireless router:
You’ll need a wireless router with available Ethernet ports to connect your DVR to the network.
Having these essential components ready will help you smoothly set up your security camera system with a wireless connection.
Check compatibility of your DVR and router
Before attempting to connect your security camera DVR to a wireless router, it is crucial to ensure that both devices are compatible with each other. Here are a few steps to check compatibility:
- Check the specifications of your DVR and router to confirm if they support the same network protocols.
- Make sure that your DVR has the necessary network port to connect to a router, such as an Ethernet port.
- Verify if your router supports the same security protocols as your DVR, such as WPA2-PSK encryption.
Locate the Ethernet port on your DVR
Before connecting your security camera DVR to a wireless router, you need to locate the Ethernet port on your DVR. The Ethernet port is typically located at the back of the DVR unit and looks like a small rectangular socket.
Make sure to check the user manual of your DVR if you are having trouble locating the Ethernet port. It is essential to find the correct port to establish a stable connection between your DVR and the wireless router.
Connect Ethernet cable from DVR to router
Once you have identified the Ethernet port on your DVR and router, connect one end of the Ethernet cable to the Ethernet port on the back of the DVR. Make sure it is securely plugged in to ensure a stable connection.
Next, locate an available Ethernet port on your wireless router and connect the other end of the cable to it. Again, make sure it is firmly plugged in to establish a proper connection between the DVR and the router.
After connecting the Ethernet cable between the DVR and the router, you may need to configure the network settings on the DVR to ensure it can communicate with the router and access the internet for remote viewing. Refer to the DVR’s user manual for specific instructions on how to set up the network settings.
Power on your DVR and router
Before you can connect your security camera DVR to a wireless router, make sure that both devices are powered on. Plug in your DVR and router to a power source and turn them on. Wait for them to fully boot up and initialize before proceeding with the connection process.
Configure DVR settings for network connection
Once you have connected your DVR to the wireless router, you will need to configure the settings on the DVR to establish a network connection. Follow these steps:
Step 1: Access the DVR settings
Use the remote control or front panel buttons to access the menu on your DVR. Navigate to the network settings option.
Step 2: Enter network information
Enter the SSID (name) of your wireless network and the password. Make sure to select the correct security protocol (WPA, WPA2, etc.) that matches your wireless router settings.
Tip: Double-check the network information to ensure it is accurate to establish a successful connection.
Access router settings for port forwarding
Port forwarding is a crucial step to ensure that your security camera DVR can be accessed remotely over the internet. To set up port forwarding, you will need to access your wireless router’s settings. Here’s how you can do it:
Step 1: Find your router’s IP address
To access your router’s settings, you first need to know its IP address. You can usually find this information on the back of your router or in the user manual. Alternatively, you can check your computer’s network settings to locate the default gateway, which is the IP address of your router.
Step 2: Log in to your router’s web interface
Open a web browser and enter your router’s IP address in the address bar. You will be prompted to enter a username and password. This information is usually found on the back of your router or in the user manual. Once you log in, you will have access to your router’s settings.
| Step 3: | Find the port forwarding section |
| Step 4: | Create a new port forwarding rule |
| Step 5: | Enter the necessary information (port number, IP address of your DVR, etc.) |
| Step 6: | Save your settings and restart your router |
By following these steps, you should be able to access your router’s settings and set up port forwarding for your security camera DVR.
Test the connection between DVR and router
Once you have connected your DVR to the wireless router, it is important to test the connection to ensure everything is working properly. Here are the steps to test the connection:
- Power on your DVR and wait for it to boot up.
- Access the network settings on your DVR and verify that it is connected to the wireless network.
- Check the IP address assigned to the DVR by the router.
- From a computer or mobile device connected to the same network, try to access the DVR’s web interface using its IP address.
- If you can access the DVR’s interface, the connection is successful. You should be able to view and manage your security camera footage remotely.
Secure your wireless network for added protection
Securing your wireless network is crucial to prevent unauthorized access and protect your data. Follow these tips to enhance the security of your network:
- Change the default SSID (Service Set Identifier) of your wireless network to a unique name.
- Enable WPA2 (Wi-Fi Protected Access 2) encryption to secure your network with a strong password.
- Disable SSID broadcast to make your network less visible to potential intruders.
- Use MAC address filtering to only allow specific devices to connect to your network.
- Regularly update your router’s firmware to patch any security vulnerabilities.
- Turn off remote management to prevent unauthorized access to your router settings.


