
 Carmen J. Moore

Brick walls can pose a unique challenge when it comes to installing security cameras. With the right tools and techniques, you can securely attach a security camera to a brick surface to enhance the safety and security of your property.
Step 1: Choose the Right Camera Mount

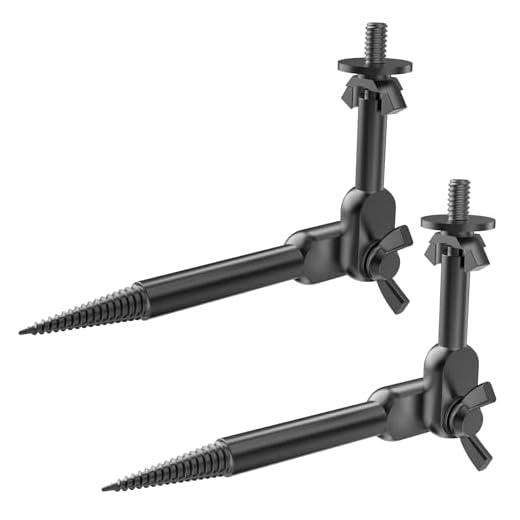
Before you start, make sure you have a camera mount that is suitable for brick walls. Look for mounts that come with screws specifically designed for masonry surfaces.
Step 2: Mark the Mounting Holes
Use a pencil to mark the spots where you want to drill the mounting holes. Make sure the holes are level and evenly spaced to ensure a secure attachment.
Choose the right security camera
When attaching a security camera to a brick wall, it’s important to choose the right camera for the job. Look for a camera that is specifically designed for outdoor use and is weatherproof to withstand the elements. Consider whether you need a wired or wireless camera, and make sure it has the necessary features such as night vision, motion detection, and remote viewing capabilities. Additionally, ensure the camera is compatible with the mounting hardware you plan to use on the brick wall.
Prepare the necessary tools
Before you start attaching your security camera to a brick wall, make sure you have all the necessary tools on hand. Here are some tools you may need:
- Drill: You’ll need a drill to make holes in the brick for mounting the camera.
- Masonry drill bit: Make sure you have the right drill bit for drilling into brick or masonry.
- Screwdriver: You’ll need a screwdriver to secure the camera mount to the wall.
- Level: To ensure that your camera is properly aligned and mounted straight.
- Pencil: Use a pencil to mark the drilling spots on the brick before drilling.
- Tape measure: Measure the distances accurately for precise placement of the camera.
- Anchors and screws: Depending on the mounting kit, you may need anchors and screws to secure the camera mount to the wall.
Having these tools ready will make the installation process smoother and more efficient.
Locate the ideal mounting spot
Before attaching your security camera to the brick wall, carefully choose the best location for optimal coverage and visibility. Consider factors such as the camera’s field of view, potential obstructions, and the angle at which it will capture footage.
Steps to follow:
- Survey the area to identify the most vulnerable spots that require monitoring.
- Ensure that the mounting spot provides a clear view of the desired area without any obstacles blocking the camera’s line of sight.
- Consider the camera’s range and adjust the mounting height to maximize its coverage.
Mark the drill holes on the brick
Before drilling into the brick to attach your security camera, it’s crucial to mark the exact locations where the holes will be made. Use a pencil or chalk to mark the spots on the brick where you want to install the camera mount. Make sure the marks are level and accurately positioned for a secure installation.
Tip: Use a level to ensure the marks are straight and aligned properly before drilling.
Once you have marked the drill holes, you can proceed with drilling into the brick to securely attach your security camera mount.
Drill the holes for mounting
Before attaching the security camera to a brick wall, you’ll need to drill holes for mounting. Here’s how to do it:
- Mark the locations where you want to mount the camera on the brick wall.
- Use a masonry drill bit that is suitable for drilling into brick.
- Put on safety goggles and ear protection before drilling.
- Start drilling at a slow speed to create a pilot hole.
- Once the pilot hole is made, increase the speed and apply firm pressure to drill through the brick.
- Repeat the process for all the mounting holes needed for the security camera.
Make sure the holes are deep enough to securely anchor the mounting hardware for the camera. Clean out any debris from the holes before proceeding with attaching the camera.
Attach the camera securely to the brick
To attach the security camera to a brick wall securely, you will need the right tools and materials. Here is a step-by-step guide to help you with the process:
1. Determine the placement
Before drilling any holes, carefully choose the location where you want to mount the camera on the brick wall. Make sure it has a clear view of the area you want to monitor.
2. Mark the drilling points
Use a pencil to mark the exact spots where you will drill holes for the camera mount. Make sure the marks are level and evenly spaced.
3. Drill pilot holes
Use a masonry drill bit to create pilot holes at the marked spots on the brick wall. Make sure the holes are deep enough to securely anchor the screws.
4. Attach the camera
Once the pilot holes are drilled, use screws or anchors that are suitable for masonry to attach the camera mount to the brick wall. Make sure the camera is securely fastened and adjust the angle as needed.
Adjust the camera angle and test the view
Once the security camera is securely attached to the brick wall, it’s important to adjust the camera angle to ensure optimal coverage of the area you want to monitor. Use the camera’s mounting bracket or arm to adjust the angle up, down, left, or right as needed.
After adjusting the camera angle, it’s recommended to test the view to make sure the camera captures the desired area effectively. You can do this by monitoring the camera’s live feed on a connected device or computer. Make any additional adjustments if necessary to achieve the best view.



I installed a security camera on my brick wall last summer, and I found that using a hammer drill made the process much easier. It took me less than an hour, and I followed all the steps mentioned in the article. Just make sure you wear safety goggles! It really helps to have someone assist you if you're drilling high up.
A hammer drill is indeed a great choice for brick installations! It can save you time and effort. Just ensure that you have the right masonry bits to go along with it.
I’m trying to decide between a wired and a wireless security camera for my brick wall. Any advice on which is better?
Don't forget to wear ear protection when drilling! The noise can be quite loud, especially when using a hammer drill. Safety first!
What kind of masonry drill bit should I use for brick? Are there any specific brands you recommend?
When marking the holes for drilling, how do I ensure they are level? Does using a level tool really make that much difference?
Yes, using a level tool is essential for ensuring your camera is straight. It prevents crooked angles that can affect the camera's view and overall effectiveness.