
 Carmen J. Moore

In the realm of security camera surveillance, having the right equipment can make all the difference in capturing clear and detailed footage. One way to enhance the capabilities of your security camera is by adding a long lens. Long lenses provide an extended reach, allowing you to zoom in on distant objects and capture fine details that may be crucial for identifying individuals or objects in the footage.
Adding a long lens to your security camera setup can significantly improve the effectiveness of your surveillance system, especially in scenarios where long-range monitoring is required. Whether you’re monitoring a large outdoor area, a parking lot, or a warehouse, a long lens can help you achieve a closer view of distant objects without compromising image quality.
With the advancements in lens technology, there are now various long lens options available that cater to different security camera models and requirements. By selecting the right long lens for your security camera, you can maximize the surveillance coverage of your system and ensure that you capture detailed footage that meets your security needs.


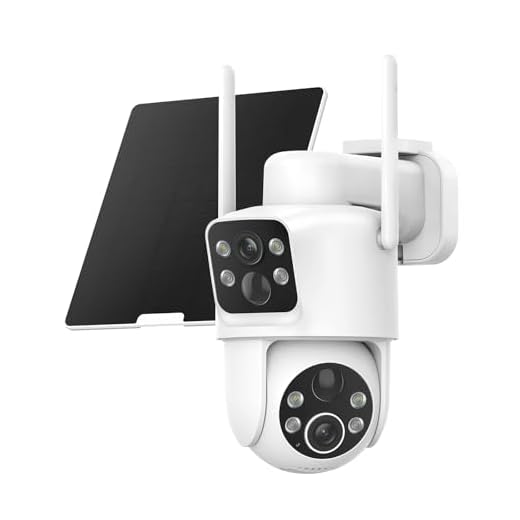
Step-by-step guide to attaching a long lens to your security camera
Step 1: Make sure your security camera is turned off to avoid any damage during the lens attachment process.
Step 2: Locate the lens mount on your security camera. This is typically located on the front of the camera body.
Step 3: Remove the protective cap covering the lens mount by twisting it counterclockwise.
Step 4: Carefully align the mounting points on the long lens with the lens mount on the camera body.
Step 5: Gently twist the lens clockwise to secure it in place on the camera body.
Step 6: Check that the lens is securely attached and adjust the focus if necessary.
Step 7: Turn on your security camera and test the new long lens to ensure proper functionality.
Following these steps will help you successfully attach a long lens to your security camera for enhanced surveillance capabilities.
Selecting the compatible long lens for your security camera
When choosing a long lens for your security camera, it is important to consider several factors to ensure compatibility and optimal performance. Here are some key points to keep in mind:
1. Camera Compatibility: Make sure the long lens you choose is compatible with your security camera model. Check the specifications provided by the manufacturer to ensure a proper fit.
2. Focal Length: Determine the focal length you need based on the distance and area you want to monitor. A longer focal length provides greater magnification but narrows the field of view.
3. Aperture: Consider the aperture of the long lens, as it affects the amount of light entering the camera. A larger aperture allows more light, making it suitable for low-light conditions.
4. Image Quality: Look for a long lens with high-quality optics to ensure clear and sharp images. Check reviews and sample images to assess the image quality before making a purchase.
5. Budget: Set a budget for your long lens purchase and compare different options within your price range. Balance cost with features to find the best value for your security camera setup.
Understanding the Lens Mount Type of Your Security Camera
Before adding a long lens to your security camera, it is crucial to understand the lens mount type of your camera system. Different security cameras have specific lens mount types that are compatible with certain lenses. Knowing the lens mount type will help you choose the right long lens for your camera.
Types of Lens Mounts:
There are several common lens mount types used in security cameras, including:
| Lens Mount Type | Compatibility |
|---|---|
| C-mount | Compatible with a wide range of lenses, including long lenses |
| CS-mount | Similar to C-mount but with a shorter flange focal distance |
| M12-mount | Commonly used in small, compact security cameras |
By identifying the lens mount type of your security camera, you can ensure that the long lens you choose is compatible and will provide optimal performance for your surveillance needs.
Removing the Existing Lens from Your Security Camera
To add a long lens to your security camera, you will first need to remove the existing lens from the camera. Follow these steps to safely remove the lens:
Step 1: Power Off the Camera
Before starting the removal process, make sure to power off the security camera to avoid any damage or interference.
Step 2: Locate the Lens
Identify the lens on your security camera. It is usually located on the front of the camera and may be surrounded by a lens ring or cover.
Once you have located the lens, you can proceed with removing it to make way for the long lens attachment.
Attaching the long lens to your security camera
Adding a long lens to your security camera can enhance the surveillance capabilities of your system. Here are the steps to attach a long lens to your security camera:
- Turn off the security camera and disconnect it from the power source.
- Locate the lens mount on the camera body.
- Remove the existing lens by twisting it counterclockwise.
- Align the new long lens with the lens mount and twist it clockwise to secure it in place.
- Make sure the lens is securely attached and there is no gap between the lens and the camera body.
- Reconnect the security camera to the power source and turn it on to test the new long lens.
By following these steps, you can easily add a long lens to your security camera and improve the range and clarity of your surveillance footage.
Adjusting the focus and aperture settings on the long lens
Once you have attached the long lens to your security camera, it’s important to adjust the focus and aperture settings for optimal performance. Start by setting the focus to ensure that the image is sharp and clear. Use the focus ring on the lens to adjust the focus until the subject is in sharp focus.
Next, adjust the aperture settings to control the amount of light entering the camera. A wider aperture (lower f-stop number) allows more light in but reduces the depth of field, while a smaller aperture (higher f-stop number) lets in less light but increases the depth of field. Experiment with different aperture settings to find the right balance between light and depth of field for your specific security needs.
Testing the new long lens on your security camera
Once you have successfully added the long lens to your security camera, it’s important to test it to ensure it is functioning properly. Here are some steps you can take to test the new long lens:
- Adjust the focus: Use the camera’s focus controls to adjust the focus of the long lens. Make sure the image is sharp and clear.
- Test the zoom: If your long lens has zoom capabilities, test it by zooming in and out to see how it performs.
- Check the angles: Move the camera around to different angles and check the field of view to ensure the lens captures the desired area.
- Test in different lighting conditions: Test the long lens in various lighting conditions to see how it performs in low light or bright sunlight.
- Review the footage: After testing the long lens, review the footage to ensure the image quality meets your expectations.
By following these steps, you can effectively test the new long lens on your security camera and make any necessary adjustments for optimal performance.
Securing the long lens properly to prevent damage
When adding a long lens to your security camera, it is important to ensure that it is securely attached to prevent any damage or mishaps. Here are some tips to help you secure the long lens properly:
1. Use the correct mounting hardware
Make sure you have the appropriate mounting hardware for your specific camera model and long lens. This will ensure a proper and secure attachment.
2. Double-check the alignment
Before tightening the lens in place, double-check the alignment to ensure that it is straight and level. This will prevent any strain on the lens or camera body.
Maintaining and cleaning your long lens for optimal performance
Keeping your long lens clean and well-maintained is essential for ensuring optimal performance and longevity. Here are some tips on how to properly care for your long lens:
- Regularly clean the front and rear lens elements using a lens cleaning cloth or brush to remove dust, fingerprints, and smudges.
- Use a lens cleaning solution or lens wipes to gently clean stubborn dirt or marks on the lens surface.
- Be careful when handling the lens to avoid scratching or damaging the glass elements.
- Store your long lens in a protective case or bag when not in use to prevent dust and debris from settling on the lens.
Additional tips:
- Avoid exposing the lens to extreme temperatures or humidity, as this can affect its performance.
- Inspect the lens regularly for any signs of wear or damage, and consult a professional if you notice any issues.
Enhancing the security coverage with the new long lens attachment
Adding a long lens attachment to your security camera can significantly enhance the coverage area and improve the quality of surveillance footage. With a long lens, you can capture detailed images of objects and individuals at a distance, making it easier to monitor large areas or specific points of interest.
Benefits of a long lens attachment:
1. Increased zoom capabilities for better identification of subjects.
2. Improved image quality for clearer surveillance footage.
3. Enhanced security coverage of larger areas or specific locations.
By adding a long lens attachment to your security camera, you can maximize the effectiveness of your surveillance system and ensure comprehensive monitoring of your property or premises.


I’ve been looking into C-mount vs. CS-mount lenses for my security camera. I've read that C-mount lenses are more versatile, but CS-mounts are easier to install. Could anyone share their experiences with both types?
C-mount lenses do generally offer more compatibility, but keep in mind that CS-mount lenses can work well for most standard setups. It often comes down to your specific needs.
I have a CS-mount lens on my camera, and honestly, it’s been straightforward to set up. But I have seen more lens options available for C-mount, which might be worth considering.
Can you clarify what the aperture settings do exactly? I’m unsure how to adjust them for low-light conditions.
The aperture controls how much light enters the camera. A lower f-stop number lets in more light, which is great for low-light situations. Adjusting it allows you to balance light and depth of field.
What types of long lenses are best for outdoor security cameras? I'm considering upgrading mine but not sure which focal length would work best for my setup. Any recommendations?
Make sure to regularly clean the long lens to maintain image quality! Dust can really affect the footage clarity.
I recently added a long lens to my security camera, and the clarity of the footage improved significantly. I can actually see the license plates of cars parked far away now!
I’m not convinced that adding a long lens makes that much of a difference. I use a standard lens, and the quality is fine for my needs. Is it really worth the effort and cost?