


Adding a camera to your Xfinity Home Security system can provide an extra level of protection and peace of mind for your home or business. With the right equipment and setup, you can easily monitor your property remotely and receive alerts in case of any suspicious activity.
In this guide, we will walk you through the step-by-step process of adding a camera to your Xfinity Home Security system. Whether you’re looking to enhance your existing setup or starting from scratch, we’ve got you covered with all the information you need to get started.
From selecting the right camera to integrating it with your Xfinity system, we’ll cover everything you need to know to ensure a seamless and effective installation. So, let’s dive in and make your home security system even more robust with the addition of a camera!
Step-by-step guide to adding a camera to Xfinity Home Security
If you want to enhance your Xfinity Home Security system by adding a camera, follow these steps to ensure a seamless integration:
Step 1: Purchase a compatible camera
Make sure to buy a camera that is compatible with the Xfinity Home Security system. Check with Xfinity or the camera manufacturer for a list of supported devices.
Step 2: Set up the camera
Follow the manufacturer’s instructions to set up the camera. This may involve connecting it to your home Wi-Fi network and installing any necessary software or apps.
Note: Ensure that the camera is placed in a strategic location to maximize its coverage and effectiveness.
Step 3: Add the camera to your Xfinity Home Security system
Log in to your Xfinity Home Security account online or through the mobile app. Navigate to the settings or devices section and look for an option to add a new camera.
Tip: Follow the on-screen instructions to pair the camera with your Xfinity system. You may need to enter a unique code or scan a QR to complete the process.
Once the camera is successfully added, you should be able to view its live feed and recordings through the Xfinity Home Security app or web portal.
Access your Xfinity Home Security account
Once you have set up your Xfinity Home Security system, you can easily access your account to add a camera. Here’s how:
- Open the Xfinity Home app on your smartphone or tablet.
- Log in using your Xfinity username and password.
- Once logged in, navigate to the “Devices” section of the app.
- Click on “Add a Device” and select “Camera” from the options.
- Follow the on-screen instructions to set up and connect your camera to your Xfinity Home Security system.
Additional Tips:
- Make sure your camera is compatible with the Xfinity Home Security system.
- Ensure that your Wi-Fi network is working properly for a smooth connection.
Navigate to the Devices section
Once you have logged into your Xfinity Home Security account, click on the “Devices” tab in the top menu. This will take you to a page where you can view and manage all the devices connected to your Xfinity Home system.
Choose the camera you want to add
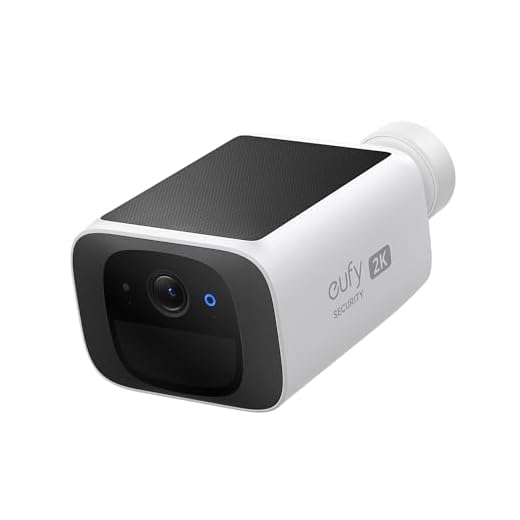
Before adding a camera to your Xfinity Home Security system, you need to choose the type of camera you want to install. Xfinity offers a variety of indoor and outdoor cameras, including HD cameras, wide-angle cameras, and night vision cameras. Consider the location where you want to place the camera and the features you need, such as motion detection or two-way audio. Once you have selected the camera that best fits your needs, you can proceed with adding it to your Xfinity Home Security system.
Click on the “Add Device” button
Adding a camera to your Xfinity Home Security system is a simple process. To begin, you will need to access your Xfinity Home app on your smartphone or tablet.
Step 1: Open the Xfinity Home App
Launch the Xfinity Home app and log in using your credentials.
Step 2: Navigate to Devices
Once you are logged in, navigate to the “Devices” section within the app.
| Step 3: | Click on the “Add Device” button |
After clicking on the “Add Device” button, follow the on-screen instructions to add your camera to your Xfinity Home Security system successfully.
Follow the on-screen instructions
Once you have selected the option to add a camera to your Xfinity Home security system, you will be guided through a series of on-screen instructions to complete the setup process.
These instructions will vary depending on the specific camera model you are adding and the Xfinity Home app version you are using.
Make sure to carefully follow each step and provide any necessary information or permissions as prompted.
Connect the camera to your Wi-Fi network
Once you have set up your Xfinity Home Security system and installed the camera, you will need to connect the camera to your Wi-Fi network. Follow these steps to complete the process:
Step 1: Power on the camera
Plug in the camera and wait for the LED indicator to start blinking.
Step 2: Open the Xfinity Home app
Open the Xfinity Home app on your smartphone or tablet and log in to your account.
| Step 3: | Tap on the camera icon |
| Step 4: | Follow the on-screen instructions to connect the camera to your Wi-Fi network. |
Position the camera in the desired location
Before mounting the camera, ensure that it is within range of your Wi-Fi network. Choose a location that provides a clear view of the area you want to monitor. Make sure the camera is positioned at the right height and angle to capture the best footage.
Use the mounting hardware provided with the camera to securely attach it to a wall or ceiling. Follow the manufacturer’s instructions for proper installation and positioning. Test the camera to ensure it is working correctly before finalizing its placement.
Consider factors such as lighting, obstructions, and potential tampering when deciding on the camera’s location. Adjust the camera as needed to achieve optimal coverage of the area you wish to monitor.
Test the camera’s functionality
Once you have successfully added the camera to your Xfinity Home Security system, it is crucial to test its functionality to ensure it is working correctly. Here are some steps to test the camera:
- Live view: Access the camera feed on your Xfinity Home Security app or web portal to see if the camera is capturing live footage.
- Motion detection: Walk in front of the camera to test if the motion detection feature is working properly. You should receive notifications if motion is detected.
- Night vision: Test the camera’s night vision capabilities by checking the video feed in low-light conditions or at night.
- Two-way audio: If your camera has two-way audio, test the feature by speaking through the app and listening for the response from the camera’s speaker.
By testing these key features, you can ensure that your camera is functioning correctly and providing the security and peace of mind you need.
Enjoy added security with your new Xfinity camera
Once you have successfully added a camera to your Xfinity home security system, you can enjoy added peace of mind and security. With the ability to monitor your home remotely, receive alerts, and check in on your property at any time, you can rest assured that your home is protected.
By adding a camera to your Xfinity system, you can enhance the overall security of your home and have an extra layer of protection against intruders and other potential threats. Whether you are at work, on vacation, or simply away from home, having a camera in place allows you to keep an eye on your property and loved ones no matter where you are.
With the convenience and peace of mind that a Xfinity camera provides, you can enjoy added security and confidence in the safety of your home.