
 Carmen J. Moore

Installing wireless security cameras has become increasingly popular as technology advances and the need for home security grows. Many people choose wireless cameras because they are easy to install and offer flexibility in terms of placement.
Most people start by selecting a suitable location for their wireless security camera. This could be near a doorway, window, or any other area they want to monitor. Once the location is chosen, they can mount the camera using the provided hardware or adhesive.
Next, they need to connect the camera to their home Wi-Fi network. This typically involves following the instructions provided by the camera manufacturer and using a mobile app to complete the setup process. Once connected, they can access the camera feed remotely from their smartphone or computer.
How to Install Wireless Security Cameras: A Step-by-Step Guide
Installing wireless security cameras is a great way to enhance the security of your home or business. Follow these steps to install your wireless security cameras:


- Choose the right location: Decide where you want to install your cameras to cover the most important areas.
- Mount the cameras: Use the included mounting hardware to securely attach the cameras to walls or ceilings.
- Power up the cameras: Connect the cameras to a power source, either through a power outlet or battery.
- Connect the cameras to your network: Follow the manufacturer’s instructions to connect the cameras to your Wi-Fi network.
- Set up the camera system: Install any required software on your computer or mobile device to access and control the cameras.
- Adjust camera settings: Configure the cameras to your desired settings, such as motion detection sensitivity or recording schedules.
- Test the cameras: Make sure the cameras are functioning properly and capturing the footage you need.
- Monitor the cameras: Keep an eye on the camera feeds regularly to ensure your property is secure.
Planning Your Camera Placement
Before installing your wireless security cameras, it is crucial to plan the placement of each camera to ensure optimal coverage and security. Here are some key factors to consider:
Determine the Areas to Monitor
Identify the areas around your property that you want to monitor, such as entry points, driveways, backyards, and any vulnerable spots. This will help you determine the number of cameras needed and their placement.
Consider the Camera’s Field of View
Understand the field of view of each camera to ensure that it covers the desired area effectively. Adjust the angle and position of the camera to maximize coverage and minimize blind spots.
- Place cameras at eye level to capture facial features for identification.
- Ensure cameras are not obstructed by objects or direct sunlight to avoid glare.
- Position cameras strategically to cover all possible entry points and pathways.
By carefully planning the placement of your wireless security cameras, you can enhance the effectiveness of your surveillance system and improve the overall security of your property.
Choosing the Right Camera System
When selecting a wireless security camera system, there are several factors to consider to ensure you choose the right one for your needs. Here are some key considerations:
1. Camera Resolution
Look for cameras with high resolution to capture clear images and videos. A minimum of 1080p HD resolution is recommended for detailed footage.
2. Field of View
Consider the field of view offered by the camera. A wider field of view will allow you to monitor a larger area with fewer cameras.
Pro tip: Choose a camera system that offers features such as night vision, motion detection, and two-way audio for added security and convenience.
Setting Up the Camera System
Installing wireless security cameras is a relatively straightforward process that can be done by most people with basic DIY skills. Here are the general steps to set up your camera system:
- Choose the right location for your cameras. Make sure they have a clear view of the areas you want to monitor.
- Mount the cameras securely using the provided mounting hardware. Ensure they are positioned at the right angle for optimal coverage.
- Connect the cameras to a power source. Most wireless cameras come with rechargeable batteries or need to be plugged into an outlet.
- Set up the camera system using the manufacturer’s app or software. Follow the on-screen instructions to connect the cameras to your Wi-Fi network.
- Adjust the camera settings, such as motion detection sensitivity and recording preferences, to suit your needs.
- Test the cameras to make sure they are functioning properly. Check the live feed on your smartphone or computer to ensure everything is working as expected.
- Consider adding additional features, such as cloud storage or integration with smart home devices, to enhance the functionality of your camera system.
Installing the Cameras
When installing wireless security cameras, the first step is to determine the best locations for each camera. Consider areas that need surveillance, such as entry points, driveways, or high-traffic areas.
Next, mount the cameras securely using the provided mounting hardware. Make sure the cameras are positioned at the right angle to capture the desired view.
Connecting to Power
Most wireless security cameras are powered by either batteries or a power adapter. Ensure that the cameras have a reliable power source to function properly.
Pro tip: For outdoor cameras, consider using weatherproof housing to protect them from the elements.
Connecting the Cameras to Power
Once you have positioned your wireless security cameras in the desired locations, the next step is to connect them to power. Most wireless security cameras come with power adapters that need to be plugged into a power outlet. Make sure to place the cameras near an outlet or use extension cords if needed.
Using Batteries
Some wireless security cameras are battery-powered, which eliminates the need for power cords. If you are using battery-powered cameras, make sure to check the battery levels regularly and replace them as needed to ensure uninterrupted surveillance.
It is important to follow the manufacturer’s instructions when connecting the cameras to power to avoid any damage to the cameras or electrical hazards. Once the cameras are connected to power, you can proceed with the setup and configuration process to start monitoring your property.
Configuring the Cameras
Once the wireless security cameras are physically installed in the desired locations, the next step is to configure them for optimal performance. This typically involves connecting the cameras to a Wi-Fi network, setting up the camera settings such as motion detection sensitivity and recording schedules, and ensuring that the cameras are accessible remotely through a mobile app or web interface.
Most wireless security cameras come with user-friendly setup guides that walk you through the configuration process step by step. It’s important to follow these instructions carefully to ensure that the cameras are properly configured and functioning as intended.
Some key configuration steps may include:
- Connecting to Wi-Fi: Enter the Wi-Fi network credentials into the camera’s settings to establish a wireless connection.
- Setting motion detection: Adjust the sensitivity and detection zones for motion alerts.
- Configuring recording settings: Set up recording schedules, video quality, and storage options.
- Enabling remote access: Ensure that the cameras can be accessed remotely via a mobile app or web interface for real-time monitoring.
By properly configuring your wireless security cameras, you can enhance the overall security and surveillance capabilities of your home or business.
Testing and Monitoring Your Security System
Once you have installed your wireless security cameras, it is crucial to test and monitor your system regularly to ensure it is working effectively. Here are some steps to follow:
1. Test Camera Placement: Check the field of view of each camera to make sure it covers the desired area without any blind spots.
2. Check Camera Connectivity: Ensure that each camera is connected to the Wi-Fi network and can transmit live footage to your monitoring device.
3. Test Motion Detection: Verify that the motion detection feature is working correctly by moving in front of the camera to trigger an alert.
4. Monitor Video Quality: Regularly review the video footage to ensure that the quality is clear and that there are no issues with playback.
5. Check Recording and Storage: Confirm that the cameras are recording footage as expected and that the storage capacity is sufficient for your needs.
6. Set Up Alerts: Configure alerts to notify you of any suspicious activity or system malfunctions.
7. Test Remote Access: Ensure that you can access the camera feeds remotely through the mobile app or web browser.
By performing these tests regularly and monitoring your security system, you can ensure the safety and security of your property.


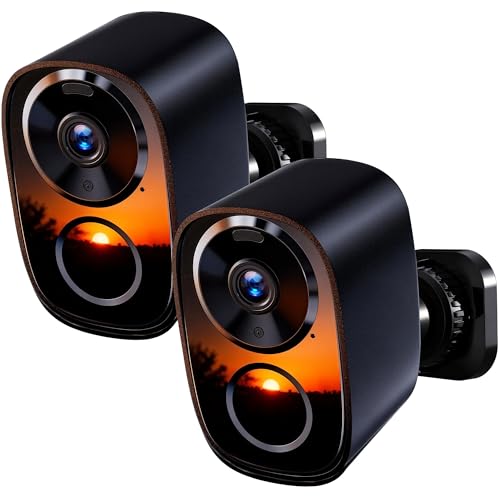



I'm thinking about installing wireless security cameras but I'm not sure about the placement. What's the best way to decide where to put them for maximum coverage?
I found that placing them at entry points like doors and garages is key. Also, backyards should get attention since they’re often overlooked.
I recently installed some wireless security cameras, and I have to say, the setup was pretty straightforward! I followed the steps listed in the article, and it took me about an hour. I chose cameras with a good field of view and positioned them at eye level. One thing I recommend is to test the live feed before finalizing the placements to avoid any surprises later.
That's awesome! Did you have any issues connecting them to your Wi-Fi?
Connecting to Wi-Fi can sometimes be tricky, depending on the camera model and your router. Make sure to have your Wi-Fi credentials handy and follow the manufacturer's app instructions closely for a smooth setup.