
 Carmen J. Moore

When the sun sets and darkness falls, the world transforms into a canvas of mysterious beauty waiting to be captured. Nighttime photography with a mirrorless camera offers endless possibilities to create stunning images that showcase the magic of the night.
However, capturing the perfect nighttime shot can be challenging, as low light conditions require a different approach and technique. With the right skills and knowledge, you can unlock the potential of your mirrorless camera and create breathtaking nighttime photos that will leave viewers in awe.


From mastering exposure settings to utilizing creative techniques such as light painting and long exposures, this guide will provide you with essential tips and tricks to elevate your nighttime photography game with a mirrorless camera.
Best Tips for Capturing Nighttime Photos with Mirrorless Camera
Shooting nighttime photos with a mirrorless camera can be a rewarding experience, allowing you to capture stunning images in low light conditions. To help you make the most of your nighttime photography, here are some tips to consider:
1. Use a Tripod
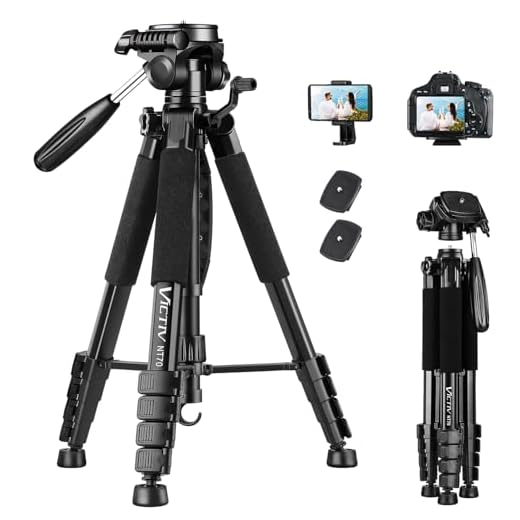
Stability is key when shooting in low light, so using a tripod is essential to avoid camera shake and ensure sharp images. Invest in a sturdy tripod to keep your camera steady during long exposures.
2. Adjust Your Settings
- Set your camera to manual mode to have full control over settings.
- Use a wide aperture (low f-stop) to let in more light.
- Adjust your ISO to a higher setting for better exposure in low light.
- Experiment with longer shutter speeds to capture more light.
By adjusting these settings, you can achieve well-exposed nighttime photos with your mirrorless camera.
Understanding Nighttime Photography Basics
When it comes to nighttime photography, understanding the basics is crucial for capturing stunning shots. Here are some key principles to keep in mind:
1. Use a tripod: Stability is key when shooting in low light conditions. A tripod will help you avoid camera shake and ensure sharp images.
2. Adjust your settings: Experiment with different settings like aperture, ISO, and shutter speed to find the right balance for your nighttime shots.
3. Embrace long exposures: Nighttime photography often requires longer exposures to capture enough light. Be patient and let your camera sensor gather the necessary light.
4. Consider light sources: Look for interesting light sources like street lamps, neon signs, or the moon to add depth and mood to your nighttime photos.
5. Practice and experiment: The more you practice shooting at night, the better you’ll become at understanding how your camera behaves in low light situations. Experiment with different techniques to find your unique style.
Choosing the Right Camera Settings
When taking nighttime photos with a mirrorless camera, selecting the right camera settings is crucial to capturing stunning images. Here are some key settings to consider:
| Setting | Recommendation |
|---|---|
| ISO | Use a low ISO (e.g., 100-400) to minimize noise in your photos. |
| Aperture | Choose a wide aperture (e.g., f/2.8 or lower) to let in more light and create a shallow depth of field. |
| Shutter Speed | Experiment with longer shutter speeds (e.g., 5-30 seconds) to capture light trails and night scenes. |
| White Balance | Adjust the white balance setting to match the lighting conditions and achieve accurate colors. |
| Focus | Consider using manual focus to ensure sharpness in low-light situations. |
By adjusting these camera settings accordingly, you can enhance the quality of your nighttime photos and unleash your creativity.
Using a Tripod for Stability
One of the key factors in capturing sharp nighttime photos with a mirrorless camera is stability. Even the slightest movement during a long exposure can result in blurry images. Using a tripod is essential to keep your camera steady and prevent any shake or vibration.
Choosing the Right Tripod
When selecting a tripod for nighttime photography, look for one that is sturdy and can support the weight of your camera and lens. Make sure the tripod is tall enough to adjust to different heights and angles for versatile shooting positions.
| Feature | Tip |
| Sturdy Build | Opt for a tripod made of durable materials like aluminum or carbon fiber for stability. |
| Height Adjustment | Choose a tripod with adjustable legs and center column to accommodate various shooting situations. |
By using a tripod for stability, you can ensure sharp and clear nighttime photos with your mirrorless camera.
Experimenting with Different Light Sources
One of the key aspects of nighttime photography is playing with different light sources to create unique and captivating images. Here are some tips on how to experiment with various light sources:
| 1. Street Lights: | Use the warm glow of street lights to add a golden hue to your photos. Experiment with different angles to create interesting shadows and highlights. |
| 2. Light Trails: | Capture the movement of cars or other light sources to create dynamic light trails in your photos. Use a slow shutter speed to achieve this effect. |
| 3. LED Lights: | Experiment with colorful LED lights to add a pop of color to your nighttime shots. Try using different colors and patterns to create a vibrant scene. |
| 4. Fireworks: | If you’re shooting during a fireworks display, adjust your exposure settings to capture the bursts of light in the sky. Experiment with long exposures for a stunning effect. |
By exploring different light sources and techniques, you can elevate your nighttime photography and create stunning images that stand out.
Mastering Long Exposure Techniques
Long exposure photography is a popular technique used to capture stunning nighttime photos with mirrorless cameras. By mastering long exposure techniques, you can create mesmerizing images that showcase the beauty of the night sky and city lights.
Equipment Needed:
Before you begin, make sure you have the following equipment:
| Mirrorless camera |
| Sturdy tripod |
| Remote shutter release |
| Neutral density filter |
Tips for Long Exposure Photography:
Here are some tips to help you master long exposure techniques:
- Choose a low ISO setting to reduce noise in your photos.
- Use a small aperture (high f-stop) to increase depth of field.
- Experiment with different exposure times to achieve the desired effect.
- Frame your shot carefully and consider composition.
- Practice patience and take multiple shots to ensure you capture the perfect image.
Editing Nighttime Photos for Optimal Results
Once you have captured your nighttime photos with your mirrorless camera, the next step is to edit them to achieve the best possible results. Here are some tips for editing nighttime photos:
1. Adjust Exposure and White Balance
Start by adjusting the exposure and white balance settings to ensure that the colors and lighting in your nighttime photos are accurate. Since nighttime shots tend to have low light levels, you may need to increase the exposure slightly to brighten the image without overexposing it. Additionally, adjusting the white balance can help correct any color casts that may be present in the photo.
2. Reduce Noise and Enhance Sharpness
When shooting in low light conditions, digital noise can often be a problem in nighttime photos. Use noise reduction tools in your editing software to reduce noise while preserving image detail. You can also enhance the sharpness of your nighttime photos by adjusting the clarity and sharpening settings to make the details in the image stand out.
By following these editing tips, you can improve the quality of your nighttime photos taken with a mirrorless camera and achieve optimal results.
Exploring Creative Nighttime Photography Ideas
When it comes to capturing nighttime photos with your mirrorless camera, there are endless creative possibilities to explore. Here are some ideas to inspire your next shoot:
1. Light Trails: Experiment with long exposure shots of moving lights, such as cars or city lights, to create mesmerizing light trails in your photos.
2. Silhouettes: Use the contrast between light and dark to capture striking silhouettes against the night sky or illuminated backgrounds.
3. Reflections: Look for reflective surfaces like water or glass to add depth and interest to your nighttime shots.
4. Starry Skies: Head to a location with minimal light pollution to capture the beauty of the night sky, including stars, constellations, and even the Milky Way.
5. Urban Landscapes: Explore the city at night and capture the dynamic architecture, street scenes, and bustling nightlife with your camera.
By experimenting with different techniques and subjects, you can push the boundaries of nighttime photography and create truly unique and captivating images.


I disagree about using a wide aperture for nighttime photography. Sometimes I find that a smaller aperture (higher f-stop) gives more depth and sharpness, especially in landscapes.
I see your point, but a wide aperture can help in low light, especially if you want a nice bokeh effect.
What’s the best ISO setting to use for nighttime photos? I’ve tried 800 and it was too noisy. Should I stick to lower ISO values?
I love capturing fireworks at night! Long exposures really bring out the colors. Can't wait to try some of these tips on my next shoot.
How does long exposure shooting with a mirrorless camera compare to a DSLR? Are there any major benefits?
Both mirrorless and DSLR cameras have their advantages for long exposure photography. Mirrorless cameras tend to be lighter and have electronic viewfinders that allow you to see exposure changes in real-time, which can be a big plus for night photography.
You mentioned using a low ISO for nighttime photos. Does that mean I should avoid higher ISO settings entirely?
Good article! I'm curious about what shutter speed I should start with for light trails. Any suggestions?
For light trails, a shutter speed between 5 to 30 seconds works well. Just remember to adjust based on how much light there is.
I recently tried long exposure photography at a local park, using a tripod and a remote shutter release. It really made a difference in keeping the images sharp! I was surprised at how many stars I could capture with just a few minutes of exposure. I also played with some LED lights for added color in some shots, which turned out great!
Thanks for sharing your experience! Using a remote shutter release can definitely minimize camera shake, and adding colored lights is a creative touch. Keep practicing!
I've found that using a remote shutter release really helps prevent camera shake during long exposures. It's a small investment for a big difference!
I’m trying to choose between two mirrorless cameras for nighttime photography. One has a wider aperture but the other has better low-light performance. Which one should I prioritize?
If nighttime photography is your main focus, prioritize the camera with better low-light performance. A wide aperture is beneficial, but if the camera struggles in low light, you might not get the best results overall.
I've been experimenting with nighttime photography for a while now. Using a tripod has made a huge difference in my shots! I also found that adjusting the ISO too high creates a lot of noise, so I stick to around 400 or lower, especially with long exposures.
What are some good tips for focusing in low light with a mirrorless camera? Sometimes I find it hard to get sharp images at night.
I recently went out to shoot some stars using a mirrorless camera, and using a tripod made a huge difference! I set my aperture to f/2.8 and my shutter speed to 20 seconds. The results were amazing, but I still need to work on my focus. Has anyone else tried astrophotography with a mirrorless camera?
Yes! I've done that too. Using manual focus is crucial for stars. I usually focus on a distant light before switching to manual mode.
I've been using my mirrorless camera for nighttime photography for a while now. I used to struggle with blurry images until I invested in a solid tripod. It made a huge difference! I also found that using a remote shutter release really helps reduce camera shake. Has anyone else had similar experiences? What gear do you use for stabilization?
I had the same issue with blurriness before I got a tripod! Also, I sometimes use a timer function instead of a remote. It works great in a pinch.
I really enjoyed the tips on using LED lights! They can really enhance nighttime shots creatively.
I've been practicing nighttime photography with my mirrorless camera, and using a tripod has made a huge difference! I tried shooting without it once, and my images came out so blurry. I also love using street lights as my main light source; they give such a warm glow to the photos. Has anyone else had similar experiences?
Can you explain more about how to adjust the white balance for nighttime photos? What settings should I use depending on the light sources around?
When adjusting white balance for nighttime photography, start with the 'Tungsten' setting if you're near streetlights, as they tend to add a yellow hue. If you're shooting under neon signs or similar, try 'Fluorescent.' Always consider experimenting with the custom white balance to achieve the best results.
What ISO settings do you recommend for shooting cityscapes at night? I've had issues with noise in my photos before.
For cityscapes at night, a low ISO of around 100-400 is generally ideal to minimize noise. You might need to adjust depending on your specific lighting conditions, but this range is a good starting point.
Don’t forget about using manual focus! It really helps in dim lighting conditions when autofocus struggles.
What ISO do you recommend for shooting in really low light? Is 800 too high? I don't want too much noise in my images.
For low light, starting with an ISO of 800 can be acceptable, but you'll want to be careful about increasing it too much. Ideally, try to keep it within the 100-400 range to minimize noise. Experiment with your camera's capabilities to find the best balance between light sensitivity and image quality.