
 Carmen J. Moore

With the advancement of technology, it has become easier than ever to seamlessly integrate your iPhone camera with your MacBook Air. Whether you want to take high-quality photos, record videos, or even use your iPhone as a webcam for video calls, there are various ways to make the most of this feature.
In this comprehensive guide, we will walk you through the different methods you can use to connect and utilize your iPhone camera on your MacBook Air. From using built-in features to third-party apps, we will cover everything you need to know to enhance your photography and video recording experience.
Step-by-Step Guide: Utilizing iPhone Camera on MacBook Air
Using your iPhone camera on your MacBook Air can be a convenient way to capture high-quality photos and videos. Follow these steps to seamlessly connect and utilize your iPhone camera on your MacBook Air:

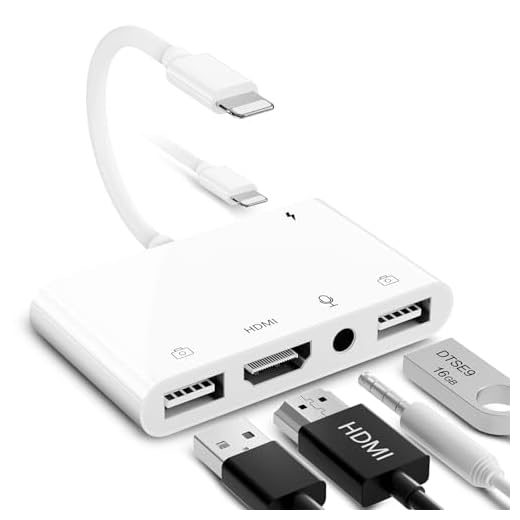

| Step 1: | Ensure that both your iPhone and MacBook Air are connected to the same Wi-Fi network. |
| Step 2: | Open the “QuickTime Player” application on your MacBook Air. |
| Step 3: | Click on “File” in the menu bar, then select “New Movie Recording”. |
| Step 4: | Next to the record button, click on the dropdown arrow and select your iPhone under the “Camera” and “Microphone” options. |
| Step 5: | Your iPhone camera feed should now appear on your MacBook Air screen. You can adjust settings like resolution and quality as needed. |
| Step 6: | To start recording, click on the record button in QuickTime Player. You can also take photos by clicking the camera icon. |
| Step 7: | Once you’re done, click on the stop button to end the recording. Your captured media will be saved on your MacBook Air. |
Compatibility Check: iPhone and MacBook Air
Before attempting to use your iPhone camera on your MacBook Air, it’s important to ensure that both devices are compatible. Here’s a quick compatibility check to make sure everything works smoothly:
| Device | Compatibility |
| iPhone | Make sure your iPhone is running on iOS 8 or later, as older versions may not be compatible with your MacBook Air. |
| MacBook Air | Ensure your MacBook Air is running on macOS Yosemite (10.10) or later to ensure compatibility with your iPhone. |
| Connection | Use a lightning cable to connect your iPhone to your MacBook Air. This will allow you to transfer photos and videos easily. |
By checking the compatibility of your devices and using the right connection method, you can easily use your iPhone camera on your MacBook Air without any issues.
Connecting Devices: Establishing a Seamless Connection
When using your iPhone camera on your MacBook Air, establishing a seamless connection between the two devices is essential for a smooth experience. Follow these steps to ensure a successful connection:
Step 1: Enable Wi-Fi and Bluetooth
Make sure both your iPhone and MacBook Air have Wi-Fi and Bluetooth enabled. This will allow the devices to communicate with each other wirelessly.
Step 2: Pair the Devices
On your MacBook Air, open the Camera app and select the option to connect to an iPhone. Follow the on-screen instructions to pair the devices. Once paired, you can easily access your iPhone camera through your MacBook Air.
By following these steps, you can seamlessly connect your iPhone camera to your MacBook Air and enjoy the convenience of using your iPhone’s camera on a larger screen.
Launching QuickTime Player: Accessing the Camera Feature
To use your iPhone camera on your MacBook Air, you can launch QuickTime Player and access the camera feature. Follow these steps:
| 1. | Open QuickTime Player on your MacBook Air. |
| 2. | Go to the “File” menu and select “New Movie Recording.” |
| 3. | A window will pop up showing your MacBook Air’s camera. Click on the dropdown arrow next to the record button. |
| 4. | Select your iPhone from the list of available cameras. |
| 5. | Your iPhone camera feed will now appear on your MacBook Air screen. You can use this feature to capture photos or videos using your iPhone camera. |
Selecting iPhone Camera: Choosing the Source
When using your iPhone camera on your MacBook Air, you need to select the source properly to ensure a smooth and efficient connection. Follow these steps to choose the iPhone camera as the source:
- Connect your iPhone to your MacBook Air using a lightning cable.
- Open the QuickTime Player on your MacBook Air.
- Click on the File menu and select “New Movie Recording”.
- Next to the record button, you will see a dropdown arrow. Click on it.
- Choose your iPhone from the list of available cameras.
Notes:
- Make sure your iPhone is unlocked and the camera app is open for the connection to work.
- If your iPhone does not appear as an option, try reconnecting the lightning cable or restarting both devices.
Adjusting Settings: Optimizing Image Quality
When using your iPhone camera on your MacBook Air, you can adjust settings to optimize the image quality. To do this, open the Camera app on your iPhone and tap on the settings icon. From there, you can adjust options such as exposure, focus, and white balance to ensure your photos are clear and well-balanced.
Exposure: Adjust the exposure level to control the brightness of your photos. Increase exposure for brighter images or decrease it for darker images.
Focus: Use the focus feature to ensure that your subject is sharp and in focus. Tap on the screen to focus on a specific area or adjust the focus manually.
White Balance: White balance settings help to correct the color temperature of your photos. Choose from presets like daylight, cloudy, or tungsten to achieve accurate colors in different lighting conditions.
By adjusting these settings, you can optimize the image quality when using your iPhone camera on your MacBook Air and capture stunning photos with ease.
Capturing Images: Snapping Photos from iPhone Camera
One of the most convenient features of using your iPhone camera on your MacBook Air is the ability to capture images directly from your device. Here’s how you can easily snap photos using your iPhone camera on your MacBook Air:
Step 1: Connect Your iPhone
Make sure your iPhone is connected to your MacBook Air using a USB cable or through AirDrop. Once connected, your iPhone camera will appear as an available camera source on your MacBook.
Step 2: Open the Camera App
Open the camera app on your MacBook Air and select the iPhone camera as the source. You can now see the live feed from your iPhone camera on your MacBook screen.
Tip: You can adjust the camera settings and choose the desired photo mode (e.g., portrait, square, panorama) on your iPhone camera before capturing the image.
Once you have framed the shot, simply click the shutter button on your MacBook Air to capture the image. The photo will be saved directly to your MacBook’s Photos app for easy access and sharing.
Saving and Sharing: Storing and Transmitting Captured Moments
Once you have captured the perfect moment using your iPhone camera on your MacBook Air, it’s time to save and share those precious memories. You can easily save the photos or videos to your MacBook Air by transferring them from your iPhone using the Photos app or AirDrop.
To store the captured moments on your MacBook Air, simply open the Photos app on your iPhone, select the photos or videos you want to transfer, and then choose the option to import them to your MacBook Air. Alternatively, you can use AirDrop to wirelessly transfer the files to your MacBook Air. Make sure both devices are connected to the same Wi-Fi network and enable AirDrop on both devices.
Once the photos or videos are saved on your MacBook Air, you can easily share them with friends and family by using email, messaging apps, or social media platforms. Simply select the files you want to share and then choose the sharing option that best suits your needs. Whether you want to send a single photo via email or share multiple photos on Instagram, the possibilities are endless.
By saving and sharing your captured moments, you can cherish and relive those memories for years to come. Whether it’s a breathtaking sunset, a hilarious candid shot, or a heartwarming family portrait, your iPhone camera on your MacBook Air allows you to capture and share life’s most precious moments with ease.


I tried using this method with my MacBook Air and iPhone 12, and it worked great! The video quality was better than I expected. Just make sure your iPhone is unlocked, or it won't connect. I had some issues with the initial setup but once I got everything configured, it was a smooth experience. Worth trying for anyone needing a webcam alternative!
How does the video quality from the iPhone compare to a built-in MacBook webcam? Is it significantly better?
Generally, the video quality from an iPhone camera is superior to that of a built-in MacBook webcam, especially in low light conditions. iPhones have advanced camera technology that typically provides better resolution and clarity.
Can I use my iPhone camera on my MacBook Air without a USB cable? I prefer a wireless setup if possible.
Does the iOS version matter? I have an older iPhone, and I’m not sure if this will work.
Yes, your iPhone needs to be running iOS 8 or later for compatibility with the MacBook Air.
I disagree with the idea that using an iPhone as a webcam is a must-have feature. I think it complicates things unnecessarily. Sometimes, it's just easier to use a dedicated webcam.
While dedicated webcams can be simpler, many users find the flexibility and quality of using an iPhone appealing, especially if they already own an iPhone.
Make sure to check the camera settings on your iPhone for the best results!