
 Carmen J. Moore

Are you a proud owner of an Olympus camera and want to easily transfer your photos to your iPhone for editing or sharing on social media? Look no further! In this guide, we will walk you through the step-by-step process of transferring your precious photos from your Olympus camera to your iPhone.
Step 1: Connect Your Olympus Camera to Your Computer

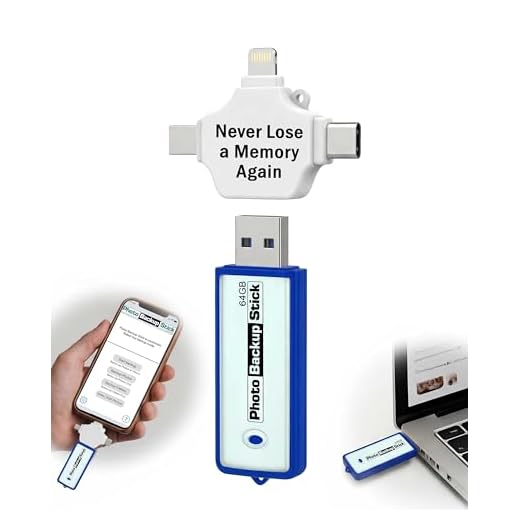

First, connect your Olympus camera to your computer using the USB cable that came with the camera. Once connected, your computer should recognize the camera as a removable storage device.
Step 2: Transfer Photos to Your Computer
Next, navigate to the folder on your Olympus camera where your photos are stored. Select the photos you want to transfer and copy them to a folder on your computer.
Step 3: Transfer Photos from Computer to iPhone
Now, connect your iPhone to your computer using a USB cable. Open iTunes and select your iPhone. Go to the “Photos” tab and check the “Sync Photos” option. Choose the folder where you saved your Olympus camera photos and click “Apply” to sync the photos to your iPhone.
Step-by-Step Guide: Transferring Photos from Olympus Camera to iPhone
Transferring photos from your Olympus camera to your iPhone can be a quick and easy process if you follow these steps:
Step 1: Install Olympus Image Share App
First, download and install the Olympus Image Share app on your iPhone from the App Store.
Step 2: Connect Camera to iPhone
Turn on your Olympus camera and enable Wi-Fi. Open the Olympus Image Share app on your iPhone and select “Camera” from the menu. Follow the on-screen instructions to connect your camera to your iPhone.
Step 3: Select and Transfer Photos
Once your camera is connected to your iPhone, you can select the photos you want to transfer. Tap on the “Transfer Images” option in the app and choose the photos you want to transfer. Confirm the transfer and wait for the process to complete.
| Important Note: | Make sure both your camera and iPhone are fully charged before starting the transfer process to avoid any interruptions. |
|---|
Install Olympus Image Share App
To transfer photos from your Olympus camera to your iPhone, you will need to download and install the Olympus Image Share app on your iPhone. The app is available for free on the App Store.
Once you have downloaded the app, follow the on-screen instructions to set it up and connect it to your Olympus camera. Make sure your camera and iPhone are connected to the same Wi-Fi network for the transfer to work smoothly.
Connect Camera and iPhone via Wi-Fi
To transfer photos from your Olympus camera to your iPhone via Wi-Fi, follow these steps:
| 1. | Make sure both your camera and iPhone are connected to the same Wi-Fi network. |
| 2. | On your Olympus camera, navigate to the Wi-Fi settings and enable the Wi-Fi connection. |
| 3. | Download and install the Olympus Image Share app on your iPhone from the App Store. |
| 4. | Open the Olympus Image Share app on your iPhone and follow the on-screen instructions to connect to your camera. |
| 5. | Once connected, you can select and transfer photos from your camera to your iPhone wirelessly. |
Select Photos to Transfer
After connecting your Olympus camera to your iPhone, open the Olympus app on your device. You will see a list of photos from your camera displayed on the app. Select the photos that you want to transfer to your iPhone by tapping on them. You can select multiple photos at once by tapping on each one. Once you have selected all the photos you want to transfer, tap on the “Transfer” button to start the transfer process.
Initiate Transfer Process
To start transferring photos from your Olympus camera to your iPhone, follow these steps:
Step 1: Connect Your Olympus Camera to Your Computer
Use the USB cable that came with your camera to connect it to your computer. Make sure your camera is turned on.
Step 2: Import Photos to Your Computer
Open the software that came with your camera or use a file management program to import the photos from your camera to your computer.
Note: Organize the photos in a folder on your computer to make it easier to transfer them to your iPhone.
Wait for Transfer Completion
Once you have initiated the transfer of photos from your Olympus camera to your iPhone, be patient and wait for the process to complete. The time it takes for the transfer to finish will depend on the number and size of the photos being transferred. Do not interrupt the transfer process to ensure that all your photos are successfully transferred to your iPhone.
Check Transferred Photos on iPhone
After successfully transferring photos from your Olympus camera to your iPhone, you can easily check the transferred photos on your device. Here’s how:
| 1. Open the Photos app: | Locate the Photos app on your iPhone and tap on it to open. |
| 2. Navigate to Albums: | In the Photos app, go to the Albums tab located at the bottom of the screen. |
| 3. Find the Imported Album: | Look for an album named “Imported” or “Olympus” where your transferred photos should be stored. |
| 4. View and Share: | You can now view the transferred photos in the Imported or Olympus album and share them with friends or family. |
Organize and Edit Photos on iPhone
Once you have transferred your photos from your Olympus camera to your iPhone, it’s time to organize and edit them to make them look their best. Here are some tips on how to do so:
1. Create Albums
Use the built-in Photos app on your iPhone to create albums for different categories of photos. This will help you keep your photos organized and easy to find.
2. Edit Photos
Take advantage of the editing tools available in the Photos app to enhance your photos. You can crop, adjust brightness and contrast, apply filters, and more to make your photos look professional.
By organizing and editing your photos on your iPhone, you can create a beautiful collection of memories that you can easily share with others.
Share Transferred Photos with Others
Once you have successfully transferred your photos from your Olympus camera to your iPhone, you can easily share them with others. You can share your photos via messaging apps, social media platforms, email, or even by transferring them to another device. Simply select the photos you want to share, choose the sharing option, and follow the prompts to send them to your friends and family.
Backup Photos for Safekeeping
It’s always a good idea to backup your photos to ensure they are safe and secure. One way to do this is by transferring them to your iPhone from your Olympus camera. Once you have successfully transferred the photos to your iPhone, consider creating a backup on a cloud storage service like iCloud, Google Photos, or Dropbox. This way, even if something happens to your phone or camera, you’ll have a copy of your precious photos stored safely online. Remember to regularly backup your photos to keep them protected.


I’ve used both the USB method and the Wi-Fi method. The Wi-Fi transfer is definitely more convenient, but it can be slower. For a larger batch of photos, I prefer the USB method.
I actually find the app method frustrating. The USB way seems much more straightforward, especially if you’re not tech-savvy.
Can someone clarify what to do if the transfer gets interrupted? I’ve had that happen before, and I’m not sure if I need to restart the whole process or if I can just continue from where it stopped.
If the transfer gets interrupted, it’s usually best to restart the process to ensure all files are transferred correctly. Make sure both devices are fully charged and connected properly before starting again.
Does the Olympus Image Share app work with all Olympus camera models? I have an older model and want to make sure it’s compatible before downloading the app.
The Olympus Image Share app is compatible with most recent Olympus models. However, for older models, it’s best to check the specifications on the Olympus website or the app's description in the App Store.
I tried using the USB method to transfer my photos and it worked flawlessly. Just be sure to have iTunes updated before starting.