
 Carmen J. Moore

Are you looking to elevate your photography and videography game with your iPhone? One of the best ways to do so is by setting up your camera for overhead shots. Whether you’re capturing flat lays, cooking tutorials, or art projects, shooting from above can offer a unique perspective and make your content stand out.
In this guide, we’ll walk you through the steps to set up your iPhone camera for overhead shots like a pro.


Step-by-step Guide for Setting Up iPhone Camera from Above
Setting up your iPhone camera from above can help you capture unique and interesting shots. Follow these steps to set up your iPhone camera for overhead photography:
Step 1: Positioning
Place your iPhone on a stable surface or use a tripod to position it directly above the subject you want to capture.
Step 2: Adjusting the Angle
Tilt the iPhone slightly to get the desired angle for your shot. You can use the grid on the camera app to ensure the alignment is correct.
| Step 3: Lighting | Make sure the lighting is adequate for your shot. Natural light from a window or a softbox can help illuminate your subject. |
| Step 4: Focus and Exposure | Tap on the subject on your iPhone screen to focus and adjust the exposure. You can also lock the focus and exposure by pressing and holding on the screen. |
| Step 5: Shooting | Once everything is set up, you can start taking photos or recording videos from above using your iPhone camera. |
By following these steps, you can set up your iPhone camera for overhead photography and capture stunning images and videos from a unique perspective.
Ensure Proper Lighting for Best Results
When setting up your iPhone camera from above, lighting plays a crucial role in achieving the best results. Here are some tips to ensure proper lighting:
1. Natural Light
Whenever possible, try to utilize natural light sources such as windows or skylights. Position your setup near a window to take advantage of soft, diffused natural light. Avoid harsh direct sunlight, as it can create strong shadows and overexposure.
2. Artificial Lighting
If natural light is not available or insufficient, consider using artificial lighting sources like desk lamps or ring lights. Position the lights strategically to evenly illuminate your subject and minimize shadows. Experiment with different angles and intensities to find the optimal lighting setup.
By paying attention to lighting and experimenting with different setups, you can enhance the quality of your overhead iPhone camera shots and capture stunning images and videos.
Adjust Camera Angle and Position
When setting up your iPhone camera from above, it’s important to adjust the angle and position to capture the best shots. Here are some tips to help you get the perfect setup:
- Mount your iPhone securely on a stable surface to prevent any shaking or movement during the recording.
- Adjust the tilt of the camera to ensure it is pointing downwards at the desired angle. You can use a tripod or a stand to achieve the right position.
- Make sure the lighting is adequate and position the camera in a way that minimizes shadows and glare.
- Consider using a remote shutter or timer to take photos or videos without having to touch the phone, which can cause vibrations.
By following these tips and adjusting the camera angle and position properly, you can create high-quality videos and photos from above with your iPhone.
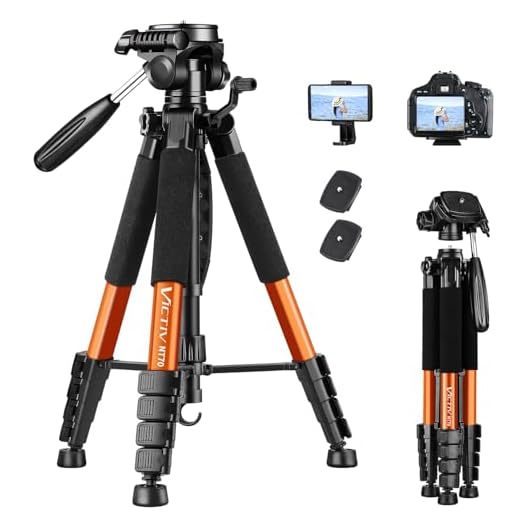
Use a Sturdy Tripod for Stability
Setting up your iPhone camera from above requires stability to ensure clear and steady shots. To achieve this, it is essential to use a sturdy tripod that can securely hold your iPhone in place. Look for a tripod with adjustable height and angle features to customize the positioning of your camera.
Make sure the tripod is placed on a flat, level surface to prevent any wobbling or tilting during recording. This will help maintain a consistent and professional-looking shot. Additionally, consider using a remote shutter or timer function on your iPhone to avoid any shaking when pressing the capture button.
Enable Gridlines for Better Composition
One of the key features that can help you set up your iPhone camera from above is the gridlines option. Gridlines are a set of horizontal and vertical lines that divide your camera screen into thirds, helping you apply the rule of thirds for better composition.
To enable gridlines on your iPhone camera, go to Settings, then Camera, and toggle on the Grid option. Once enabled, you’ll see the gridlines overlay on your camera screen, which can guide you in aligning your subject and composing your shots more effectively.
By using gridlines, you can ensure that your photos are well-balanced and visually appealing when shooting from above. Experiment with different compositions and see how gridlines can enhance your photography skills.
Set Focus and Exposure Manually
To get the best results when setting up your iPhone camera from above, it’s important to manually adjust the focus and exposure settings. Here’s how you can do it:
- Tap on the screen where you want to focus. This will set the focus point for your shot.
- Once the focus point is set, you can adjust the exposure by sliding your finger up or down on the screen. Sliding up will make the image brighter, while sliding down will make it darker.
- You can also lock the focus and exposure settings by pressing and holding the focus point until you see the AE/AF Lock banner appear at the top of the screen.
- Experiment with different focus and exposure settings to find the perfect balance for your overhead shots.
Experiment with Different Camera Modes
Once you have your iPhone set up in a stable position above your subject, it’s time to experiment with different camera modes to capture the best shot. Here are a few modes to try:
- Photo Mode: Capture still images of your subject from above. Adjust the exposure and focus to get the perfect shot.
- Video Mode: Record videos from a unique perspective. Try different angles and movements to create dynamic footage.
- Square Mode: Perfect for sharing photos on social media platforms like Instagram. Experiment with composition and framing in this mode.
- Time-Lapse Mode: Create captivating time-lapse videos of your subject’s activities from above. Set the interval and duration for stunning results.
- Panorama Mode: Capture wide scenic views from above by panning your iPhone camera. Experiment with different speeds and angles for panoramic shots.
By trying out different camera modes, you can unleash your creativity and capture stunning photos and videos from above with your iPhone camera.
Practice and Refine Your Skills
Setting up your iPhone camera from above may take some practice to get the perfect shot. Try experimenting with different angles, lighting conditions, and compositions to see what works best for your needs. Take advantage of the various camera settings and features on your iPhone to enhance your photos.
Consider practicing with different objects or subjects to capture a variety of images. This will help you refine your skills and develop your eye for composition. Don’t be afraid to try new techniques and experiment with different styles to find your unique photography style.
Additionally, take the time to review your photos and analyze what works well and what can be improved. This feedback will help you continuously improve your photography skills and enhance your ability to set up your iPhone camera from above effectively.


Good article! I’m curious about the best type of tripod to use for overhead shots. Do you recommend any specific models or features I should look for?
I recently bought a flexible tripod that can wrap around surfaces. It’s great for getting just the right angle!
I think using artificial lights can often create harsh shadows, even if positioned correctly. Natural light is always the best for me!
I tried setting up my iPhone for overhead shots using a table and some books to prop it up. It worked decently, but I noticed a lot of shadows. I wish I had read the part about lighting before attempting! Now, I’ll definitely experiment with natural light and maybe buy a ring light to improve my shots.
I recently tried setting up my iPhone for overhead flat lays, and using the grid lines made a huge difference in composition. I also found that natural light from my window worked better than my ring light for these shots. Highly recommend experimenting with both to see what works best!
Great guide! How do you recommend stabilizing the iPhone if I don’t have a tripod?
If you don't have a tripod, you can use stable surfaces like tables or counters. You might also consider DIY options like stacking books or using a sturdy shelf. Just ensure whatever you use is stable to prevent shaking!
I’ve heard that using a gimbal can help with stability too. Is that better than a tripod for overhead shots?
Gimbals can offer more fluid movement, but for overhead shots, a sturdy tripod is usually the best choice for stability. If you're just shooting straight down, a tripod will keep your iPhone steady.
When you mention locking focus and exposure, does that apply to video as well? I often use my iPhone for shooting tutorials.
Yes, you can lock the focus and exposure while recording video as well! Just tap and hold on the screen to set it, and it will remain consistent throughout your recording.
I’m curious about the focus and exposure locking. Can you explain again how to lock those settings on the iPhone?
To lock focus and exposure, tap on the area you want to focus on, then press and hold until you see the AE/AF Lock banner at the top. This will hold those settings in place while you shoot!