
 Carmen J. Moore

Are you looking to transfer photos from your iPhoto library to your iPhone camera roll? Look no further! In this guide, we will walk you through the steps to easily import your favorite pictures from iPhoto to your iPhone.
With the advancements in technology, it has become increasingly convenient to access and manage our photos across different devices. Whether you want to showcase your photography skills or simply carry your memories with you on your iPhone, importing photos from iPhoto to your camera roll is a quick and seamless process.
By following the simple steps outlined in this article, you can effortlessly transfer your photos from iPhoto to your iPhone camera roll in just a few minutes. Say goodbye to the hassle of searching for your favorite pictures on different devices and enjoy easy access to all your photos on your iPhone.
Step-by-Step Guide to Import Photos from iPhoto to iPhone Camera Roll
If you have photos in iPhoto that you want to transfer to your iPhone camera roll, follow these steps:
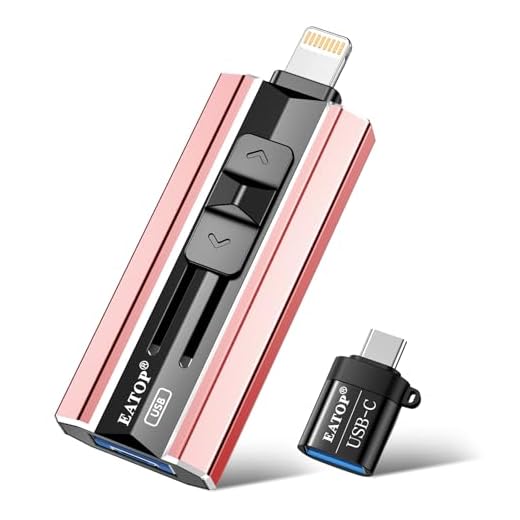


- Connect your iPhone to your computer using a USB cable.
- Launch the iPhoto app on your computer.
- Select the photos you want to import to your iPhone camera roll.
- Click on the “File” menu and choose “Export” to save the selected photos to a folder on your computer.
- Open the folder where you saved the exported photos.
- Select the photos and drag them to iTunes.
- In iTunes, click on your iPhone icon and go to the “Photos” tab.
- Check the box next to “Sync Photos” and select the folder where you saved the photos.
- Click on “Apply” to sync the photos to your iPhone camera roll.
Now, the photos from iPhoto should be successfully imported to your iPhone camera roll. Enjoy your pictures on the go!
Access iPhoto Library on Mac
To access your iPhoto Library on a Mac, follow these steps:
1. Open Finder: Click on the Finder icon in the dock or press Command + N to open a new Finder window.
2. Go to Home: In the Finder window, navigate to your home directory by clicking on your username in the sidebar.
3. Locate iPhoto Library: Find the iPhoto Library file, which is usually located in the Pictures folder. It will have a flower icon.
4. Access iPhoto Library: You can now access all your photos and albums stored in the iPhoto Library by double-clicking on the file.
5. Copy Photos: To copy photos from the iPhoto Library to your iPhone, simply drag and drop them into the Photos app on your Mac or import them into the Photos app if you’re using macOS Catalina or later.
Select Photos for Export
Before you can import photos from iPhoto to your iPhone camera roll, you need to select the photos you want to export. Follow these steps:
- Open iPhoto on your Mac.
- Go to the “Photos” tab to view all your photos.
- Hold down the “Command” key on your keyboard and click on the photos you want to export. This allows you to select multiple photos at once.
- Once you have selected all the photos you want to export, go to the “File” menu and choose “Export.”
- Choose the export settings that best suit your needs, such as file format and quality.
- Click “Export” to save the selected photos to a folder on your Mac.
Now that you have selected and exported the photos from iPhoto, you can proceed to import them to your iPhone camera roll using iTunes or other third-party apps.
Export Photos from iPhoto
To export photos from iPhoto to your iPhone camera roll, follow these steps:
- Open iPhoto on your Mac.
- Select the photos you want to export.
- Go to the “File” menu and choose “Export.”
- Choose the export settings, such as file format and quality.
- Click “Export” to save the photos to your computer.
- Connect your iPhone to your computer using a USB cable.
- Open iTunes on your computer.
- Select your iPhone from the iTunes sidebar.
- Go to the “Photos” tab and check the option to sync photos.
- Select the folder where you exported the photos from iPhoto.
- Click “Apply” to sync the photos to your iPhone camera roll.
Connect iPhone to Mac
To import photos from iPhoto to iPhone camera roll, you need to connect your iPhone to your Mac. Follow these steps:
Step 1: Use the USB cable that came with your iPhone to connect it to your Mac.
Step 2: Unlock your iPhone and trust the computer if prompted.
Step 3: Open the Photos app on your Mac.
Step 4: Click on your iPhone under the Devices section in the Photos app.
Step 5: Select the photos you want to import from iPhoto to your iPhone camera roll.
Step 6: Click on the Import button to transfer the selected photos to your iPhone.
Once the import process is complete, you can find the photos in your iPhone camera roll.
Launch iTunes and Sync Photos
To import photos from iPhoto to iPhone camera roll, you can use iTunes to sync the photos. Follow these steps:
- Connect your iPhone to your computer using a USB cable.
- Launch iTunes on your computer.
- Click on the device icon in iTunes to access your iPhone.
- Go to the “Photos” tab in the device summary.
- Check the box next to “Sync Photos” and select the folder or application you want to sync photos from (in this case, iPhoto).
- Choose whether you want to sync all photos or selected albums.
- Click on the “Apply” button to start syncing the photos to your iPhone camera roll.
Once the syncing process is complete, you should see the imported photos from iPhoto in your iPhone’s camera roll.
Enable iCloud Photo Library on iPhone
To import photos from iPhoto to iPhone camera roll, you can enable iCloud Photo Library on your iPhone. Follow these steps:
- Go to Settings on your iPhone.
- Tap on your Apple ID at the top of the screen.
- Select iCloud.
- Tap on Photos.
- Toggle the switch next to iCloud Photos to turn it on.
Once iCloud Photo Library is enabled, your photos from iPhoto will sync to your iPhone camera roll automatically. This makes it easier to access and view your photos across all your devices.
Check iPhone Storage Availability
Before importing photos from iPhoto to your iPhone camera roll, it’s essential to check the available storage on your iPhone. This step is crucial to ensure that you have enough space to accommodate the imported photos without running out of storage.
To check the storage availability on your iPhone, follow these steps:
Step 1: Go to Settings
Open the Settings app on your iPhone.
Step 2: Navigate to General > iPhone Storage
Scroll down and tap on “General” and then select “iPhone Storage.” Here, you will see a breakdown of your iPhone’s storage usage, including how much space is available and how much is used.
Transfer Photos to iPhone Camera Roll
If you want to import photos from iPhoto to your iPhone camera roll, you can follow these simple steps:
Step 1: Connect Your iPhone to Your Computer
Connect your iPhone to your computer using a USB cable. Make sure to unlock your iPhone and trust the computer if prompted.
Step 2: Open iTunes and Sync Photos
Open iTunes on your computer and select your iPhone. Go to the “Photos” tab and check the box next to “Sync Photos.” Choose the folder or album where your iPhoto photos are stored.
Note: If you don’t have iPhoto, you can transfer photos from any folder on your computer to your iPhone camera roll using the same steps.
After selecting the photos you want to transfer, click on the “Apply” or “Sync” button to start the transfer process.
Make sure to eject your iPhone safely from your computer once the sync is complete.
Verify Photos in Camera Roll
After importing photos from iPhoto to your iPhone camera roll, it is essential to verify that the photos have been successfully transferred. Follow these steps to ensure that your photos are in the camera roll:
- Open the Photos app: Launch the Photos app on your iPhone to access your camera roll.
- Scroll through the camera roll: Swipe through the photos in your camera roll to locate the imported photos from iPhoto.
- Check for duplicates: Look for any duplicate photos that may have been created during the import process.
- Verify image quality: Zoom in on the imported photos to ensure that they maintain their original quality.
- Organize your photos: Sort the photos in your camera roll to keep them organized and easy to access.
By following these steps, you can verify that the photos imported from iPhoto are safely stored in your iPhone camera roll for easy viewing and sharing.
Organize and Share Imported Photos
Once you have successfully imported your photos from iPhoto to your iPhone camera roll, it’s important to organize them for easy access and sharing. You can create albums or folders within the Photos app to categorize your photos based on events, dates, or themes. This will help you quickly locate specific photos when you need them.
Additionally, you can use the sharing options in the Photos app to share your imported photos with friends and family. You can send them via email, text message, or social media platforms like Facebook and Instagram. Sharing your photos is a great way to keep your loved ones updated on your life and adventures.
Remember to regularly back up your imported photos to ensure they are safe and secure. You can use iCloud or other cloud storage services to back up your photos and keep them accessible across all your devices. By organizing and sharing your imported photos, you can make the most of your memories captured on your iPhone.


What if I don’t have iTunes installed? Can I still transfer photos?
I just did this yesterday. The steps were pretty straightforward, but I had some trouble finding the right folder after exporting from iPhoto. It took a little longer because I kept looking in the wrong places!
Is there a difference in quality when importing photos through iCloud compared to using iTunes? I prefer iCloud for convenience but never really thought about the photo quality aspect.
Good question! Generally, both methods maintain the original quality of your photos. However, iCloud allows for automatic syncing across devices, which is a big plus for convenience.
When you mention checking iPhone storage, how much space should I ideally have free before importing?
It's best to have at least 15-20% of your total storage free to ensure smooth operation and avoid any storage issues.
Don't forget to eject your iPhone safely to avoid any data corruption!
I actually found the process more difficult than it seemed here. I think using third-party apps might be more user-friendly for transferring photos. Anyone else feel the same way?