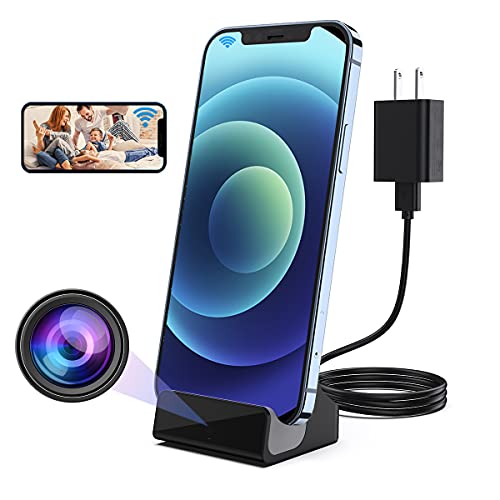
Having a home surveillance camera can provide you with peace of mind and security, but being able to monitor your camera feed on your iPhone adds an extra layer of convenience. With the advancement of technology, connecting your iPhone to your home surveillance camera is easier than ever before.
Whether you’re looking to keep an eye on your property while you’re away or just want to check in on your pets, connecting your iPhone to your home surveillance camera allows you to access live video feeds from anywhere with an internet connection.
In this article, we’ll walk you through the steps on how to connect your iPhone to your home surveillance camera, so you can keep an eye on what matters most to you.
Step-by-step guide for connecting your iPhone to home surveillance camera
Setting up your iPhone to connect to your home surveillance camera can provide you with peace of mind and security. Follow these simple steps to ensure a smooth and easy connection:
Step 1: Download the App
First, you need to download the corresponding app for your home surveillance camera on your iPhone. Check the user manual or the manufacturer’s website for the correct app.
Step 2: Connect to the Same Wi-Fi Network
Make sure both your iPhone and the home surveillance camera are connected to the same Wi-Fi network. This is essential for them to communicate with each other.
| Step | Instructions |
|---|---|
| Step 3 | Open the app on your iPhone and follow the on-screen instructions to add your home surveillance camera to the app. |
| Step 4 | Once the camera is added, you can access live video feeds, recordings, and control settings directly from your iPhone. |
| Step 5 | Ensure that your camera is securely mounted and positioned for optimal coverage of your home or property. |
By following these steps, you can easily connect your iPhone to your home surveillance camera and monitor your property remotely with ease.
Prepare your home surveillance camera
Before connecting your iPhone to your home surveillance camera, make sure your camera is properly set up and functioning correctly. Follow these steps to prepare your camera:
- Placement: Position your camera in a strategic location with a clear view of the area you want to monitor.
- Power: Ensure your camera is plugged in and receiving power. If your camera is battery-operated, make sure it is fully charged.
- Network connection: Connect your camera to your home Wi-Fi network. Follow the manufacturer’s instructions for the specific camera model.
- Camera settings: Adjust the camera settings as needed, such as motion detection sensitivity, recording options, and alerts.
- Test: Test the camera by monitoring the live feed on your computer or mobile device to confirm it is capturing the desired area.
Once your home surveillance camera is properly prepared, you can proceed to connect it to your iPhone for remote monitoring and access.
Download the camera app on your iPhone
To connect your iPhone to your home surveillance camera, you will need to download the camera app on your iPhone. The specific app you need will depend on the brand and model of your surveillance camera. Visit the App Store on your iPhone and search for the app recommended by the manufacturer of your camera. Once you find the app, download and install it on your iPhone.
Connect your iPhone to the same Wi-Fi network as the camera
Before you can access your home surveillance camera on your iPhone, make sure that your iPhone is connected to the same Wi-Fi network as the camera. This is essential for establishing a connection between the two devices.
Launch the camera app on your iPhone
To connect your iPhone to your home surveillance camera, start by launching the camera app on your iPhone. This app allows you to view the live feed from your surveillance camera and control its settings. Make sure your iPhone is connected to the same Wi-Fi network as your surveillance camera for seamless connectivity. Once the camera app is open, you can easily access and monitor your home surveillance camera from anywhere in your house or even remotely. Explore the different features and options available in the app to customize your viewing experience.
Enter the camera’s IP address in the app
Once you have downloaded the surveillance camera app on your iPhone, it’s time to connect it to your home camera. Start by opening the app and navigating to the settings or setup section.
Find the option to add a new camera or device and select it. You will be prompted to enter the IP address of your home surveillance camera. Make sure you have the correct IP address handy, as this is crucial for the connection to be successful.
Follow the on-screen instructions for pairing
Step 1: Open the surveillance camera app on your iPhone.
Step 2: Navigate to the settings or pairing section within the app.
Step 3: Follow the on-screen instructions to connect your iPhone to the surveillance camera. This may involve scanning a QR code, entering a unique code, or selecting the camera from a list of available devices.
Step 4: Once the pairing process is complete, you should be able to view live footage from the surveillance camera on your iPhone.
Adjust camera settings for optimal viewing on your iPhone
Once you have connected your iPhone to your home surveillance camera, it is important to adjust the camera settings for optimal viewing. Follow these steps to ensure you get the best possible view:
1. Resolution and Quality
Make sure to set the resolution and quality of the camera to a level that is compatible with your iPhone. Higher resolution and quality settings will provide clearer images but may require more bandwidth.
2. Frame Rate
Adjust the frame rate of the camera to a level that provides smooth video playback on your iPhone. A higher frame rate will result in smoother video but may require more processing power.
By adjusting these settings, you can ensure that you have the best viewing experience when accessing your home surveillance camera on your iPhone.
Access live feed and recordings on your iPhone
Once your iPhone is connected to your home surveillance camera system, you can easily access the live feed and recordings using the dedicated mobile app. Simply open the app on your iPhone and log in with your account credentials.
From the app, you can view the live feed from all your cameras in real-time, check previous recordings, adjust camera settings, and receive notifications for any motion detection or security alerts.
With just a few taps on your iPhone screen, you can stay connected to your home surveillance system from anywhere, ensuring peace of mind and security at all times.
Enjoy peace of mind with remote surveillance from your iPhone
With the advancement of technology, you can now monitor your home from anywhere using your iPhone. Connecting your home surveillance camera to your iPhone allows you to keep an eye on your property even when you’re away.
Benefits of remote surveillance:
1. Stay connected to your home: Whether you’re at work, on vacation, or running errands, you can check in on your home at any time.
2. Peace of mind: Knowing that you can monitor your home remotely can provide a sense of security and peace of mind.
By following a few simple steps, you can easily connect your iPhone to your home surveillance camera and enjoy the convenience and security of remote monitoring.


