
 Carmen J. Moore

Have you ever wanted to transfer photos or videos from your iPhone camera to your MacBook Air? It can be a convenient way to backup your media files, edit them on a larger screen, or simply free up some storage space on your phone. Luckily, there are several methods you can use to connect your iPhone camera to your MacBook Air.
In this article, we will walk you through the different ways to establish a connection between your iPhone camera and MacBook Air, including wired and wireless options.
Step-by-Step Guide on Connecting iPhone Camera to MacBook Air
Connecting your iPhone camera to your MacBook Air is a convenient way to transfer photos and videos from your phone to your computer. Follow these steps to easily connect your iPhone camera to your MacBook Air:
- Use a USB cable: Grab your iPhone charging cable (USB to Lightning) and connect one end to your iPhone and the other end to a USB port on your MacBook Air.
- Unlock your iPhone: Make sure your iPhone is unlocked and trust the connected device if prompted on your iPhone screen.
- Open the Photos app: On your MacBook Air, open the Photos app or any other photo management software that can import photos from connected devices.
- Import photos: In the Photos app, you should see your iPhone listed as a device. Click on it and select the photos or videos you want to import to your MacBook Air.
- Transfer files: Click on the import button to transfer the selected files from your iPhone to your MacBook Air. Wait for the process to complete.
Following these steps, you can easily connect your iPhone camera to your MacBook Air and transfer your photos and videos with ease.

Check Compatibility of Devices
Before attempting to connect your iPhone camera to your MacBook Air, it is essential to ensure that both devices are compatible with each other. Check the compatibility requirements for both devices to make sure they can work together seamlessly.
Verify that your MacBook Air is running on a compatible operating system that supports connecting external devices like the iPhone camera. Additionally, ensure that your iPhone model is compatible with the MacBook Air and supports the necessary connectivity features.
Checking the compatibility of your devices beforehand will help avoid any technical issues and ensure a smooth connection process between your iPhone camera and MacBook Air.
Prepare Required Cables
Before you can connect your iPhone camera to your MacBook Air, you will need to gather the necessary cables. Here’s what you’ll need:
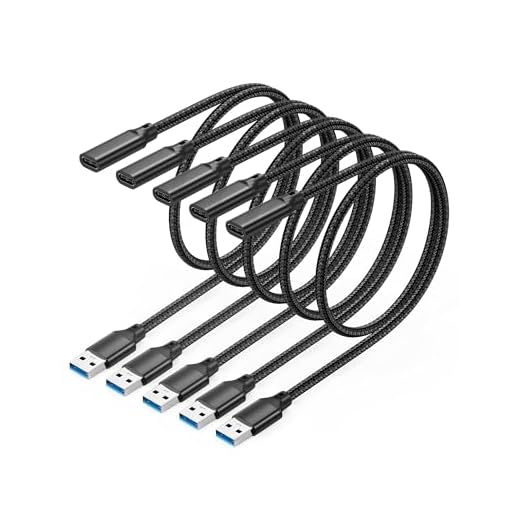
- Lightning to USB Cable: This cable is used to connect your iPhone to your MacBook Air. Make sure you have a genuine Apple Lightning to USB cable to ensure a reliable connection.
- USB-C to USB Adapter: Since the MacBook Air only has USB-C ports, you may need an adapter to connect the Lightning to USB cable to your laptop. Make sure you have a USB-C to USB adapter handy.
Once you have these cables ready, you can proceed with connecting your iPhone camera to your MacBook Air.
Unlock Your iPhone and MacBook Air
Before you can connect your iPhone camera to your MacBook Air, you need to make sure both devices are unlocked. Unlock your iPhone by entering your passcode or using Face ID/Touch ID. Similarly, unlock your MacBook Air by entering your password or using your fingerprint if available.
Connect iPhone to MacBook Air with Cable
To connect your iPhone to your MacBook Air using a cable, follow these simple steps:
- Make sure both your iPhone and MacBook Air are turned on.
- Use the Lightning-to-USB cable that came with your iPhone.
- Connect one end of the cable to the Lightning port on your iPhone.
- Connect the other end of the cable to a USB port on your MacBook Air.
- Your MacBook Air should recognize your iPhone and open the Photos app automatically.
Tip: If the Photos app doesn’t open automatically, you can manually open it to import photos from your iPhone to your MacBook Air.
Select iPhone Camera as Input Source
To connect your iPhone camera to your MacBook Air, you need to select the iPhone camera as the input source. Follow these steps:
- Connect iPhone to MacBook: Use a USB cable to connect your iPhone to your MacBook Air.
- Open QuickTime Player: Launch QuickTime Player on your MacBook Air.
- Select New Movie Recording: In QuickTime Player, go to the “File” menu and select “New Movie Recording.”
- Choose iPhone Camera: Click on the dropdown menu next to the record button in the QuickTime Player window. Select your iPhone camera from the list of available cameras.
- Adjust Settings (optional): You can adjust settings like resolution, frame rate, and audio input if needed.
- Start Recording: Click the record button in QuickTime Player to start recording using your iPhone camera as the input source on your MacBook Air.
Set Up iPhone Camera Settings
Before connecting your iPhone camera to your MacBook Air, it’s essential to ensure that your iPhone camera settings are optimized for the best results. Follow these steps to set up your iPhone camera settings:
Step 1: Open Camera App
Launch the Camera app on your iPhone to access the camera settings.
Step 2: Adjust Camera Settings
| Settings | Adjustment |
|---|---|
| Resolution | Set the resolution to the highest quality available for better image quality. |
| Exposure | Adjust exposure settings to ensure proper lighting in your photos or videos. |
| Focus | Manually adjust the focus for sharp and clear images. |
| Grid | Enable the grid option to help you compose your shots using the rule of thirds. |
By setting up your iPhone camera settings correctly, you can enhance the quality of your photos and videos when connecting it to your MacBook Air.
Start Using iPhone Camera on MacBook Air
If you want to utilize your iPhone camera on your MacBook Air, you can easily do so by following these simple steps:
- Make sure both your iPhone and MacBook Air are connected to the same Wi-Fi network.
- On your MacBook Air, open the “Photo Booth” application.
- On your iPhone, swipe up from the bottom of the screen to access the Control Center.
- Tap on “AirPlay Mirroring” or “Screen Mirroring” and select your MacBook Air from the list of available devices.
- Your iPhone screen will now be mirrored on your MacBook Air.
- Open the camera app on your iPhone and start taking photos or recording videos directly from your MacBook Air.
By following these steps, you can easily connect and use your iPhone camera on your MacBook Air for a convenient and seamless experience.




Can I use my iPhone with a MacBook Air that has USB-C ports?
Yes, you'll need a Lightning to USB cable along with a USB-C to USB adapter to connect your iPhone to a MacBook Air.
I recently transferred photos from my iPhone to my MacBook Air. It was super easy with the Photos app! Just plugged in my iPhone and it recognized it right away. Saved me a lot of hassle!
I found the wireless method to be more convenient than using a cable. After connecting both devices to the same Wi-Fi, I was able to transfer files without any hassle. I think the article should highlight wireless options more since they can be easier for many users.
That's a valid point! While wired connections are often reliable for large transfers, wireless methods like AirDrop can definitely be more convenient for quick file sharing.