
 Carmen J. Moore
GoPro cameras are known for their stunning video quality and durability, making them a popular choice for capturing action-packed moments. However, one area where GoPro cameras can fall short is in the audio department. The built-in microphone may not always capture clear and high-quality sound, especially in noisy or windy environments.
Fortunately, there are several ways to enhance the audio quality of your GoPro footage. From external microphones to audio adapters, you can improve the sound of your recordings and take your GoPro videos to the next level. In this article, we will explore various options for adding better audio to your GoPro camera.
Enhance Your GoPro Camera Audio
GoPro cameras are known for their stunning video quality, but sometimes the audio can be lacking. Luckily, there are several ways to enhance the audio on your GoPro camera to take your videos to the next level.
- Use an external microphone: One of the best ways to improve the audio quality of your GoPro camera is to use an external microphone. There are many different options available, from shotgun mics to lavalier mics, so you can choose the one that best suits your needs.
- Windscreen: If you’re filming outdoors, wind can often ruin your audio quality. Invest in a windscreen or a foam cover for your microphone to reduce wind noise and capture clearer audio.
- Adjust settings: GoPro cameras have settings that allow you to adjust the audio levels and quality. Experiment with these settings to find the best configuration for your needs.
- Edit in post-production: If you still aren’t satisfied with the audio quality after filming, you can use editing software to enhance the audio. You can adjust levels, remove background noise, and add effects to improve the overall sound.
Choose the Right Microphone
When it comes to improving the audio quality of your GoPro videos, choosing the right microphone is crucial. The built-in microphones on GoPro cameras are often not sufficient for capturing high-quality audio, especially in noisy or windy environments. Here are some factors to consider when selecting a microphone for your GoPro:


1. Directionality
Consider the directionality of the microphone. A unidirectional microphone, such as a shotgun microphone, is ideal for capturing sound from a specific direction, while an omnidirectional microphone captures sound from all directions. Depending on your recording needs, choose the microphone with the appropriate directionality.
2. Compatibility
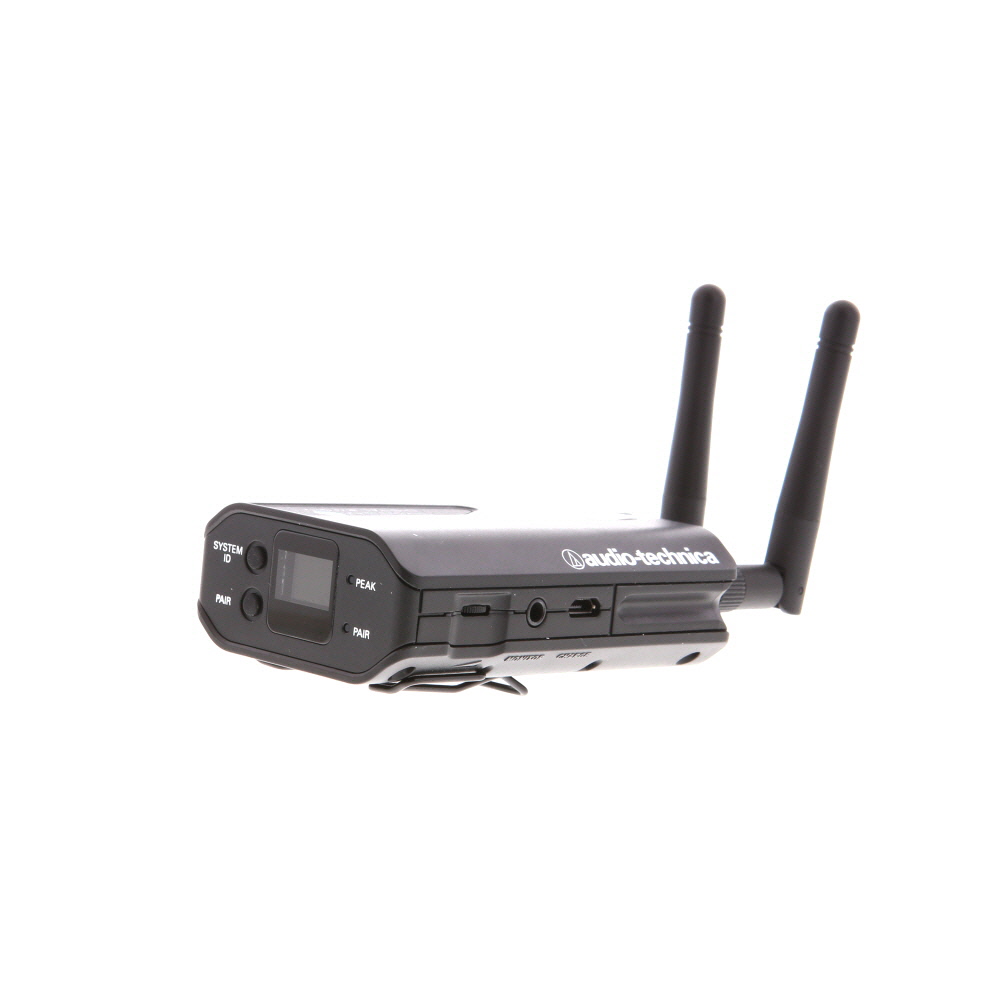
Make sure the microphone you choose is compatible with your GoPro camera. Some microphones require an adapter or an external recorder to connect to the GoPro. Check the specifications of the microphone and your camera to ensure they are compatible.
| Microphone Type | Pros | Cons |
|---|---|---|
| Shotgun Microphone | Excellent directionality, ideal for capturing focused sound | May pick up handling noise or wind noise |
| Lavalier Microphone | Hands-free operation, discreet placement | May require additional accessories for connection |
| USB Microphone | Easy to connect and use | May not be compatible with GoPro cameras without an adapter |
External Microphone Compatibility
If you want to improve the audio quality of your GoPro videos, using an external microphone is a great option. However, not all GoPro models are compatible with external microphones out of the box. It’s important to check the compatibility of your GoPro model before purchasing a microphone.
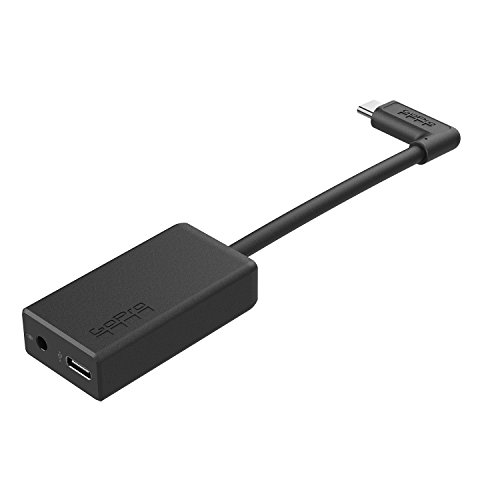
Most newer GoPro models, such as the HERO7, HERO8, and HERO9, have a USB-C port that can be used to connect external microphones. You will need an adapter or a special microphone that is compatible with the USB-C port to use an external microphone with these models.
If you have an older GoPro model without a USB-C port, you may need to use a special adapter or an external recorder to capture high-quality audio separately and sync it with your video in post-production.
Before purchasing an external microphone for your GoPro, make sure to do your research and check the compatibility with your specific GoPro model to ensure that you can achieve the best audio quality for your videos.
Use a Windscreen for Outdoor Recording
When recording outdoors with your GoPro camera, wind noise can be a major issue that affects the audio quality of your footage. To minimize wind noise and improve the audio quality, consider using a windscreen. A windscreen is a foam cover that fits over the microphone on your GoPro camera, helping to reduce the impact of wind on the audio recording.
Wind noise can be particularly problematic when recording in windy conditions or at high speeds, such as when engaging in action sports or capturing footage while moving quickly. By using a windscreen, you can significantly reduce the amount of wind noise that makes its way into your audio recordings, resulting in clearer, more professional-sounding audio.
Wind screens are available for purchase from various manufacturers and are typically designed to fit specific GoPro camera models. They are easy to attach and remove, making them a convenient accessory to have on hand for outdoor recording sessions. Invest in a quality windscreen to ensure that your audio recordings are free from unwanted wind noise and interference.
Adjust Audio Settings on Your GoPro
Getting the perfect audio quality on your GoPro footage is essential for creating professional-looking videos. Here are some tips on how to adjust the audio settings on your GoPro:
1. Access the Settings Menu
Turn on your GoPro and navigate to the settings menu. Look for the “Audio” or “Sound” option to access the audio settings.
2. Adjust the Microphone Sensitivity
Depending on your shooting environment, you may need to adjust the microphone sensitivity. Lower the sensitivity for loud environments and increase it for quieter settings.
- For loud environments: decrease the microphone sensitivity to prevent distortion.
- For quiet settings: increase the microphone sensitivity to capture clear audio.
Experiment with different sensitivity levels to find the best option for your recording.
By adjusting the audio settings on your GoPro, you can enhance the sound quality of your videos and create a more immersive viewing experience for your audience.
Position the Microphone Properly
One of the key factors in improving the audio quality of your GoPro footage is positioning the microphone correctly. The built-in microphone on GoPro cameras is usually located on the top or front of the camera, so make sure it is not obstructed by any objects or your hands while recording.
For better audio capture, consider using an external microphone that can be attached to your GoPro. Position the external microphone close to the sound source, such as your mouth or the subject you are filming, to ensure clear and crisp audio recording.
Test Audio Levels Before Recording
Before you start recording, it’s important to test the audio levels to ensure you capture clear and high-quality sound. Here’s how you can do it:
| 1. Check the microphone settings: | Make sure the microphone is properly connected to your GoPro camera and check the settings to ensure it’s set up correctly. |
| 2. Test the audio input: | Record a short test clip in the environment where you’ll be filming to check the audio input levels. Play back the clip to listen for any distortions or background noise. |
| 3. Adjust the levels: | If the audio levels are too low or too high, adjust the settings on your GoPro camera or use an external microphone to improve the sound quality. |
| 4. Repeat the test: | After making adjustments, test the audio levels again to ensure you have the best sound quality before starting your recording. |
By testing the audio levels before recording, you can avoid common audio issues and ensure your videos have clear and professional sound.
Consider Using a Portable Recorder
If you want to significantly improve the audio quality of your GoPro videos, consider using a portable recorder. Portable recorders are small, lightweight devices that can capture high-quality audio separately from your camera. This allows you to place the recorder closer to the sound source and avoid capturing unwanted background noise.
One popular option is the Zoom H1n, which offers excellent audio quality in a compact package. Simply connect the recorder to your GoPro using a microphone adapter cable, and you’ll be able to record crystal-clear audio to accompany your stunning video footage.
Edit and Enhance Audio in Post-Production
Once you have captured your footage with your GoPro camera, you can edit and enhance the audio in post-production to improve the overall quality of your video.
1. Import Your Footage
Start by importing your footage into a video editing software like Adobe Premiere Pro or Final Cut Pro. Once your footage is imported, you can begin editing the video and audio tracks separately.
2. Enhance the Audio
You can enhance the audio in several ways, such as adjusting the levels, removing background noise, adding effects, and syncing audio from an external recorder. Use tools like equalizers, compressors, and noise reduction plugins to improve the overall sound quality.
- Adjust levels to ensure that the audio is not too loud or too quiet.
- Use noise reduction tools to eliminate background noise and improve clarity.
- Add effects like reverb or EQ to enhance the audio and make it more dynamic.
- If you have recorded audio separately, sync it with the video footage to ensure perfect timing.
By editing and enhancing the audio in post-production, you can create professional-quality videos with clear and crisp sound to complement your stunning visuals captured with your GoPro camera.
Share Your High-Quality Audio Content
Now that you have enhanced the audio quality of your GoPro videos, it’s time to share your content with the world. Here are some tips on how to share your high-quality audio content:
- Upload your videos to social media platforms like YouTube, Instagram, or Facebook to reach a wider audience.
- Create a podcast using your GoPro footage and high-quality audio to engage listeners in a different format.
- Collaborate with other content creators and share your audio-enhanced videos on their channels to expand your reach.
- Submit your videos to online communities and forums related to your content niche to connect with like-minded individuals.
By sharing your high-quality audio content, you can showcase your creativity and skills while building a strong online presence.




Adjusting audio settings beforehand is key! I learned that the hard way after some recordings turned out poorly without testing first.
How does using a portable recorder compare to using an external mic directly with the GoPro? Is one generally better than the other?
Using a portable recorder often provides higher audio quality and flexibility, as you can capture sound away from the camera's noise. However, it does require syncing in post-production.
I don't think an external mic is always necessary. I’ve been using my GoPro's built-in mic for years, and it gets the job done for casual vlogs. Seems like overkill for some simple shoots.
I recently added a windscreen to my GoPro setup and it made a huge difference! No more annoying wind noise during my outdoor shoots.
Thanks for sharing! Windscreens can really enhance outdoor audio quality.
Don't forget to adjust the sensitivity settings on your GoPro! I found a huge difference in my recordings after tweaking that.
I'm really curious about using an external microphone with my GoPro. Are there specific brands that are known to work best?
There are several well-reviewed brands like Rode and Zoom that produce great external microphones compatible with GoPros. It's always good to check recent reviews for the specific model you have!
What types of external microphones are best for voice recording with a GoPro? I'm looking to capture interviews and some dialogue.
Can anyone explain how to check if my specific GoPro model is compatible with external microphones? I have an older model, and I'm not sure what to look for.
Can someone explain what kind of adapter I need for older GoPro models to connect an external mic? I'm a bit lost on that part.
For older models, you'll typically need a 3.5mm mic adapter to connect external microphones. Make sure to check your specific model for compatibility!
I don't think using an external mic is always necessary. The built-in mic works well enough for casual videos, especially if you're not filming in windy conditions. Sometimes people overthink it.
I get what you're saying, but I've noticed a big difference in sound quality when using an external mic, especially when capturing action sports.
I recently tried using a shotgun mic for my GoPro, and it made a noticeable difference in audio quality, especially when filming in busy environments. However, I did have some issues with wind noise, even with a windscreen. I guess it really depends on how windy it is. Has anyone else faced similar challenges?
I've had the same problem with wind noise. Even with a windscreen, it can be tricky. What helped me was positioning the microphone differently and testing it a few times.