


Filters are essential accessories for any photographer looking to enhance their images and take their photography to the next level. Whether you’re a beginner or a seasoned pro, understanding how to use filters on your DSLR camera can greatly improve the quality of your photos and open up new creative possibilities.
From polarizing filters that reduce glare and enhance colors to neutral density filters that allow for long exposure shots, there are a variety of filters available to help you achieve the desired effect in your photos. Learning how to choose the right filter for the situation and how to properly attach and use it on your camera is key to getting the most out of your photography equipment.
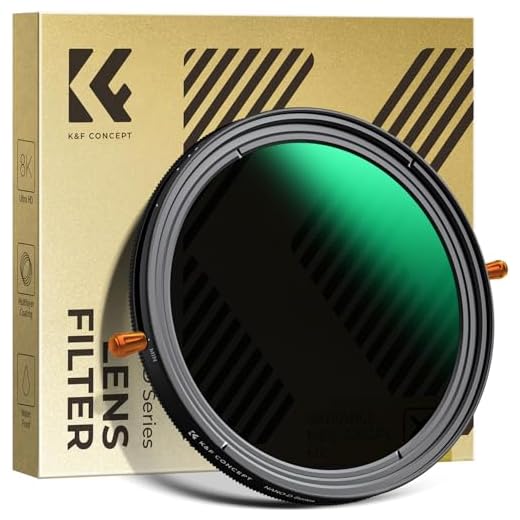
Understanding the different types of filters
Filters are essential accessories for DSLR cameras that can enhance your photography by controlling light, reducing glare, and adding creative effects. There are several types of filters available on the market, each serving a different purpose:
1. UV Filter: Used primarily for protecting the camera lens from dust, moisture, and scratches. It also reduces the bluish cast that can occur in daylight photography.
2. Polarizing Filter: Helps reduce reflections and glare from surfaces like water or glass, resulting in richer colors and improved contrast in your images.

3. Neutral Density Filter: Allows you to reduce the amount of light entering the camera without affecting the color balance, ideal for long exposure photography or shooting in bright sunlight.
4. Graduated Neutral Density Filter: Useful for balancing the exposure in scenes with a significant difference in brightness between the sky and the foreground, such as sunsets or landscapes.
5. Color Filter: Adds a tint or color effect to your photos, enhancing specific tones or creating a mood in your images.
Understanding the different types of filters and their unique functions will help you choose the right filter for your photography needs and achieve the desired results in your photos.
Choosing the right filter for your photography needs
Filters are essential accessories for DSLR cameras, as they can enhance your photographs and help you achieve the desired effects. When selecting a filter for your camera, it’s important to consider your photography needs and the type of shots you want to capture.
1. UV Filter: A UV filter is primarily used to protect the camera lens from scratches, dust, and moisture. It also reduces haze and improves the overall image quality.
2. Polarizing Filter: A polarizing filter is ideal for reducing reflections and glare, especially when shooting landscapes or water scenes. It also enhances color saturation and contrast in your photos.
3. Neutral Density Filter: A neutral density filter is perfect for controlling the amount of light entering the lens, allowing you to use slower shutter speeds or wider apertures in bright conditions.
4. Graduated Neutral Density Filter: A graduated neutral density filter is useful for balancing the exposure between the sky and the foreground in landscape photography, creating well-exposed images with detail in both areas.
5. Creative Filters: There are various creative filters available, such as color filters, star filters, and soft-focus filters, which can add artistic effects to your photos and enhance your creativity.
Consider your photography style and preferences when choosing a filter for your DSLR camera, and experiment with different filters to find the ones that best suit your needs and enhance your images.
Step-by-step guide to attaching a filter to your lens
Attaching a filter to your DSLR camera lens can significantly enhance your photography by allowing you to control light, reduce glare, and add various effects to your images. Follow these simple steps to properly attach a filter to your lens:
- 1. Select the appropriate filter for your desired effect, such as a UV filter for protection, polarizing filter for reducing glare, or ND filter for long exposures.
- 2. Hold the filter with the threads facing the lens and align it with the front of the lens.
- 3. Gently screw the filter onto the lens in a clockwise direction until it is securely attached.
- 4. Avoid overtightening the filter to prevent damage to the lens or filter threads.
- 5. Once the filter is attached, you can adjust its position by rotating it to achieve the desired effect.
- 6. When you no longer need the filter, simply unscrew it from the lens in a counterclockwise direction and store it in a protective case.
By following these steps, you can easily attach a filter to your DSLR camera lens and start experimenting with different effects to enhance your photography.
Tips for using filters to enhance your photos
Filters can be a powerful tool to enhance your photos and take your photography to the next level. Here are some tips on how to use filters effectively:
1. Understand the purpose of each filter
Before using a filter, it’s important to understand its purpose and how it will affect your photos. Different filters can help enhance colors, reduce reflections, or create special effects like long exposure or starbursts.
2. Experiment with different filters
Don’t be afraid to experiment with different filters to see how they can enhance your photos. Try using a polarizing filter to reduce glare and reflections, a neutral density filter for long exposure shots, or a graduated filter to balance exposure in landscape photography.
Remember, practice makes perfect, so don’t be afraid to try out different filters and see how they can enhance your photography.
Common mistakes to avoid when using filters
Using filters on your DSLR camera can greatly enhance your photography, but there are some common mistakes that beginners often make. Here are some key things to avoid:
1. Using low-quality filters
Investing in high-quality filters is crucial for achieving excellent results in your photography. Low-quality filters can degrade image quality, introduce color casts, and reduce sharpness. Always opt for reputable brands to ensure optimal performance.
2. Using the wrong filter for the situation
It’s essential to choose the right filter for the specific shooting conditions. Using a polarizing filter when shooting in low light, for example, may not yield the desired effect. Take the time to understand the purpose of each filter and use them accordingly.
- 3. Overusing filters
- 4. Forgetting to clean filters before use
- 5. Not adjusting filter settings for different lighting conditions
Exploring creative effects with filters on your DSLR camera
Filters are a powerful tool for enhancing your photography and adding creative effects to your images. With a DSLR camera, you have the ability to experiment with a wide variety of filters to achieve different looks and styles. Here are some tips for exploring creative effects with filters on your DSLR camera:
1. ND Filters
Neutral density (ND) filters are great for long exposure photography, allowing you to capture motion blur in your images. Experiment with different shutter speeds and apertures to create stunning effects such as silky smooth waterfalls or streaking car lights.
2. Polarizing Filters
Polarizing filters are ideal for reducing glare and reflections, especially when shooting landscapes or water scenes. By rotating the filter, you can adjust the level of polarization to enhance colors and contrast in your images.
Advanced techniques for using filters in professional photography
Filters are essential tools for photographers looking to enhance their images and add creative effects to their shots. Here are some advanced techniques for using filters in professional photography:
- Experiment with different filter types: Try out a variety of filters such as polarizing filters, ND filters, and color filters to see how they can enhance your photos.
- Understand filter effects: Learn how each filter affects your images, such as reducing glare with a polarizing filter or creating long exposure effects with an ND filter.
- Stack filters for creative effects: Combine multiple filters to achieve unique and creative effects in your photos.
- Use graduated filters for landscape photography: Graduated filters help balance exposure in landscape shots by darkening the sky or bright areas while keeping the rest of the image properly exposed.
- Experiment with filter placement: Move the filter around on your lens to see how it affects the composition and lighting of your image.
- Practice with manual focusing: Some filters may require manual focusing, so practice using manual focus to ensure sharp images when using filters.
FAQ
What is a filter on a DSLR camera?
A filter on a DSLR camera is an accessory that is attached to the front of the lens to modify or enhance the image quality in various ways. Filters can be used for different purposes such as reducing glare, enhancing colors, or protecting the lens.
Why would I need to use a filter on my DSLR camera?
Using a filter on your DSLR camera can help improve the quality of your photos by reducing unwanted reflections, enhancing colors, or protecting the lens from scratches and dust. Filters can also help you achieve creative effects like long exposure shots or black and white conversions.
How do I attach a filter to my DSLR camera?
To attach a filter to your DSLR camera, first, determine the size of your lens thread diameter. Then, choose a filter that matches the size of your lens. Simply screw the filter onto the front of your lens in a clockwise direction until it is securely attached. Make sure to align the filter properly to avoid any vignetting or image distortion.

What are some common types of filters used on DSLR cameras?
Some common types of filters used on DSLR cameras include UV filters for lens protection, polarizing filters for reducing reflections and enhancing colors, ND (neutral density) filters for controlling exposure in bright conditions, and color filters for creative effects. Each type of filter serves a different purpose and can help you achieve specific results in your photography.


