
 Carmen J. Moore
Transferring photos from your Nikon DSLR camera to your computer is a simple process that allows you to easily access and manage your images. Whether you’re a professional photographer or a hobbyist, knowing how to transfer your photos efficiently can save you time and ensure that your images are safely stored.
In this article, we’ll walk you through the steps to transfer your Nikon DSLR camera photos to your computer using both wired and wireless methods. By following these instructions, you’ll be able to quickly and easily transfer your photos and videos to your computer for editing, sharing, and backup.


Step-by-step guide to transferring Nikon DSLR camera photos to computer
Transferring photos from your Nikon DSLR camera to your computer is a simple process that allows you to easily access and organize your images. Follow these steps to transfer your photos:
Step 1: Connect your camera to the computer
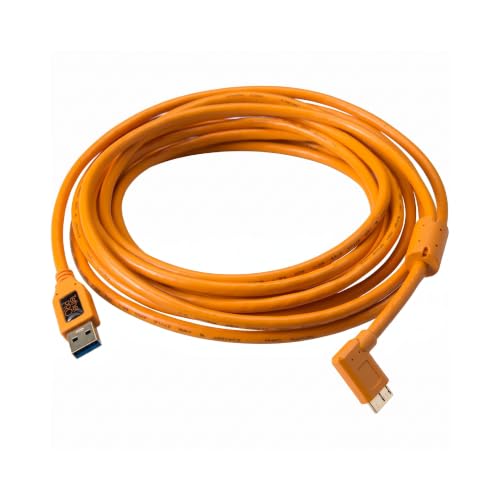
Use the USB cable that came with your Nikon DSLR camera to connect it to your computer. Make sure both devices are turned on.
Step 2: Access the camera’s storage
Once connected, your computer should recognize the camera as a storage device. Open the file explorer on your computer and locate the camera’s storage folder.
| Windows | Mac |
|---|---|
| Go to “My Computer” or “This PC” and find your camera under the devices section. | Look for the camera under the “Devices” section in Finder. |
Once you locate the camera’s storage folder, you can access the photos stored on the memory card.
Connect your Nikon DSLR camera to the computer
To transfer photos from your Nikon DSLR camera to your computer, you will need to connect the two devices using a USB cable. Follow these steps to establish the connection:
- Turn off your camera and computer before connecting them.
- Locate the USB port on your Nikon DSLR camera. It is usually located on the side or back of the camera.
- Connect one end of the USB cable to the USB port on your camera.
- Locate the USB port on your computer. It is typically found on the side or back of the computer.
- Connect the other end of the USB cable to the USB port on your computer.
- Turn on your camera.
- Your computer should detect the connected camera and prompt you to access the files on the camera.
Once the connection is established, you can navigate through the camera’s folders and copy the photos to your computer for storage or editing.
Choose the transfer method: USB cable or memory card reader
When transferring photos from your Nikon DSLR camera to your computer, you have two main options: using a USB cable or a memory card reader. Each method has its own advantages and disadvantages, so you can choose the one that best fits your needs.
USB cable
Using a USB cable is a common and convenient way to transfer photos from your camera to your computer. Simply connect one end of the USB cable to your camera and the other end to your computer’s USB port. Once connected, you can easily access your camera’s storage and transfer photos directly to your computer. This method is quick, easy, and doesn’t require any additional hardware.
Memory card reader
Alternatively, you can use a memory card reader to transfer photos from your camera’s memory card to your computer. Simply remove the memory card from your camera and insert it into the card reader, then connect the card reader to your computer’s USB port. This method may be slightly more time-consuming than using a USB cable, but it can be more convenient if you frequently transfer photos from multiple cameras or devices.
Access the camera’s memory card on your computer
Before transferring photos from your Nikon DSLR camera to your computer, you need to access the camera’s memory card. Here’s how to do it:
- Turn off your camera: Make sure your camera is turned off before removing the memory card.
- Locate the memory card slot: Depending on your camera model, the memory card slot may be located on the side or bottom of the camera.
- Remove the memory card: Carefully remove the memory card from the camera by gently pushing it in and releasing it. Avoid touching the gold contacts on the card.
- Insert the memory card into your computer: Use a memory card reader or adapter to insert the memory card into a USB port on your computer.
- Access the memory card: Once the memory card is inserted, your computer should recognize it as a removable storage device. You can now access the photos stored on the memory card and transfer them to your computer.
Select and copy the photos you want to transfer
Once your Nikon DSLR camera is connected to your computer, open the folder that contains the photos on your camera.
You can then select the photos you want to transfer by clicking on them while holding down the Ctrl key (for Windows) or the Command key (for Mac).
After selecting the photos, right-click on one of the selected photos and choose the “Copy” option.
You can also use the keyboard shortcut Ctrl+C (for Windows) or Command+C (for Mac) to copy the selected photos.
Create a new folder on your computer to store the photos
Before transferring photos from your Nikon DSLR camera to your computer, it’s a good idea to create a new folder on your computer where you can store all the photos. This will help you keep your photos organized and easily accessible.
Paste the copied photos into the new folder
Once you have copied the photos from your Nikon DSLR camera to your computer, it’s time to organize them. Create a new folder on your computer where you want to store these photos. Right-click in the folder and select “Paste” to transfer the copied photos into the new folder.
Safely eject the camera or memory card from the computer
After transferring your Nikon DSLR camera photos to your computer, it is important to safely eject the camera or memory card to avoid any data corruption or loss. Follow these steps to safely remove your camera or memory card:
- Windows: Right-click on the camera or memory card icon in the system tray and select “Eject” or “Safely Remove Hardware.”
- Mac: Drag the camera or memory card icon to the Trash or use the “Eject” button next to the device in Finder.
Once you have safely ejected the camera or memory card, you can disconnect it from your computer without any risk of data loss. This simple step helps ensure the integrity of your photos and prevents any potential damage to the storage device.
Verify that the photos have been successfully transferred
Once the transfer process is complete, it is important to verify that the photos have been successfully transferred to your computer.
You can do this by navigating to the folder on your computer where the photos were transferred to and checking if all the files are present. You can also open a few random photos to ensure they open correctly and are not corrupted.
Organize and edit the photos on your computer as needed
Once you have transferred your Nikon DSLR camera photos to your computer, it’s time to organize and edit them as needed. Here are a few steps to help you manage your photos effectively:
- Organize your photos into folders based on date, event, or any other criteria that make sense to you. This will make it easier to find specific photos later on.
- Use photo editing software to enhance your images. You can adjust brightness, contrast, color balance, and other settings to make your photos look their best.
- Delete any unwanted or duplicate photos to free up space on your computer and keep your photo collection clutter-free.
By organizing and editing your Nikon DSLR camera photos on your computer, you can create a well-managed and visually appealing collection of images that you can easily access and share with others.
FAQ
How can I transfer photos from my Nikon DSLR camera to my computer?
You can transfer photos from your Nikon DSLR camera to your computer by connecting the camera to the computer using a USB cable. Once connected, your computer should recognize the camera as a storage device, allowing you to access and transfer your photos to your computer.
Is there a way to transfer photos wirelessly from my Nikon DSLR camera to my computer?
Yes, you can transfer photos wirelessly from your Nikon DSLR camera to your computer by using a wireless adapter or a Wi-Fi enabled SD card. These accessories allow you to connect your camera to your computer over a wireless network, making it easy to transfer photos without the need for a physical connection.




I've been using a memory card reader for a while, and I find it much faster than the USB method. I can transfer photos from multiple cameras without having to connect each one. Just make sure to safely eject the card after transferring. It's saved me a lot of time when working with different devices.
What if I don’t have the USB cable that came with my camera? Can I use any other cable?
I love using the USB method! It's super straightforward and I haven't had any issues.
Can you clarify how to safely eject the camera on a Mac? I always worry about losing files.
To safely eject your camera on a Mac, simply drag the camera icon to the Trash, which will turn into an Eject icon, or click the Eject button next to the device in Finder. This will ensure no files are corrupted during disconnection.
Is there a way to transfer photos wirelessly? I often travel and prefer not to carry extra cables.
Yes, many Nikon DSLR cameras come with built-in Wi-Fi or Bluetooth, which allows you to transfer photos wirelessly to your computer or compatible mobile devices. Check your camera's manual for specific instructions on setting up the wireless transfer feature.
I think the USB method is really the only way to go. Memory card readers can be a hassle, especially if you lose the card. The direct connection feels safer to me.