
 Carmen J. Moore

High Dynamic Range (HDR) photography is a popular technique used to capture a greater range of luminosity levels in a scene, resulting in vibrant and detailed images. To achieve stunning HDR photos, it is essential to properly set up your DSLR camera to capture multiple exposures. In this tutorial, we will guide you through the process of configuring your camera for HDR shooting.
Before you start shooting HDR images, ensure that your DSLR camera is set to manual mode to have full control over the exposure settings. This will allow you to adjust the aperture, shutter speed, and ISO independently to capture the desired range of light in your scene. Additionally, make sure your camera is mounted on a sturdy tripod to prevent any movement between exposures.
To capture multiple exposures for HDR, you will need to set your camera to Auto Exposure Bracketing (AEB) mode. This feature allows you to take a series of shots at different exposure levels, typically ranging from -2 to +2 stops. Adjust the AEB settings on your camera to determine the number of shots and the exposure increments based on the scene’s dynamic range.


Understanding HDR Photography
High Dynamic Range (HDR) photography is a technique used to capture a wider range of light and dark in a single image. By combining multiple exposures of the same scene, photographers can create stunning images with enhanced details and colors.
When shooting HDR images, it is essential to understand the dynamic range of your camera and how to adjust the settings to capture the full range of light. HDR photography is especially useful in high-contrast scenes where the camera may struggle to capture details in both the highlights and shadows.
How HDR Works
To create an HDR image, photographers typically take three or more exposures of the same scene at different exposure levels – underexposed, properly exposed, and overexposed. These images are then merged using specialized software to create a single image with a wider dynamic range.
Benefits of HDR Photography
HDR photography allows photographers to capture scenes with high contrast and vibrant colors that may be challenging to reproduce with a single exposure. By blending multiple exposures, photographers can create images that closely resemble what the human eye sees in real life.
| Key Points: |
|---|
| • HDR photography combines multiple exposures to capture a wider dynamic range |
| • Understanding how HDR works is crucial for creating stunning images |
| • HDR photography is ideal for high-contrast scenes with extreme lighting conditions |
Choosing the Right DSLR Camera
When selecting a DSLR camera for HDR shooting, there are several key factors to consider:
- Resolution: Look for a camera with high resolution to capture fine details in your HDR images.
- Dynamic Range: Choose a camera with a wide dynamic range to capture the full range of tones in high-contrast scenes.
- ISO Performance: Consider the camera’s ISO performance for shooting in low light conditions without introducing noise.
- Bracketing Options: Ensure the camera offers bracketing options to easily capture multiple exposures for HDR merging.
- Manual Controls: Look for a camera with manual controls to adjust settings like aperture, shutter speed, and ISO for precise HDR shooting.
Setting up Your Camera for HDR Shooting
High Dynamic Range (HDR) photography requires specific settings on your DSLR camera to capture a wider range of light and details in your photos. Follow these steps to set up your camera for HDR shooting:
1. Set your camera to Aperture Priority mode
Aperture Priority mode allows you to control the aperture while the camera sets the appropriate shutter speed. This mode is ideal for HDR photography as it ensures consistent depth of field across multiple exposures.
2. Use a tripod
For HDR shooting, it’s crucial to keep your camera steady between exposures to avoid blurry images. Use a sturdy tripod to maintain stability and ensure sharp images.
Follow these steps to get your camera ready for HDR shooting and capture stunning high dynamic range photos.
Adjusting Exposure Settings
When shooting HDR photos, it’s important to adjust your exposure settings to capture a wider range of light in a single shot. Here are some tips for setting up your DSLR camera for HDR shooting:
- Set your camera to Manual mode to have full control over the exposure settings.
- Adjust the aperture to a mid-range value (around f/8 to f/11) for sharpness and depth of field.
- Set the ISO to its lowest value to reduce noise in the image.
- Use a tripod to keep the camera steady during longer exposures.
- Bracket your shots by taking multiple photos at different exposure levels to capture the full dynamic range.
By adjusting your exposure settings correctly, you can ensure that your HDR photos have a balanced exposure and capture all the details in both the highlights and shadows.
Using Tripod and Remote Shutter
When shooting HDR images, stability is key to ensure your photos are sharp and aligned perfectly. Using a tripod is essential to keep your camera steady throughout the bracketed shots. Make sure your tripod is sturdy and set up on a level surface to avoid any unwanted movements.
Remote Shutter
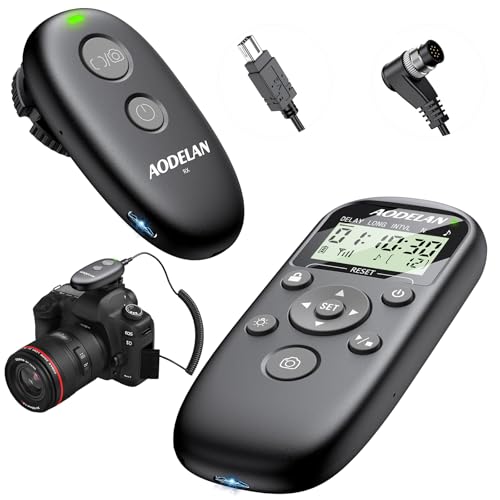
Using a remote shutter release or the self-timer function on your camera is recommended to avoid any camera shake when pressing the shutter button. This will help maintain the stability of your setup and ensure sharp images for your HDR photography.
| Tip: | Invest in a high-quality tripod and remote shutter for the best results in HDR shooting. |
Post-processing HDR Images
After capturing your bracketed shots and merging them into an HDR image, the next step is post-processing to enhance the final result. Here are some tips for post-processing HDR images:
1. Adjust Tone Mapping
Use tone mapping to bring out the details in the shadows and highlights of your HDR image. Experiment with different settings to achieve the desired look, but be careful not to overdo it and end up with an unnatural-looking result.
2. Fine-tune Colors and Contrast
Pay attention to the colors and contrast in your HDR image. Use tools like saturation, vibrance, and contrast adjustments to make the colors pop and the image more visually appealing. Be mindful of achieving a balance between enhancing the image and maintaining a natural look.
FAQ
What is HDR shooting and why is it important?
HDR (High Dynamic Range) shooting is a technique used in photography to capture a wide range of light and dark areas in a scene. It combines multiple exposures of the same image to create a final photo with enhanced details and colors. HDR is important because it allows you to capture scenes with high contrast lighting that a single exposure might not be able to handle effectively.
Can you provide step-by-step instructions on how to set up a DSLR camera for HDR shooting?
Sure! To set up your DSLR camera for HDR shooting, you first need to switch to manual mode and set your camera on a tripod to ensure stability. Adjust the exposure bracketing settings to take multiple shots at different exposures. Make sure to use a remote trigger or timer to avoid camera shake. Lastly, use software like Lightroom or Photoshop to merge the images and create the final HDR photo.




This tutorial was really helpful! Just to clarify, can you explain a bit more about how to adjust the AEB settings? I’m not sure how to determine the number of shots and increments to use for different scenes.
What settings do you recommend for shooting HDR at sunset?
I've tried HDR photography and found that using a remote shutter really helps with camera shake. I usually shoot in Aperture Priority mode, and it gives me great results!