
 Carmen J. Moore

Creating a beautiful blurry background, also known as bokeh, can add a professional and artistic touch to your photos. One of the best ways to achieve this effect is by using a DSLR camera. With the right settings and techniques, you can capture stunning images with a dreamy background that makes your subject stand out.
First and foremost, you need to choose the right lens for creating a blurry background. A lens with a wide aperture, such as f/1.8 or f/2.8, will allow more light to enter the camera and create a shallow depth of field, resulting in a blurred background. Prime lenses are often preferred for this purpose due to their wider apertures.
Once you have the right lens, set your DSLR camera to aperture priority mode (usually denoted as “A” or “Av” on the mode dial). This mode allows you to control the aperture while the camera adjusts the shutter speed accordingly. Select the widest aperture available on your lens to achieve the desired blur effect.
Step-by-Step Guide to Blurring Background on DSLR Camera
1. Choose a Wide Aperture: Set your DSLR camera to a wide aperture, such as f/2.8 or lower, to create a shallow depth of field.
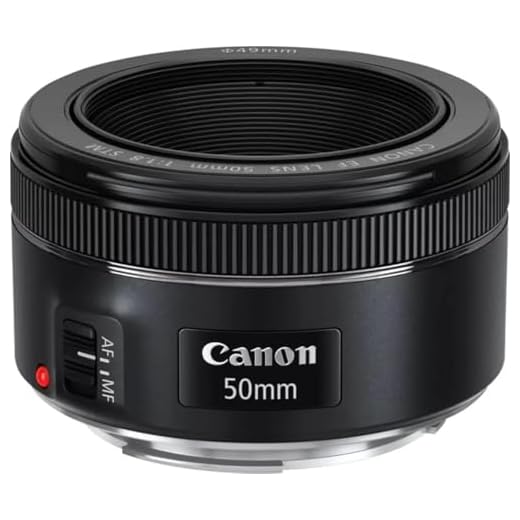


2. Select the Right Lens: Use a lens with a low f-stop number, like a prime lens, for better background blur.
3. Position Your Subject: Place your subject away from the background to create separation and enhance the blur effect.
4. Adjust the Distance: Increase the distance between your subject and the background to increase the blur intensity.
5. Focus on the Subject: Ensure your subject is in sharp focus while the background remains blurred.
6. Use Manual Mode: Switch to manual mode to have more control over aperture, shutter speed, and ISO settings.
7. Experiment with Different Settings: Play around with different combinations of settings to achieve the desired background blur effect.
8. Practice and Patience: Practice regularly and be patient to master the art of creating beautiful blurry backgrounds with your DSLR camera.
Understanding Aperture and Depth of Field
Aperture is the opening in a lens through which light passes to enter the camera. It is measured in f-stops, with smaller f-stop numbers indicating larger apertures and more light entering the camera. A larger aperture (smaller f-stop number) will result in a shallower depth of field, where only a small portion of the image is in focus while the background is blurred.
Depth of field refers to the range of distance in a photo that appears sharp and in focus. A shallow depth of field is desirable for portraits and close-up shots, as it helps to isolate the subject from the background by creating a soft, blurry background. To achieve this effect, you can set a wide aperture (small f-stop number) on your DSLR camera.
Selecting the Right Lens for Background Blur
When aiming for a blurry background effect in your photos, choosing the right lens is crucial. Here are some factors to consider:
1. Aperture Size
Wide aperture lenses (with smaller f-stop numbers like f/1.4 or f/2.8) are ideal for achieving a shallow depth of field and creating a beautiful bokeh effect in the background.
2. Focal Length
Telephoto lenses with longer focal lengths tend to produce a more pronounced background blur compared to standard or wide-angle lenses. Consider using a lens with a focal length of 50mm or higher for optimal results.
Adjusting Aperture for Desired Blur Effect
One of the key factors in creating a blurry background on a DSLR camera is adjusting the aperture settings. The aperture controls the amount of light that enters the camera and also affects the depth of field in your photos.
For a more pronounced blur effect, you’ll want to use a wider aperture (lower f-stop number). This allows more light to enter the camera, resulting in a shallower depth of field and a blurrier background. Experiment with different aperture settings to achieve the desired level of blur in your photos.
Setting up Manual Focus for Sharp Subjects
1. Switch your camera to manual focus mode.
2. Use the focus ring on your lens to adjust the focus until your subject appears sharp in the viewfinder.
3. If your camera has focus peaking feature, enable it to help you identify the sharpest areas in the frame.
4. Fine-tune the focus by zooming in on your subject on the camera’s LCD screen and adjusting the focus ring accordingly.
5. Take test shots and review them to ensure the focus is sharp on your subject.
6. Experiment with different apertures to achieve the desired level of background blur while keeping your subject sharp.
Using the Bokeh Effect for Artistic Blur
The Bokeh effect is a popular technique used in photography to create a beautiful and artistic blur in the background of an image. This technique involves intentionally blurring the out-of-focus areas of a photo to create a soft and dreamy look. Bokeh is characterized by smooth, round, and soft-edged highlights that add a sense of depth and dimension to an image.
How to Achieve the Bokeh Effect:
To achieve the Bokeh effect on your DSLR camera, you can use a wide aperture (low f-stop number) to create a shallow depth of field. This will help blur the background while keeping the subject in focus. Additionally, using a lens with a longer focal length can enhance the Bokeh effect by further isolating the subject and creating a more pronounced blur in the background.
Experiment with different lighting conditions and compositions to create unique and visually appealing Bokeh effects in your photographs. Remember, the key to achieving stunning Bokeh is to focus on creating a beautiful and artistic blur that complements your subject and enhances the overall aesthetic of your image.
Experimenting with Distance and Composition
One way to create a blurry background on a DSLR camera is to experiment with the distance between your subject and the background. The farther away the background is from your subject, the more likely it is to appear blurry in the final image. Try positioning your subject closer to the camera and further away from the background to achieve this effect.
Another technique is to pay attention to the composition of your shot. By using a wide aperture (low f-stop number), you can create a shallow depth of field that will naturally blur the background. Experiment with different angles and perspectives to see how the background blurs in relation to your subject.
Post-Processing Tips for Enhancing Background Blur
After capturing your photos with a DSLR camera, you can further enhance the background blur through post-processing techniques. Here are some tips to help you achieve a more pronounced background blur:
1. Use a Bokeh Effect
One popular post-processing technique is to use a bokeh effect to enhance the background blur. You can achieve this by adding a blur effect to the background while keeping the subject sharp and in focus. This can help create a more aesthetically pleasing and professional-looking image.
2. Adjust the Depth of Field
Another way to enhance background blur is by adjusting the depth of field in your photo editing software. By selectively blurring the background while keeping the subject in focus, you can create a more visually appealing image with a shallow depth of field.
By using these post-processing tips, you can take your photos to the next level and create stunning images with enhanced background blur.
FAQ
How can I achieve a blurry background on my DSLR camera?
To achieve a blurry background on your DSLR camera, you can use a wide aperture setting (low f-stop number), focus on your subject while keeping the background at a distance, and use a longer focal length lens. You can also increase the distance between the subject and the background to create more separation and enhance the blur effect.
What is the best aperture setting for creating a blurry background on a DSLR camera?
The best aperture setting for creating a blurry background on a DSLR camera is a wide aperture, typically around f/2.8 or lower. This allows more light to enter the lens, resulting in a shallower depth of field and a more pronounced background blur. Experiment with different aperture settings to find the right balance between blurriness and sharpness.
Can I achieve a blurry background on my DSLR camera without using a wide aperture?
While using a wide aperture is the most common method to achieve a blurry background on a DSLR camera, you can also try other techniques such as using a longer focal length lens, focusing on your subject while keeping the background at a distance, and increasing the distance between the subject and the background. These methods can help create a nice separation between the subject and the background, resulting in a blurred background effect.




Good article! I have a question about lenses. If I'm new to photography, would a 50mm f/1.8 lens be a good start for achieving that blurry background effect?
I recently tried using a 50mm f/1.8 lens and the bokeh effect was fantastic for my portrait shots. The background was beautifully blurred without distracting from my subject.
I've used both a prime lens and a zoom lens for background blur. The prime lens definitely creates a more pronounced bokeh, but the zoom lens is more versatile for different shooting scenarios. Anyone else have thoughts on this?
I recently tried using a 50mm f/1.8 lens and was amazed by the background blur. It really makes portraits pop!
What aperture do you recommend for portraits to achieve that nice blur?
Just remember, the distance between your subject and the background really affects the blur too!
Can someone explain how to set my DSLR to manual mode? I’m a bit confused about adjusting the settings.
To switch to manual mode, look for the mode dial on your camera and turn it to 'M'. From there, you can adjust the aperture, shutter speed, and ISO manually.
I think using a wider aperture isn’t always the best. Sometimes a slight increase in f-stop can actually improve the photo, especially in bright conditions.
Great tips! I never considered the importance of distance in my shots. I'll definitely keep that in mind for my next photoshoot.
I don’t think using a wide aperture is always the best choice. Sometimes, a bit of background detail can add context to a photo. It all depends on what you’re going for!
Could someone explain what 'depth of field' really means? I think I understand it, but I want to be sure I’m getting it right. How does it relate to blurring the background?
Depth of field refers to the range of distance in a photo that appears sharp and in focus. A shallow depth of field, achieved with a wide aperture, makes your subject stand out while the background blurs, creating that beautiful bokeh effect.
I've used both a prime lens and a zoom lens for portraits. I felt the prime lens created much better background blur. The separation between my subject and the background was so much more pronounced! Has anyone else found this to be true?
Yes, I totally agree with that! The wider aperture on a prime lens really helps in achieving that creamy bokeh effect.
Could you clarify what you mean by 'selecting the right lens'? Are there specific brands or models you recommend?
I disagree with the idea that only prime lenses can achieve a nice blurry background. Some zoom lenses with wide apertures also do a great job. I use a 24-70mm f/2.8, and it offers fantastic results.
You make a valid point! Zoom lenses with wide apertures can indeed create beautiful background blur. It’s all about using the right settings and distance to achieve the desired effect.
I recently started using a prime lens, and I've noticed such a difference! The bokeh effect is beautiful, especially when I set my aperture to f/1.8. It really makes my subjects pop in portraits. Experimenting with distance also helped me a lot; I've been placing my subjects further from the background to enhance the blur. Highly recommend it!
Thanks for sharing your experience! Prime lenses indeed provide excellent bokeh due to their wide apertures. Keep experimenting with different distances for even more creative shots.
I'm new to DSLR photography. If I use a wide aperture like f/2.8, do I need to worry about my subject being out of focus? How do I make sure my subject is sharp?