
 Carmen J. Moore

Have you ever gazed up at the night sky and wondered about the mysteries of the universe? Telescopes offer a window into the vastness of space, allowing us to observe distant stars, planets, and galaxies. And with the advent of digital single-lens reflex (DSLR) cameras, capturing these celestial wonders has never been easier.


In this article, we will guide you through the process of how to look through a telescope using a DSLR camera. Whether you are a seasoned astronomer or a beginner stargazer, this method will help you take stunning photographs of the cosmos and enhance your astronomical experience.
Step-by-Step Guide on Looking Through a Telescope with a DSLR Camera
If you want to use your DSLR camera to capture stunning images through a telescope, follow these steps:
- Set up your telescope on a stable surface and ensure it is properly aligned.
- Attach your DSLR camera to the telescope using a T-ring and T-adapter.
- Adjust the focus of the telescope to ensure a sharp image.
- Turn on your camera and set it to manual mode.
- Adjust the camera settings (ISO, aperture, shutter speed) for the best exposure.
- Look through the viewfinder of your camera and adjust the telescope’s position to frame your desired object.
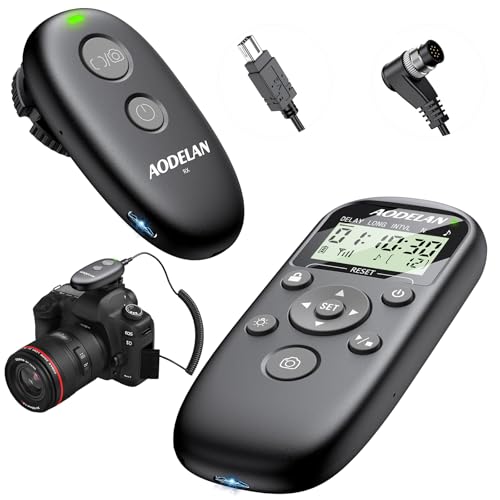
- Use a remote shutter release or the camera’s self-timer to minimize camera shake.
- Take your shot and review the image to make any necessary adjustments.
- Experiment with different settings and techniques to capture the best possible images.
Choosing the Right Telescope for Astrophotography
When it comes to astrophotography, choosing the right telescope is crucial for capturing stunning images of the night sky. There are a few key factors to consider when selecting a telescope for this purpose.
Aperture
The aperture of a telescope is one of the most important factors to consider for astrophotography. A larger aperture allows more light to enter the telescope, resulting in brighter and clearer images of celestial objects. Look for a telescope with a large aperture for better astrophotography results.
Focal Length
The focal length of the telescope determines the magnification of the images it produces. A longer focal length can capture more details of distant objects, making it ideal for astrophotography. Consider a telescope with a longer focal length for capturing high-resolution images of the night sky.
Setting Up Your DSLR Camera for Telescope Viewing
When using a DSLR camera with a telescope, it’s important to set up your camera properly to capture clear and sharp images of celestial objects. Here are some key steps to follow:
1. Mounting the Camera:
Attach your DSLR camera to the telescope using a T-ring adapter and a T-adapter. Make sure the camera is securely mounted to prevent any shaking or movement during the observation.
2. Adjusting Camera Settings:
Set your camera to manual mode and adjust the ISO, aperture, and shutter speed settings. A lower ISO (e.g., 400 or 800) is recommended for astrophotography to reduce noise in the images. Use a wide aperture (e.g., f/2.8) to let in more light and a longer shutter speed (e.g., 10-30 seconds) to capture faint objects.
3. Focusing:
Use the telescope’s focusing mechanism to achieve sharp focus on the celestial object. You may need to fine-tune the focus by taking test shots and adjusting the focus ring on the telescope or camera lens.
4. Image Capture:
Once you have set up the camera and achieved focus, you can start capturing images. Use a remote shutter release or the camera’s self-timer function to minimize vibrations when taking photos.
By following these steps and experimenting with different settings, you can capture stunning images of the night sky using your DSLR camera and telescope.
Focusing Your DSLR Camera with the Telescope
1. Start by pointing your telescope at a bright object, such as the moon or a distant light source.
2. Attach your DSLR camera to the telescope using a T-ring adapter and a camera-specific T-adapter.
3. Turn on your camera and set it to manual mode for better control over settings.
4. Look through the telescope’s eyepiece and adjust the focus until the object appears sharp and clear.
5. Use the camera’s live view mode to fine-tune the focus by zooming in on the object and adjusting the focus ring on the telescope.
6. Take test shots and review them on the camera’s screen to ensure the focus is accurate.
7. Experiment with different settings and techniques to capture the best possible images through your DSLR camera and telescope setup.
Aligning Your Telescope for Optimal Viewing
Before you start using your DSLR camera with a telescope, it is important to align your telescope properly to ensure optimal viewing. Follow these steps to align your telescope:
1. Set up your telescope in a stable position
Make sure your telescope is set up on a stable surface to prevent any vibrations or movement that could affect your viewing experience.
2. Align the finderscope
Use the finderscope on your telescope to point it at a distant object or a bright star. Make sure the object is centered in the finderscope.
- Adjust the finderscope alignment screws to center the object in the finderscope.
- Once the object is centered, lock the finderscope in place to maintain alignment.
By aligning your telescope properly, you will ensure that your DSLR camera captures clear and crisp images of celestial objects during your viewing session.
Taking Photos Through the Telescope with a DSLR Camera
Using a DSLR camera with your telescope can open up a whole new world of astrophotography possibilities. Here are some tips to help you get started:
1. Attach the Camera: Mount your DSLR camera to the telescope using a T-ring and T-adapter. Make sure the camera is securely attached to the telescope.
2. Focus the Telescope: Use the telescope’s focuser to bring the object you want to photograph into sharp focus. You may need to adjust the focus several times to get it just right.
3. Set the Camera Settings: Set your DSLR camera to manual mode and adjust the settings for astrophotography, such as ISO, aperture, and exposure time. Experiment with different settings to find the best combination for your images.
4. Use a Remote Shutter Release: To prevent camera shake, use a remote shutter release or the camera’s built-in timer to take the photo without touching the camera.
5. Take Test Shots: Take a few test shots to check the exposure and focus before capturing your final images. Make adjustments as needed to improve the quality of your photos.
6. Capture the Image: Once you are satisfied with the settings and focus, take the photo by pressing the shutter release. Keep experimenting and practicing to improve your astrophotography skills.
Post-Processing Your Telescope Images from the DSLR Camera
After you have captured stunning images of celestial objects through your telescope using a DSLR camera, the next step is post-processing to enhance and refine your images. Here are some steps to help you get the best results:
1. Transfer Your Images
First, transfer the images from your DSLR camera to your computer. Make sure you have the necessary software installed to work with RAW image files if your camera shoots in RAW format.
2. Adjust Exposure and Contrast
Use photo editing software like Adobe Photoshop or Lightroom to adjust the exposure, contrast, and brightness of your images. This step will help bring out more details in your photos.
- Experiment with different settings to find the right balance for your image.
- Consider enhancing the colors to make your images pop.
By fine-tuning these parameters, you can make your telescope images more visually appealing and detailed.
FAQ
Can I use a DSLR camera with a telescope?
Yes, you can use a DSLR camera with a telescope to capture stunning images of celestial objects. By attaching your DSLR camera to the telescope using a T-ring and a T-adapter, you can easily take advantage of the telescope’s magnification to capture detailed photos of the night sky.
What equipment do I need to connect my DSLR camera to a telescope?
To connect your DSLR camera to a telescope, you will need a T-ring that is compatible with your camera model, a T-adapter that fits your telescope’s focuser, and possibly a Barlow lens for additional magnification. These accessories will allow you to securely attach your camera to the telescope and achieve proper focus for capturing images.




I tried using my DSLR with a telescope last week, and it was such a game changer for capturing the moon! I followed your steps about focusing and adjusting camera settings, but I found it tricky to align the finderscope. Does anyone have tips for making alignment easier?
Aligning the finderscope can be tough, but I recommend using a bright star for alignment during the daytime. Once you have it centered, it’s much easier when you're out stargazing at night.
Great article! I'm new to astrophotography and was wondering if there's a specific type of T-ring and T-adapter I should look for when connecting my DSLR to the telescope. Any recommendations?
What type of T-ring and T-adapter should I look for when attaching my DSLR to the telescope? Is there a specific brand that works best?
It's important to choose a T-ring and T-adapter that match your DSLR model and your telescope's optical design. Brands like Baader and Celestron offer reliable options, but make sure to check compatibility before purchasing.
I started using my DSLR with a telescope last summer, and it really changed my viewing experience. At first, I struggled with the settings, but I found that using a lower ISO really helps reduce noise in the pictures. I also had to experiment a lot with the shutter speed. My best shots so far have been of the moon, but I’m hoping to capture some distant galaxies soon!
That’s awesome to hear! I’ve been focusing on the moon too. What ISO and shutter speed settings did you find worked best for you?