
 Carmen J. Moore

Connecting your DSLR camera to your PC can open up a world of possibilities for editing, organizing, and sharing your photos. Whether you’re a professional photographer or just starting out, learning how to hook up your camera to your computer is an essential skill. In this article, we’ll walk you through the steps to connect your DSLR camera to your PC.
Step 1: Check Your Camera’s Connection Options
Before you can connect your DSLR camera to your PC, you’ll need to determine what type of connection options your camera has. Most DSLR cameras come with a USB cable that can be used to connect the camera to your computer. Some cameras also have Wi-Fi or Bluetooth connectivity options, which can make transferring photos wirelessly a breeze.
Step-by-step guide on connecting your DSLR camera to your PC
Connecting your DSLR camera to your PC allows you to transfer photos and videos, use your camera as a webcam, or control it remotely. Follow these steps to connect your DSLR camera to your PC:


Step 1: Prepare your equipment
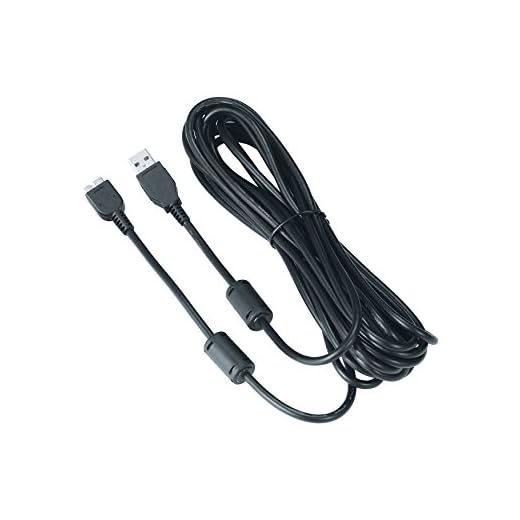
Make sure you have the necessary cables to connect your DSLR camera to your PC. Most DSLR cameras come with a USB cable for this purpose.
Step 2: Turn on your camera
Turn on your DSLR camera and set it to the appropriate mode for connecting to a computer. This mode is usually labeled as “PC” or “USB.”
Step 3: Connect your camera to your PC
Connect one end of the USB cable to your DSLR camera and the other end to a USB port on your PC. Your PC should recognize the camera and install any necessary drivers automatically.
Once connected, you can transfer photos and videos from your camera to your PC, use your camera as a webcam for video calls or live streaming, or even control your camera remotely using specialized software.
Check camera compatibility with your PC
Before connecting your DSLR camera to your PC, it’s essential to ensure that the camera is compatible with your computer. Different camera models may require specific drivers or software to establish a connection. Here are a few steps to check compatibility:
- Review the camera manual: Check the user manual that came with your camera for information on connecting it to a computer. It may provide details on required software or compatibility with different operating systems.
- Visit the manufacturer’s website: Go to the official website of your camera’s manufacturer and look for support or downloads section. Here, you can find the necessary drivers or software updates for connecting your camera to a PC.
By verifying the compatibility of your DSLR camera with your PC, you can ensure a smooth connection process and avoid any potential issues while transferring photos or videos.
Install necessary software for camera connection
Before you can connect your DSLR camera to your PC, you will need to install the necessary software that allows your computer to recognize and communicate with the camera. Most DSLR cameras come with a CD or DVD that contains the required software. If you don’t have the disc, you can usually download the software from the manufacturer’s website.
Once you have the software downloaded or installed, follow the on-screen instructions to complete the installation process. This software is essential for establishing a connection between your camera and your PC, enabling you to transfer photos and videos, control the camera remotely, or use it as a webcam.
Connect the camera to your PC using a USB cable
To connect your DSLR camera to your PC, you will need a USB cable that is compatible with both devices. Most DSLR cameras come with a USB cable in the box, but if not, you can purchase one online or at an electronics store.
First, locate the USB port on your DSLR camera. It is usually found on the side or back of the camera. Next, locate the USB port on your PC. This is typically found on the back of the computer near the other ports.
Once you have found both USB ports, simply plug one end of the USB cable into the camera and the other end into the PC. Your computer should recognize the camera as a storage device and you can access your photos and videos through the file explorer.
Set up the camera for data transfer mode
Before connecting your DSLR camera to your PC, you need to set it up for data transfer mode. Here’s how to do it:
- Turn on your DSLR camera and navigate to the Settings menu.
- Find the option for USB connection or data transfer mode.
- Select the appropriate setting (usually labeled as “PC” or “Mass Storage”) to enable data transfer.
- Save the changes and exit the settings menu.
Once you have set up your camera for data transfer mode, you can proceed to connect it to your PC using a USB cable.
Open the software and import photos from the camera to your PC
Once your DSLR camera is connected to your computer via USB and recognized by the software, you can open the photo management software that came with your camera or use a third-party program like Adobe Lightroom, Capture One, or Windows Photo Gallery.
Within the software, look for an option to import photos from the camera. This may be labeled as “Import,” “Download,” or “Transfer.” Click on this option to start the process of transferring your photos from the camera to your computer.
“`html
Adjust camera settings for live view on your PC
Once you have connected your DSLR camera to your PC, you may need to adjust some settings to enable live view functionality. Follow these steps to adjust your camera settings:
Step 1: Enable live view mode
Check your camera’s manual to find out how to enable live view mode. This setting is usually located in the camera’s menu under “Live View” or a similar option. Once you have enabled live view mode, your camera’s display should show the live feed from the camera.
Step 2: Adjust focus and exposure
Use the camera’s controls to adjust the focus and exposure settings to ensure that the image on your PC screen is clear and properly exposed. You may need to use manual focus and exposure settings to achieve the desired results.
| Tip: Use a tripod to stabilize your camera for better live view results. |
Use camera as a webcam for video calls and streaming
If you want to use your DSLR camera as a webcam for video calls or live streaming, you can easily achieve this by connecting it to your PC. Follow these steps to set up your DSLR camera as a webcam:
| Step 1: | Make sure your DSLR camera supports a clean HDMI output. This means that the camera can output a video signal without any overlays or icons on the screen. |
| Step 2: | Get an HDMI capture card or USB capture device. Connect the HDMI output from your camera to the capture card, and then connect the capture card to your PC via USB. |
| Step 3: | Download and install camera software that allows you to use your DSLR as a webcam. Many camera manufacturers offer software for this purpose, or you can use third-party software like OBS Studio. |
| Step 4: | Open the camera software on your PC and select your DSLR camera as the input source. You should now be able to use your DSLR camera as a webcam for video calls, online meetings, or streaming. |
Troubleshooting common issues with DSLR camera connection
If you’re having trouble connecting your DSLR camera to your PC, here are some common issues and solutions:
- Check the USB cable: Make sure the USB cable you are using is not damaged or faulty. Try using a different USB cable to see if that resolves the issue.
- Update drivers: Ensure that you have the latest drivers installed for your camera. Visit the manufacturer’s website to download and install the latest drivers.
- Restart your PC: Sometimes a simple restart can fix connectivity issues. Try restarting your PC and then reconnecting your camera.
- Check camera settings: Make sure your camera is set to the correct mode for connecting to a PC. Consult your camera’s manual for instructions on how to do this.
- Try a different USB port: If your camera is not being recognized, try connecting it to a different USB port on your PC.
- Disable firewall or antivirus: Sometimes security software can block the connection between your camera and PC. Temporarily disable your firewall or antivirus software to see if that resolves the issue.
Explore advanced features for remote shooting and control
Once you have successfully connected your DSLR camera to your PC, you can take advantage of advanced features for remote shooting and control. This allows you to have more control over your camera settings and capture images without physically touching the camera.
1. Remote shooting
You can use software like Canon EOS Utility or Nikon Camera Control Pro to remotely control your camera settings such as aperture, shutter speed, ISO, and focus. This is useful for shooting in situations where you cannot be near the camera, such as wildlife photography or self-portraits.
2. Live view
Many DSLR cameras offer a live view feature that allows you to see what the camera sees in real-time on your PC screen. This is particularly useful for composing shots and adjusting settings without looking through the camera’s viewfinder.
| Feature | Description |
|---|---|
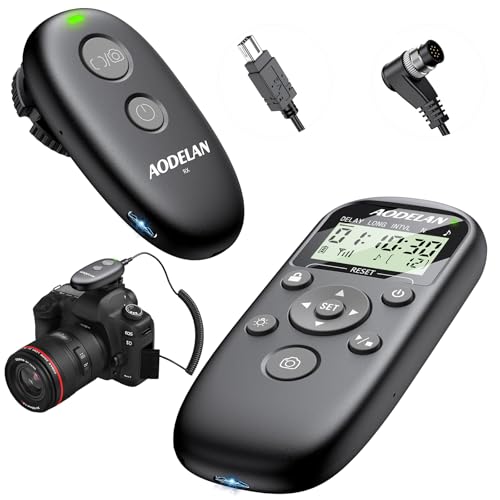
| Remote shutter release | You can remotely trigger the camera shutter from your PC, eliminating camera shake and allowing for precise timing of shots. |
| Time-lapse photography | Some software allows you to set up time-lapse sequences directly from your PC, controlling the interval and duration of shots. |
| Camera settings adjustment | You can adjust various camera settings remotely, such as white balance, picture style, and metering mode, to achieve the desired look for your photos. |
FAQ
How can I connect my DSLR camera to my PC?
To connect your DSLR camera to your PC, you will need a USB cable that is compatible with your camera model. Simply connect one end of the USB cable to your camera and the other end to a USB port on your PC. Your PC should recognize the camera as a storage device and you will be able to transfer photos and videos from your camera to your computer.
What software do I need to connect my DSLR camera to my PC?
To connect your DSLR camera to your PC, you may need specific software provided by the camera manufacturer. Some cameras are compatible with popular photo editing software like Adobe Lightroom or Canon EOS Utility. These programs allow you to control your camera settings, transfer files, and even remotely shoot photos from your computer. Make sure to check the manufacturer’s website for the appropriate software for your camera model.




Don’t forget to set your camera to the right mode! I left mine on auto and it wouldn’t connect until I switched to PC mode.
I disagree with the suggestion of using third-party software like OBS Studio. The native software that comes with the camera usually works better.
Can anyone explain what 'clean HDMI output' means? I'm considering using my camera for live streaming but don’t understand that feature.
'Clean HDMI output' means that the video feed from your camera does not display any of the camera's settings or overlays, providing a clear image. Make sure to check if your model supports this feature.
What if my camera doesn't have a USB cable? Can I still connect it wirelessly?
I'm trying to connect my DSLR to my PC, but it doesn't seem to recognize the camera. Do I need special software for my specific model?
Yes, it's important to check if your DSLR requires specific software or drivers. You can typically find this information in your camera's manual or on the manufacturer's website.
I just connected my DSLR to my PC last week. It was easy using the USB cable that came with it!