
 Carmen J. Moore

Have you ever marveled at those captivating photos where real-life scenes look like miniature models? This intriguing visual effect, known as tilt-shift photography, can be easily achieved with a DSLR camera and a few simple techniques. By manipulating the focus and perspective, you can transform ordinary landscapes into enchanting miniature worlds.

In this guide, we will explore the art of creating a miniature effect with your DSLR camera. Whether you’re a photography enthusiast or a professional looking to add a creative touch to your images, mastering tilt-shift photography will open up a whole new realm of possibilities in your craft.
Choosing the right DSLR camera
When it comes to creating the miniature effect with a DSLR camera, choosing the right camera is crucial. Here are some key factors to consider:
1. Sensor Size
The sensor size of the DSLR camera plays a significant role in achieving the miniature effect. Cameras with larger sensors tend to produce better results as they capture more light and detail, resulting in sharper images with shallower depth of field.
2. Lens Options
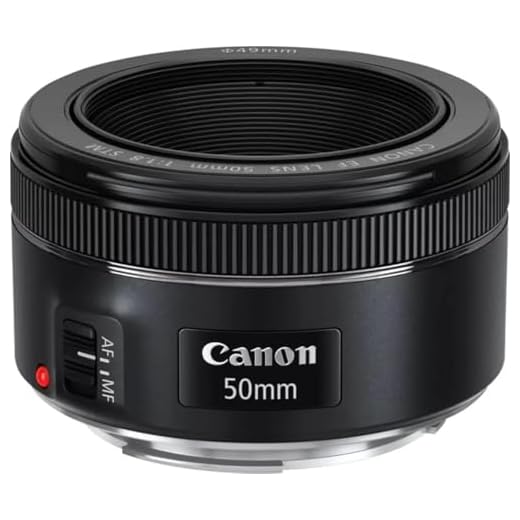
Investing in a good quality lens is essential for achieving the miniature effect. Look for lenses with wide apertures (such as f/1.8 or f/2.8) to create a shallow depth of field. Prime lenses are also a great choice as they offer sharpness and clarity.
| Camera Model | Sensor Size | Recommended Lens |
|---|---|---|
| Canon EOS 5D Mark IV | Full-frame | Canon EF 50mm f/1.8 STM |
| Nikon D750 | Full-frame | Nikon AF-S Nikkor 50mm f/1.8G |
| Sony Alpha a7 III | Full-frame | Sony FE 50mm f/1.8 |
“`html
Understanding Aperture Settings
Aperture settings on a DSLR camera control the size of the opening in the lens through which light passes. The aperture is measured in f-stops, such as f/2.8 or f/16. A lower f-stop (e.g. f/2.8) means a larger aperture opening, allowing more light to enter the camera. This results in a shallower depth of field, creating a blurred background effect that is ideal for achieving the miniature effect.
Effects of Aperture Settings
By adjusting the aperture settings, you can control the amount of background blur in your photos. A wide aperture (low f-stop) will produce a more pronounced bokeh effect, while a narrow aperture (high f-stop) will keep more of the scene in focus. Experimenting with different aperture settings can help you achieve the desired miniature effect in your photos.
Remember, aperture settings not only affect the exposure of your image but also play a crucial role in creating the desired artistic effect. Understanding how aperture settings work is essential for mastering the miniature effect with your DSLR camera.
Setting up the scene for miniature effect
To create a convincing miniature effect with your DSLR camera, it’s important to pay attention to the details of your scene. Here are some tips on setting up the perfect miniature scene:
1. Choose the right subject
Look for subjects that will work well with the miniature effect, such as buildings, landscapes, or everyday objects. Objects with clear shapes and textures tend to work best for this effect.
2. Consider the angle and perspective
When setting up your scene, think about the angle and perspective from which you will be shooting. Experiment with different angles to find the most convincing miniature effect.
Focusing Techniques for Miniature Photography
When creating a miniature effect with a DSLR camera, proper focusing techniques are crucial to achieve the desired result. Here are some tips to help you nail the focus in your miniature photography:
1. Use Manual Focus
Switching to manual focus mode allows you to have full control over where the focus is placed in your shot. This is especially important when shooting miniature scenes, as you want to ensure that the main subject is sharp and in focus while the background remains blurred.
2. Adjust Your Aperture
By using a wider aperture (small f-stop number), you can create a shallower depth of field, which helps in achieving the miniature effect. Experiment with different aperture settings to find the right balance between sharpness and blur in your photos.
| Technique | Description |
|---|---|
| Focus Stacking | Combine multiple images with different focus points to create a sharp overall image. |
| Live View Mode | Use the camera’s live view mode to zoom in and ensure accurate focus on the miniature subject. |
Experimenting with different angles
One of the key elements in achieving a convincing miniature effect is experimenting with different angles. By changing the perspective from which you shoot your subject, you can create the illusion of looking down on a tiny world. Try shooting from a high vantage point, such as a rooftop or a balcony, to capture a bird’s eye view of the scene. Alternatively, get down low and shoot from ground level to make your subject appear larger than life.
Don’t be afraid to get creative with your angles – try shooting through objects, such as foliage or architecture, to frame your subject and add depth to your photos. Experimenting with different angles will not only help you achieve a more convincing miniature effect but also add visual interest to your photos.
Post-processing tips for enhancing the effect
After capturing your images with the miniature effect, you can further enhance the effect through post-processing techniques. Here are some tips:
1. Adjust the contrast: Increasing the contrast can make the miniature effect more pronounced by emphasizing the differences between light and dark areas.
2. Blur the background: You can blur the background even more in post-processing to create a stronger sense of depth and focus on the main subject.
3. Increase saturation: Boosting the colors in your image can make the miniature effect appear more vibrant and eye-catching.
4. Experiment with filters: Try applying different filters or effects to your image to achieve a unique look and enhance the overall miniature effect.
5. Crop strategically: Crop your image to remove any distractions and focus on the main subject, enhancing the illusion of a miniature scene.
Sharing your miniature masterpieces
Once you have created your stunning miniature photos using the tilt-shift technique with your DSLR camera, it’s time to share your creations with the world. Here are a few ways you can showcase your miniature masterpieces:
1. Social Media
Share your photos on popular social media platforms like Instagram, Facebook, and Twitter. Use relevant hashtags to reach a wider audience and engage with other photography enthusiasts.
2. Photography Communities
Join online photography communities and forums to share your work and receive feedback from fellow photographers. Sites like Flickr and 500px are great platforms to showcase your miniature photos and connect with like-minded individuals.
| Platform | Benefits |
| Social Media | Reach a larger audience and engage with followers |
| Photography Communities | Receive feedback and connect with other photographers |
FAQ
What is the miniature effect in photography?
The miniature effect in photography is a technique where a photo is taken in such a way that it simulates a miniature model. This effect is achieved by using a shallow depth of field and selective focus to make the subjects in the photo appear smaller than they actually are.




What kind of lens do you recommend for beginners trying out the miniature effect? Do I really need a prime lens, or can I get by with a kit lens?
Can you clarify what you mean by 'focus stacking'? How does that help in achieving the miniature effect?
Focus stacking involves taking multiple shots at different focus points and combining them to create one sharp image. This technique is useful in miniature photography because it allows you to keep the main subject in sharp focus while having a dreamy background.
I disagree that a full-frame camera is necessary for the miniature effect. I have a crop sensor camera, and I've achieved good results. It’s more about the technique than the gear!
That's a fair point! It's definitely possible to get creative with what you have. Technique can often outweigh the equipment.
I recently tried the tilt-shift technique with my Canon EOS 5D Mark IV. The results were amazing! I shot from a high angle and it transformed an ordinary park scene into a miniature wonderland. Just remember to play around with the aperture settings to get that ideal blur in the background.