
 Carmen J. Moore

If you’re passionate about videography and looking to add some cinematic flair to your shots, building a DSLR camera crane can be a game-changer. A camera crane, also known as a jib or crane arm, allows you to achieve smooth and sweeping camera movements that can elevate the production value of your videos.
Building a DSLR camera crane doesn’t have to be complicated or expensive. With some basic tools and materials, along with a bit of DIY spirit, you can create a functional camera crane that will take your videography to the next level. In this guide, we’ll walk you through the step-by-step process of building your own DSLR camera crane.

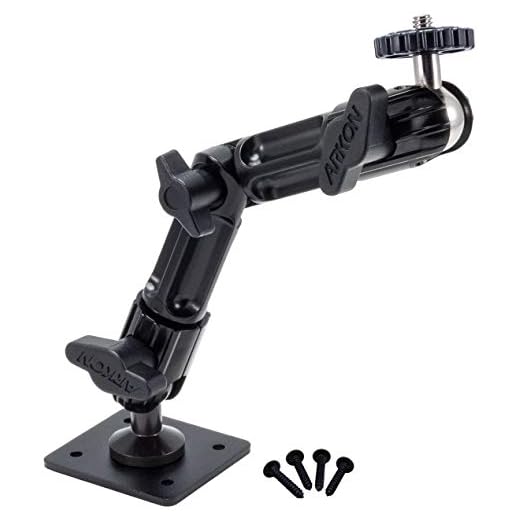

From selecting the right materials to assembling the crane and fine-tuning its movements, this guide will cover everything you need to know to create a sturdy and versatile camera crane for your DSLR camera.
Choosing the Right Materials
When building a DSLR camera crane, choosing the right materials is crucial to ensure stability and durability. Here are some key materials you will need:
| Aluminum: | Aluminum is lightweight and strong, making it an ideal choice for the main frame of the crane. Look for high-quality aluminum tubes or bars for the best results. |
| Steel: | Steel can be used for added reinforcement in areas that require extra strength, such as joints or connections. Opt for steel brackets or plates for this purpose. |
| Hardware: | Choose high-quality nuts, bolts, and screws to secure the different parts of the crane together. Stainless steel hardware is recommended for its corrosion resistance. |
| Counterweights: | Consider using steel or lead weights as counterweights to balance the camera crane properly. Make sure they are securely attached to the crane for safety. |
| Grip: | Select a comfortable and non-slip grip material for the handles of the crane. Rubber or foam grips are popular choices for a secure and ergonomic hold. |
Tools Required for Assembly
Before you start assembling your DSLR camera crane, make sure you have the following tools ready:
| Tool | Quantity |
| Drill | 1 |
| Screwdriver | 1 (Phillips head) |
| Wrench | 1 (adjustable) |
| Measuring tape | 1 |
| Allen key set | 1 |
Having these tools on hand will make the assembly process smoother and ensure that you have everything you need to put together your DSLR camera crane.
Step-by-Step Assembly Process
Follow these steps to assemble your DIY DSLR camera crane:
Step 1: Gather Materials
Collect all the necessary materials and tools listed in the materials section.
Step 2: Build the Base
| 1. | Attach the PVC pipes to create the base structure. |
| 2. | Secure the PVC pipes with connectors and ensure stability. |
Continue assembling the crane by following the instructions provided in the tutorial.
Balancing and Testing the Crane
Once you have assembled your DSLR camera crane, it is crucial to balance it properly to ensure smooth and stable shots. Begin by adjusting the counterweights on the crane to achieve a neutral balance. You can do this by moving the weights back and forth until the crane stays level when you let go of it.
After balancing the crane, it is essential to test it to ensure it can support the weight of your DSLR camera. Attach your camera to the crane and carefully move it through different angles to check for any instability or shaking. Make any necessary adjustments to the counterweights or camera placement to achieve optimal balance.
| Step | Actions |
|---|---|
| 1 | Adjust counterweights for neutral balance |
| 2 | Attach camera and test for stability |
| 3 | Make adjustments as needed for optimal balance |
Adjusting the Camera Mount
Once you have mounted your camera securely on the crane, it’s important to adjust the camera mount to ensure that it is properly balanced and positioned for smooth operation. Follow these steps to adjust the camera mount:
- Balance the camera: Make sure that the camera is balanced on the mount by adjusting the position of the camera plate. You can do this by sliding the plate forward or backward until the camera is balanced and doesn’t tilt to one side.
- Adjust the tilt angle: Use the tilt adjustment knob to set the desired tilt angle for your shots. This will allow you to control the vertical movement of the camera while operating the crane.
By properly adjusting the camera mount, you can ensure that your shots are stable and smooth, giving you professional-looking footage with your DSLR camera crane.
Safety Precautions and Maintenance
Safety Precautions:
1. Always secure the camera crane properly before use to prevent accidents.
2. Check all the components of the crane for any signs of damage or wear before each use.
3. Ensure that the weight capacity of the crane is not exceeded to prevent tipping or structural failure.
4. Keep the area around the crane clear of obstacles and bystanders during operation.
5. Use proper lifting and handling techniques to avoid strain or injury.
Maintenance:
1. Regularly clean and lubricate the moving parts of the crane to ensure smooth operation.
2. Inspect the cables and connections for any signs of wear and tear, and replace them if necessary.
3. Store the camera crane in a dry and dust-free environment when not in use to prevent corrosion.
4. Follow the manufacturer’s guidelines for maintenance and servicing to prolong the lifespan of the crane.
Tips for Getting Smooth Shots
When using your DIY DSLR camera crane, follow these tips to ensure you capture smooth and professional-looking shots:
1. Use Slow and Steady Movements
Slow and steady movements will help eliminate jerky footage and create a more cinematic look. Practice controlling the crane’s movements to achieve smooth pans and tilts.
2. Balance the Camera Properly
Properly balancing your camera on the crane is essential for smooth shots. Make sure the camera is securely attached and the crane is properly counterbalanced to prevent any unnecessary movements.
Tip: Use a spirit level to ensure your crane is perfectly level before shooting.
By following these tips, you’ll be able to capture professional-looking footage with your DIY DSLR camera crane.
FAQ
What are the basic materials needed to build a DSLR camera crane?
To build a DSLR camera crane, you will need materials such as aluminum or PVC pipes, a tripod head, counterweights, screws, nuts, bolts, a drill, and a saw. These materials will form the structure of the crane and allow you to attach your camera securely.
Can I customize the length and height of the DSLR camera crane?
Yes, you can customize the length and height of the DSLR camera crane according to your needs. By adjusting the length of the aluminum or PVC pipes and the positioning of the counterweights, you can modify the crane’s dimensions to suit different shooting scenarios and camera setups.






I disagree with the notion that more weight is always better for stability. In my experience, using lighter counterweights can lead to smoother shots, especially if you're comfortable with the crane. It’s all about balancing the setup for your specific shooting style.
What are some good alternatives to aluminum for the crane frame? I'm concerned about weight but also need it to be sturdy.
What are the best materials for the counterweights?
I built my own DSLR crane using PVC pipes, and while it was lightweight, it wasn’t very stable. I wish I had used aluminum instead. The stability is key for smooth shots.
I think using PVC pipes might not provide enough stability for heavier cameras. I’ve seen others recommend using all metal parts for better support. What do you think?
How does a DIY crane compare to a pre-made one in terms of stability and cost? I'm curious if the effort is worth it.
A DIY crane can save you quite a bit of money, but the stability really depends on your build quality. Pre-made cranes are usually tested for durability and can offer smoother operation straight out of the box.
I built a simple crane using PVC pipes, and it worked pretty well for my budget shoots. Just make sure to balance it right!
I'm really interested in building a DSLR camera crane, but I'm not sure how to choose the right type of aluminum. Are there specific grades or thicknesses that work better for stability?
Great question! For stability, it's recommended to use aluminum that is around 6061-T6 grade, which is strong and lightweight. Look for tubes with a thickness of at least 1/8 inch for added durability.
When you say to adjust the counterweights for balance, how exactly do you know when it's right?
I’ve seen some metal cranes online for around $200. How does the DIY version compare in terms of cost and quality? Is it really worth making one from scratch?
I love that this guide emphasizes safety precautions. It's so important to check everything before using equipment like this!
I was wondering how this DIY crane compares to buying a pre-made one. Are there significant differences in performance or usability? I've seen some popular brands, but they're quite expensive. Would I get similar results with this build?
Building your own crane can be cost-effective and allows for customization, but pre-made options often have better materials and design features for stability and ease of use. If you stick to the guidelines in the article, you can achieve good results, but it might take more practice to perfect the movements.
I built a DSLR crane last summer, and it was a game-changer for my videos. I used aluminum piping as suggested, which worked great. However, I learned that balancing the camera properly was critical. I ended up adding extra weights to stabilize my shots. Also, make sure to practice moving slowly; it really improves the quality of your footage.
In the section about adjusting the camera mount, is there a specific method to ensure the camera is balanced correctly? I want to avoid any tilting issues.
To ensure the camera is balanced on the mount, adjust the position of the camera plate by sliding it forward or backward until the camera sits level. Using a spirit level can really help in achieving precise balance.
Using a spirit level is a great tip! It really helps in getting everything lined up correctly.
I believe using lead weights might not be safe due to the risk of lead exposure. I prefer using sandbags instead.
Can you clarify how much weight the crane can support? I have a heavier DSLR and want to be sure it won't tip over.
What type of aluminum should I look for when buying materials for the crane? Any specific thickness recommendations?
For a DSLR camera crane, look for aluminum tubing that is both lightweight and strong, typically around 1” in diameter. A thickness of 0.08 inches is a common choice to ensure durability while keeping the weight manageable.
I used 1-inch diameter aluminum tubes, and they worked well. I think around 0.08 inches thickness is a good balance for strength and weight.
I recently built a DSLR crane using PVC pipes instead of aluminum to save costs. It was a bit heavier but still functional. The key was ensuring proper balance with the counterweights. I was surprised by how smoothly it operated after following the balancing steps from the guide. Just make sure the joints are tight, or it might wobble during use.
I disagree with the idea that using lead weights is necessary. I found that using sandbags works just as well and is safer.