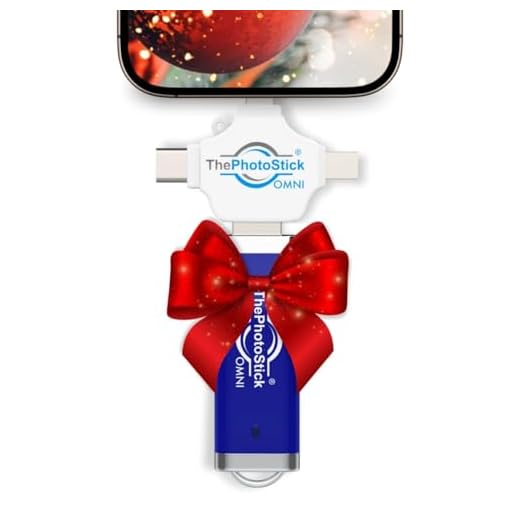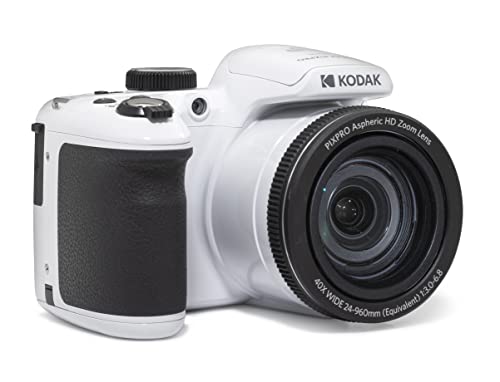


Are you looking for a way to transfer your photos from a digital camera to your iPad? With the advancement of technology, it has become easier than ever to share and store your precious memories on your iPad. In this article, we will guide you through the steps to upload pictures from your digital camera to your iPad effortlessly.
There are several methods you can use to transfer photos from your digital camera to your iPad. One of the most common ways is to use a USB cable to connect your camera to your iPad. This method allows you to directly transfer photos from your camera to your iPad without the need for any additional software.
Alternatively, you can also use a memory card reader to transfer photos from your camera’s memory card to your iPad. This method is convenient if your camera uses a memory card that is compatible with your iPad. Simply remove the memory card from your camera, insert it into the memory card reader, and connect it to your iPad to transfer the photos.
Step-by-Step Guide on Transferring Photos from Digital Camera to iPad
If you want to transfer photos from your digital camera to your iPad, follow these simple steps:
- Connect your digital camera to your computer using the USB cable.
- Transfer the photos from your camera to your computer using the appropriate software or by manually copying the files.
- Once the photos are on your computer, connect your iPad to the computer using a USB cable.
- Open iTunes on your computer and select your iPad.
- Go to the “Photos” tab in iTunes and check the box next to “Sync Photos.”
- Select the folder where you saved the photos from your camera and click “Apply” to sync the photos to your iPad.
- Once the syncing process is complete, disconnect your iPad from the computer.
- Open the Photos app on your iPad to view the transferred photos.
Prepare Your Digital Camera and iPad
Before you can upload pictures from your digital camera to your iPad, you need to make sure both devices are ready for the transfer. Here are the steps to prepare your digital camera and iPad:
Check Your Camera
- Make sure your digital camera is charged or has fresh batteries.
- Ensure that your camera’s memory card has enough space to store the pictures you want to transfer.
- If necessary, transfer any existing photos from the camera to a computer to free up space.
Prepare Your iPad
- Ensure that your iPad is charged or connected to a power source to prevent it from running out of battery during the transfer.
- Check that your iPad has enough storage space available to accommodate the pictures you plan to upload.
- If your iPad has a Lightning port, make sure you have the appropriate adapter to connect the camera to the iPad.
Connect Your Digital Camera to Your iPad
To upload pictures from your digital camera to your iPad, you will need to connect the two devices using a USB cable. Make sure your digital camera is turned on and unlocked before connecting it to your iPad.
Once connected, your iPad should recognize the digital camera and prompt you to import photos. Follow the on-screen instructions to select the photos you want to transfer to your iPad.
After selecting the photos, tap the “Import” button to begin the transfer process. Depending on the number of photos and their file sizes, the transfer may take some time to complete.
Once the transfer is finished, you can access your photos in the Photos app on your iPad. Enjoy your newly imported pictures!
Import Photos Using Official Camera Connection Kit
If you want to import photos from your digital camera to your iPad, you can use the official Camera Connection Kit provided by Apple. This kit includes two adapters: one for SD cards and one for USB connections.
Step 1: Insert the SD card or connect the USB cable from your camera to the corresponding adapter.
Step 2: Connect the adapter to your iPad using the Lightning or USB-C port, depending on your iPad model.
Step 3: Your iPad should automatically open the Photos app and display the imported photos. If not, open the Photos app manually.
Tip: Make sure your camera is turned on and unlocked before connecting it to the iPad.
Transfer Photos via Wireless Connection
If your digital camera and iPad both support Wi-Fi connectivity, you can easily transfer photos wirelessly without the need for any cables or adapters. Here’s how to do it:
Step 1: Enable Wi-Fi on Both Devices
Make sure both your digital camera and iPad have Wi-Fi turned on and are connected to the same Wi-Fi network.
Step 2: Access Camera’s Wi-Fi Settings
On your digital camera, navigate to the Wi-Fi settings and enable the option for transferring photos wirelessly.
- Some cameras may require you to download a specific app to facilitate the transfer process.
- Follow the on-screen instructions on your camera to establish a connection with your iPad.
Once the connection is established, you can easily transfer photos from your camera to your iPad wirelessly.
Use Third-Party Apps for Photo Transfer
If you prefer a more streamlined approach to transferring photos from your digital camera to your iPad, you can use third-party apps designed for this purpose. These apps often offer additional features and functionality compared to the built-in options provided by Apple. Here are a few popular apps you can consider:
1. Camera Connect & Control
Camera Connect & Control is a versatile app that allows you to transfer photos from your digital camera to your iPad wirelessly. Simply connect your camera to a Wi-Fi network and use the app to browse and select the photos you want to transfer.
2. PhotoSync
PhotoSync is another excellent app for transferring photos between devices. It supports a wide range of digital cameras and provides a seamless transfer experience. You can transfer photos over Wi-Fi or Bluetooth, making it convenient and easy to use.
| App Name | Features |
|---|---|
| Camera Connect & Control | Wireless transfer, photo selection |
| PhotoSync | Wide camera support, Wi-Fi and Bluetooth transfer |
Organize and Edit Your Photos on iPad
Once you have transferred your photos from your digital camera to your iPad, you can easily organize and edit them using the built-in Photos app. Here are some tips to help you get started:
1. Create Albums: Organize your photos into albums to keep them neatly categorized. You can create albums for different events, places, or themes.
2. Edit Your Photos: Use the editing tools in the Photos app to enhance your photos. You can adjust the brightness, contrast, and color of your photos, crop them, apply filters, and more.
3. Share Your Photos: Easily share your photos with friends and family by using the sharing options in the Photos app. You can email your photos, share them on social media, or even create a shared album for others to view.
4. Use iCloud Photo Library: Consider enabling iCloud Photo Library to automatically upload and store your photos in the cloud. This way, you can access your photos from any device and never have to worry about losing them.
By following these tips, you can make the most of your photo collection on your iPad and enjoy your memories in a more organized and visually appealing way.
Safely Eject Your Digital Camera
After transferring the photos from your digital camera to your iPad, it is important to safely eject your camera to avoid any data corruption or loss. Follow these steps to safely remove your digital camera:
- Check the Transfer Status: Make sure that all the photos have been successfully transferred to your iPad before ejecting the camera.
- Turn Off Your Camera: Switch off your digital camera to ensure that there is no active data transfer happening.
- Eject the Camera: On your iPad, go to the Photos app or the Files app and locate your camera’s folder. Tap on the eject icon next to the camera’s name to safely disconnect it from your iPad.
By following these steps, you can prevent any potential data loss or damage to your digital camera while safely ejecting it from your iPad.
Enjoy Your Photos on Your iPad
Once you have successfully transferred your photos from your digital camera to your iPad, you can now enjoy them on the go. The iPad offers a great platform for viewing and sharing your photos with friends and family.
| Viewing: | Open the Photos app on your iPad to view all the photos you have uploaded. You can swipe through them, zoom in or out, and create albums to organize your photos. |
| Sharing: | You can easily share your photos from your iPad via email, social media, or messaging apps. Simply select the photo you want to share and choose the sharing option. |
| Editing: | The iPad offers basic photo editing tools that allow you to enhance your photos. You can crop, adjust brightness and contrast, apply filters, and more. |
| Backup: | It’s important to regularly back up your photos from your iPad to avoid losing them. You can use iCloud or other cloud storage services for seamless backup. |
FAQ
Can I upload pictures from a digital camera directly to my iPad?
Yes, you can upload pictures from a digital camera to your iPad using a compatible adapter. You will need a Lightning to USB Camera Adapter or a Lightning to SD Card Camera Reader to connect your camera to the iPad and import photos. Simply connect the adapter to your iPad, then plug in your camera or insert the SD card to transfer the pictures.
What is the process for transferring photos from a digital camera to an iPad?
To transfer photos from a digital camera to an iPad, you will need to first connect your camera to the iPad using a Lightning to USB Camera Adapter or a Lightning to SD Card Camera Reader. Once connected, open the Photos app on your iPad and select the Import tab. You can then choose the photos you want to import and click Import Selected or Import All to transfer them to your iPad.
Are there any apps that can help me upload pictures from my digital camera to my iPad?
Yes, there are apps available on the App Store that can help you upload pictures from your digital camera to your iPad. Some popular apps include the Camera Connect & Control app, the Wireless Mobile Utility app, or the SnapBridge app, depending on the camera brand and model. These apps enable wireless transfer of photos from your camera to your iPad, making the process more convenient.
Can I edit the photos I upload from my digital camera on my iPad?
Yes, you can edit the photos you upload from your digital camera on your iPad using the built-in editing tools in the Photos app or by using third-party photo editing apps available on the App Store. Once you have transferred the photos to your iPad, you can crop, adjust brightness and contrast, apply filters, and enhance your pictures to make them look even better before sharing or saving them.


