


Are you looking to enhance your video conferencing experience or improve the quality of your live streams? If you have a digital camera lying around, you can easily transform it into a high-quality web camera with just a few simple steps. Using your digital camera as a web camera can provide better video quality, improved audio, and more control over your settings.
In this guide, we will walk you through the process of turning your digital camera into a web camera. Whether you’re a content creator, business professional, or just looking to upgrade your video calls, this tutorial will help you get set up quickly and easily.
By following these steps, you can elevate your online presence and create a more professional image during video calls and live streams. Let’s get started on transforming your digital camera into a powerful web camera that will take your online interactions to the next level.
Transforming Digital Camera to Web Camera
Turning your digital camera into a web camera can be a useful and cost-effective solution for video conferencing, live streaming, or online meetings. With the right steps, you can easily repurpose your digital camera to serve as a webcam. Here’s how you can do it:

| Step 1: | Check if your digital camera has a video output port, such as HDMI or USB. |
| Step 2: | Get the necessary cables to connect your camera to your computer or laptop. |
| Step 3: | Install any required software or drivers for the camera to work as a webcam. |
| Step 4: | Set up your camera on a stable surface and adjust the angle and focus as needed. |
| Step 5: | Open your preferred video conferencing or streaming software and select your digital camera as the input device. |
| Step 6: | You’re now ready to use your digital camera as a web camera for high-quality video calls and streaming! |
Required Equipment
Before you can turn your digital camera into a web camera, you will need the following equipment:
- A digital camera with a USB output or a Wi-Fi connection
- A USB cable to connect your camera to your computer
- Camera software compatible with your operating system
- A stable internet connection for streaming
- A tripod or stand to position your camera properly
Software Installation Process
Before you can use your digital camera as a web camera, you will need to install the necessary software on your computer. Here is a step-by-step guide to help you with the software installation process:
- Check if your digital camera manufacturer provides software that allows you to use your camera as a webcam. If they do, download the software from their official website.
- If your camera manufacturer does not provide webcam software, you can use third-party software like ManyCam, OBS Studio, or CyberLink YouCam. Download and install the software from their respective websites.
- Once the software is downloaded, double-click on the installation file and follow the on-screen instructions to install the software on your computer.
- After the installation is complete, launch the software and look for the option to connect a camera or webcam. Follow the prompts to select your digital camera as the input device.
- You may need to adjust the settings within the software to ensure that your digital camera is recognized as a webcam. Check the software’s settings menu for options related to camera input.
- Once your digital camera is set up as a webcam, you can now use it for video calls, live streaming, or any other applications that require a webcam.
Connection Setup
Once you have all the necessary equipment ready, it’s time to set up the connection between your digital camera and your computer to turn it into a web camera. Follow these steps:
- Connect the USB cable from your digital camera to your computer’s USB port.
- Turn on your digital camera and set it to the mode that allows it to function as a webcam.
- Install any necessary software or drivers that came with your camera or download them from the manufacturer’s website.
- Open your preferred video conferencing or streaming software on your computer and select your digital camera as the video input device.
- Adjust the camera settings such as resolution, frame rate, and focus to ensure optimal performance.
Once you have completed these steps, your digital camera should now be functioning as a web camera, ready to use for video calls, live streaming, or any other webcam-related activities.
Testing the Setup
Before using your digital camera as a web camera, it is important to test the setup to ensure everything is working correctly. Connect the camera to your computer using the appropriate cable and power it on. Open the software you installed earlier to enable the camera to function as a webcam. Check the video and audio settings to make sure the camera is selected as the input device.
Then, open a video conferencing or streaming application on your computer and select the camera as the video source. Test the camera by making a video call or recording a short video to see if the quality is satisfactory. Make any necessary adjustments to the settings to improve the image and sound quality.
Once you are satisfied with the setup and the quality of the video and audio, your digital camera is ready to use as a web camera for various purposes, such as online meetings, live streaming, or video chats.
Adjusting Camera Settings
Before using your digital camera as a web camera, it’s important to adjust the camera settings to ensure optimal performance. Here are a few key settings to consider:
1. Resolution
Make sure to set the resolution of your camera to match the resolution required for web conferencing or streaming. A higher resolution will provide better image quality, but may require more bandwidth.
2. Frame Rate
Adjust the frame rate of your camera to ensure smooth video streaming. A frame rate of 30 frames per second is commonly used for web conferencing and streaming applications.
Troubleshooting Tips
If you are facing issues with turning your digital camera into a web camera, here are some troubleshooting tips:
1. Make sure the camera is connected to your computer properly via USB cable.
2. Check if the camera’s drivers are installed on your computer. If not, download and install the necessary drivers from the manufacturer’s website.
3. Ensure that the camera is set to the correct mode for webcam use. Refer to the camera’s manual for instructions on how to switch to webcam mode.
4. Restart your computer and the camera to see if that resolves any connectivity issues.
5. If you are using third-party software to convert your camera into a webcam, make sure the software is compatible with your camera model.
6. Test the camera on a different computer to determine if the issue is with the camera or your computer.
7. If all else fails, contact the camera manufacturer’s customer support for further assistance.
Final Thoughts
Converting your digital camera into a web camera can open up a world of possibilities for video conferencing, live streaming, and online content creation. By following the steps outlined in this guide, you can easily repurpose your existing camera to serve as a high-quality webcam. Remember to check for compatibility with your camera model and computer system before getting started. With a few simple tools and adjustments, you can enhance the quality of your video calls and broadcasts without the need for an expensive webcam. Get creative and explore the potential of your digital camera in the world of online communication!
Share Your Experience
If you have successfully turned your digital camera into a web camera, we would love to hear about your experience. Share any tips, tricks, or challenges you encountered during the process. Your insights could be helpful for others looking to do the same.
Example:
When I converted my digital camera into a web camera, I found that adjusting the settings on the camera itself was crucial for achieving the best video quality. I also had to download specific software to enable the camera to connect to my computer. Overall, the process was straightforward once I did some research and followed the steps carefully.
| Name | John Doe |
| [email protected] |
FAQ
Can I use my digital camera as a web camera?
Yes, you can turn your digital camera into a web camera with the help of specific software and hardware. This process allows you to use your high-quality digital camera for video calls, streaming, and online meetings.
What equipment do I need to convert my digital camera into a web camera?
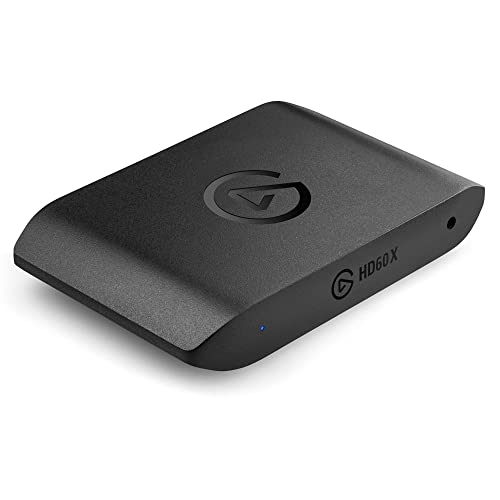
To convert your digital camera into a web camera, you will need a capture card or HDMI video capture device, a USB cable to connect your camera to your computer, and webcam software that supports external cameras. Make sure your camera has a clean HDMI output for best results.
Is it worth turning a digital camera into a web camera?
Turning a digital camera into a web camera can be worth it if you want to improve the video quality of your online meetings or live streams. Digital cameras often offer better image quality and control over settings compared to traditional webcams, enhancing your overall video experience.


