
 Carmen J. Moore
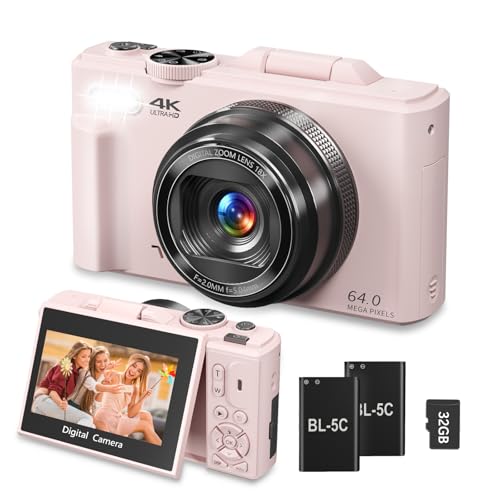
Are you an art lover who wants to capture the beauty of artworks with your digital camera? Taking photos of art pieces requires a special approach to ensure the colors, details, and textures are accurately represented. In this guide, we will explore the techniques and tips to help you master the art of photographing art.
Understanding Lighting and Composition
Lighting plays a crucial role in photographing art. Natural light is often the best option for capturing the true colors and details of artworks. When photographing indoors, position your art piece near a window to take advantage of natural light. Pay attention to the angle of light to avoid glare or shadows that can distort the image.



Tips for capturing art
When taking photos of art with a digital camera, there are a few tips to keep in mind to ensure you capture the beauty and detail of the piece:
| 1. | Use natural light: Natural light can help bring out the true colors and details of the artwork. Avoid using the camera flash as it can create harsh shadows and reflections. |
| 2. | Adjust the white balance: Make sure the white balance on your camera is set correctly to accurately capture the colors of the artwork. |
| 3. | Use a tripod: To avoid camera shake and ensure sharp images, use a tripod when photographing art. |
| 4. | Experiment with angles: Try capturing the artwork from different angles to find the best composition that highlights its features. |
| 5. | Focus on details: Pay attention to the details of the artwork and use the camera’s macro mode to capture close-up shots. |
| 6. | Check the camera settings: Adjust the camera settings such as ISO, aperture, and shutter speed to get the best results based on the lighting conditions. |
Prepare your equipment
Before you start taking photos of art with your digital camera, it’s important to make sure you have the right equipment. Here are some tips to help you prepare:
1. Choose the right camera:
- Make sure your camera has a high resolution to capture the details of the artwork.
- Consider using a camera with manual settings for more control over the image.
2. Use a tripod:
Using a tripod can help you keep your camera steady and avoid blurry photos. This is especially important when taking close-up shots of art.
Set up the lighting
Proper lighting is crucial when photographing art. To ensure the colors and details of the artwork are accurately captured, set up your lighting carefully. Here are some tips for setting up the lighting:
| 1. Natural light: | Utilize natural light whenever possible by placing the artwork near a window. Avoid direct sunlight, as it can create harsh shadows and affect color accuracy. |
| 2. Artificial light: | If natural light is not available or sufficient, use artificial lighting sources like softboxes or LED lights. Position the lights at a 45-degree angle to the artwork to reduce glare and shadows. |
| 3. Diffusion: | To soften harsh light and create a more even lighting, use diffusers or bounce cards. This will help prevent hot spots and create a more natural look. |
| 4. White balance: | Adjust the white balance on your camera to match the lighting conditions and ensure accurate color reproduction. Take test shots and adjust as needed. |
Frame the artwork
When framing the artwork, make sure the edges of the frame align with the edges of the artwork. This will help create a balanced composition in your photo.

Consider using a mat or mount to create space between the artwork and the frame. This can help prevent reflections and glare in your photos.
Use a tripod for stability
One of the most important tools for taking high-quality photos of art is a tripod. A tripod provides stability and eliminates camera shake, resulting in sharp and clear images. When photographing art, especially in low light conditions or when using slower shutter speeds, a tripod is essential to prevent blurriness and ensure the details of the artwork are captured accurately.
When setting up your tripod, make sure it is positioned securely and adjust the height and angle to frame the artwork properly. Using a tripod also allows you to use longer exposures without worrying about camera movement, which can be useful when capturing intricate details or textures in the artwork.
Adjust camera settings
Before taking photos of art with your digital camera, it’s important to adjust the camera settings to ensure you capture the best possible images. Here are some key settings to consider:
1. Use manual mode
Switch your camera to manual mode to have full control over settings such as aperture, shutter speed, and ISO. This will allow you to customize the settings based on the lighting and composition of the artwork.
2. Set the white balance
Adjust the white balance setting on your camera to match the type of lighting in the room where the art is displayed. This will help ensure accurate color reproduction in your photos.
By adjusting these settings, you can improve the quality of your photos and capture the details and colors of the artwork effectively.
Focus on details
When photographing art, pay attention to the details. Capture the intricate brushstrokes, textures, and small elements that make the artwork unique. Use a macro lens or set your camera to macro mode to get close-up shots of the details. Adjust the aperture to create a shallow depth of field, which will help to emphasize the details and make them stand out in the photo.
Lighting is key
Good lighting is essential for capturing the details of art. Avoid harsh, direct light that can create shadows and wash out the colors. Instead, opt for soft, diffused light that will highlight the textures and details of the artwork. Natural light is often the best option, so consider photographing art near a window or outdoors on a cloudy day.
Steady your camera
To ensure sharp, detailed photos, use a tripod or stabilize your camera on a flat surface. This will help prevent camera shake and blurriness, allowing you to capture the fine details of the artwork with clarity. If you don’t have a tripod, try using a makeshift stabilizer like a stack of books or a table to steady your camera.

Experiment with angles
When taking photos of art with a digital camera, don’t be afraid to experiment with different angles. Try shooting from above, below, or even from the side to capture unique perspectives and details of the artwork. Changing the angle can help you highlight different textures, colors, and shapes in the piece, giving your photos a more dynamic and interesting look.
Consider getting close to the artwork and shooting details, or stepping back to capture the piece in its entirety. Play around with the composition and framing to create visually appealing shots that showcase the art in the best possible way. Remember, there are no strict rules when it comes to photography, so feel free to get creative and explore different angles to find the best shot.
Edit and enhance images
Once you have captured photos of the art, it’s time to edit and enhance them to make sure they look their best. Use image editing software like Adobe Photoshop or Lightroom to adjust brightness, contrast, colors, and sharpness. You can also crop the image to focus on the artwork itself and remove any distracting elements.
Consider using filters or presets to give your photos a unique look or style. Experiment with different editing techniques to find the best way to showcase the artwork in your photos. Remember to save your edited images in high-resolution formats to preserve the quality of the artwork.
Share your art photos
Once you have taken stunning photos of your art using your digital camera, it’s time to share them with the world. You can showcase your artwork on social media platforms such as Instagram, Facebook, or Pinterest to reach a wider audience. Don’t forget to use relevant hashtags to attract art lovers and potential buyers.
You can also create a portfolio on websites like Behance or DeviantArt to display your artwork professionally. Consider participating in online art communities or forums to get feedback and connect with other artists. Remember to always credit your work and engage with your audience to build a strong online presence.
FAQ
What are some tips for taking high-quality photos of art with a digital camera?
When taking photos of art with a digital camera, make sure to use even lighting to reduce shadows and reflections. Use a tripod to keep the camera steady and avoid blurry images. Set the white balance correctly to ensure accurate colors. Experiment with different angles and perspectives to capture the artwork in the best possible way.
What camera settings should I use when photographing art?
When photographing art, use a low ISO setting to reduce noise in the image. Set a narrow aperture (higher f-stop) for a larger depth of field, ensuring that the entire artwork is in focus. Adjust the shutter speed accordingly to get the right exposure. Shoot in RAW format to retain more image data for editing later.
Can you provide some post-processing tips for photos of art taken with a digital camera?
After taking photos of art, use photo editing software to adjust the brightness, contrast, and color balance if needed. Crop the image to remove any distractions and ensure the focus is on the artwork. Remove any dust or imperfections using the healing tool. Save the final image in a high-quality format for printing or online display.



I've been using a tripod for all my art photography, and it has made a huge difference! I used to struggle with blurry images, especially in low light. Now, I can really focus on capturing the details without worrying about camera shake.
I find using flash can sometimes create interesting effects, especially in textured artworks. It may not be ideal, but with proper angle and distance, it can add depth.
While flash can enhance certain aspects, it often leads to glare and washed-out colors. If you're going to use flash, try diffusing it or bouncing it off a surface to maintain color accuracy.
Don't forget to check your lens for dust or smudges before shooting! A clean lens makes a big difference in image quality.
What type of camera settings do you recommend for indoor photography? I'm often struggling with getting the colors right.
For indoor photography, I recommend using a low ISO (100-400) to reduce noise, a wide aperture (f/2.8 to f/5.6) for good light, and adjusting the white balance based on the lighting type. Experimenting with manual settings will also help!
Can you explain the difference between using natural light vs. artificial light when photographing art? Which one usually gives better results?
Natural light generally provides softer, more flattering illumination without harsh shadows. However, artificial light allows more control, especially in dim environments. It really depends on the specific artwork and the effect you want to achieve.