Carmen J. Moore

Are you a film photography enthusiast looking to digitize your film negatives but don’t have a dedicated film scanner? Don’t worry, you can still achieve high-quality scans using a digital camera and a macro lens. This DIY method allows you to capture the details and colors of your film negatives with precision, giving you the flexibility to experiment with different scanning techniques.
In this article, we will guide you through the process of scanning your film using a digital camera and a macro lens. We will cover the equipment you need, the setup process, and the post-processing steps to ensure your scanned images look professional and true to the original film.
By following our step-by-step instructions, you’ll be able to create stunning digital scans of your film negatives without the need for expensive scanning equipment. So, grab your camera, dust off your film negatives, and let’s get started!


Equipment needed for scanning film
To scan your film using a digital camera and a macro lens, you will need the following equipment:
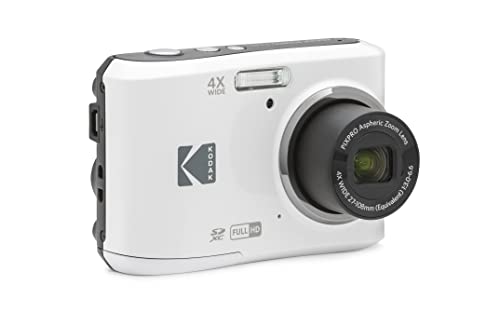
- A digital camera with manual settings and a macro lens
- A light table or a backlight source
- A tripod to keep your camera steady
- A film holder or negative holder to keep the film flat and in place
- A remote shutter release or self-timer function on your camera to avoid camera shake
- A computer or laptop for transferring and editing scanned images
- Optional: a film scanner or a dedicated film digitizer for higher quality scans
Setting up your digital camera for scanning
Before you start scanning your film using a digital camera and macro lens, it’s essential to set up your camera correctly to ensure high-quality results. Follow these steps to prepare your digital camera for scanning:
| 1. Mount your camera on a stable tripod: | Ensure your camera is securely mounted on a tripod to prevent any camera shake during the scanning process. |
| 2. Use a macro lens: | Attach a macro lens to your camera to capture sharp and detailed images of your film negatives or slides. |
| 3. Set your camera to manual mode: | Switch your camera to manual mode to have full control over settings such as aperture, shutter speed, and ISO. |
| 4. Adjust the focus: | Manually focus your camera on the film negative or slide to ensure crisp and clear images. |
| 5. Use a remote trigger or self-timer: | Minimize camera shake by using a remote trigger or setting a self-timer to capture the image without physically touching the camera. |
Preparing your film for scanning
Before you start scanning your film using a digital camera and macro lens, it’s important to properly prepare your film to ensure the best results. Here are some steps to follow:
- Handle your film with clean hands to avoid leaving fingerprints or dirt on the surface.
- Carefully inspect your film for any dust, debris, or scratches that may affect the scanning process.
- Clean your film using a soft, lint-free cloth or a film-specific cleaning solution to remove any visible particles.
- If there are stubborn marks or spots on your film, consider using a film-safe cleaning brush or air blower to gently remove them.
- Ensure that your film is properly aligned and flat before scanning to prevent any distortion or blurriness in the final images.
Scanning process with a digital camera and macro lens
Scanning your film using a digital camera and macro lens can be a cost-effective and efficient way to digitize your analog images. Here is a step-by-step guide to help you through the process:
1. Set up your equipment: Place your film negative on a light table or any backlit surface. Mount your digital camera on a tripod and attach a macro lens for close-up shots.

2. Adjust settings: Set your camera to manual mode to have full control over exposure settings. Adjust your aperture, shutter speed, and ISO to get the desired image quality.
3. Focus: Use manual focus to ensure sharpness. Zoom in on the negative to focus on the details and make necessary adjustments.
4. Capture the image: Take a photo of the negative using your camera. Make sure the lighting is even to avoid shadows or reflections on the negative.
5. Transfer and edit: Transfer the captured image to your computer for further editing. Use software like Photoshop or Lightroom to adjust colors, contrast, and remove any imperfections.
6. Save your digitized image: Save the edited image in a suitable file format and resolution for your intended use, whether for printing or online sharing.
By following these steps, you can effectively scan your film using a digital camera and macro lens, preserving your analog memories in a digital format.
Adjusting the settings for optimal results
When scanning your film using a digital camera and macro lens, there are several settings you can adjust to achieve the best results:
Exposure
Make sure to set the exposure correctly to avoid overexposed or underexposed images. Adjust the ISO, aperture, and shutter speed to get the right balance of light.
White Balance
Set the white balance according to the lighting conditions to ensure accurate color reproduction. You can use a white balance card or adjust it manually on your camera.
| Setting | Recommendation |
|---|---|
| ISO | Choose a low ISO (100-400) for better image quality |
| Aperture | Use a small aperture (f/8-f/11) for sharpness and depth of field |
| Shutter Speed | Adjust the shutter speed to avoid motion blur |
Editing and saving your scanned images
Once you have scanned your film using a digital camera and macro lens, the next step is to edit and save your scanned images. Here are some tips to help you get the best results:
1. Adjusting colors and exposure
Use photo editing software like Adobe Photoshop or Lightroom to adjust the colors and exposure of your scanned images. You can tweak the white balance, contrast, saturation, and brightness to make your photos look their best.
2. Removing dust and scratches
If your scanned images have dust or scratches, you can use the healing brush tool in your editing software to remove them. Be careful not to overdo it, as this can result in unnatural-looking images.
Tip: Save your edited images in a high-quality format like TIFF or JPEG to preserve the quality of your scans.
FAQ
What equipment do I need to scan film using a digital camera and macro lens?
To scan film using a digital camera and macro lens, you will need a digital camera with manual settings, a macro lens, a light table or a backlight source, a film holder or a negative holder, and a tripod to keep your camera stable during the scanning process.
Can I achieve high-quality scans with a digital camera and macro lens setup?
Yes, you can achieve high-quality scans using a digital camera and macro lens setup. By following the proper techniques such as using a tripod, adjusting the exposure settings, and ensuring even lighting, you can capture detailed and sharp images of your film negatives or slides.