


Photographing star trails with a digital SLR camera can result in stunning images that capture the beauty of the night sky in a unique way.
Star trails are created by capturing the movement of the stars over a period of time, resulting in mesmerizing streaks of light across the night sky.
With the right equipment and techniques, you can easily capture these celestial wonders and create your own breathtaking star trail images.
Mastering the art of capturing star trails
Photographing star trails with a digital SLR camera can be a rewarding experience, but it requires patience and practice to master the technique. Here are some tips to help you capture stunning star trail images:
- Choose a dark location away from light pollution to minimize interference with the star trails.
- Set up your camera on a sturdy tripod to prevent camera shake during long exposures.
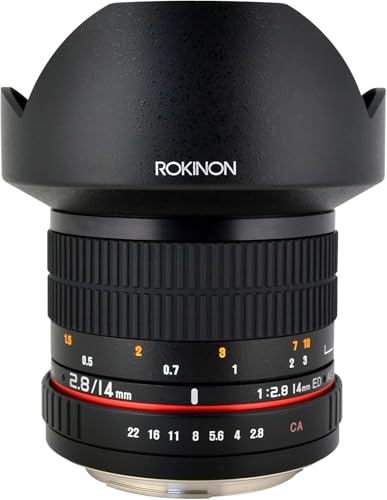
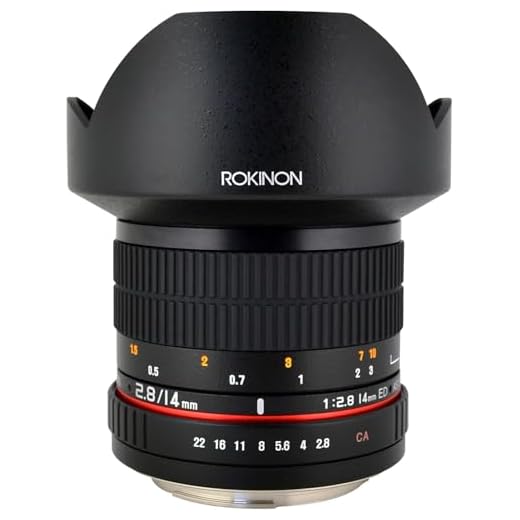
- Use a wide-angle lens to capture more of the night sky and enhance the effect of the star trails.
- Set your camera to manual mode and adjust the settings for a long exposure time (typically 30 seconds or longer).
- Use a low ISO setting to reduce noise in the image and maintain image quality.
- Focus your camera on a bright star or distant light to ensure sharpness in your star trail photos.
- Experiment with different compositions and exposure times to create unique and captivating star trail images.
With practice and experimentation, you can master the art of capturing stunning star trails with your digital SLR camera.
Understanding the basics of astrophotography
Astrophotography is a specialized form of photography that involves capturing images of astronomical objects and events in the night sky. It requires a good understanding of both photography techniques and astronomy.
Equipment
To get started with astrophotography, you will need a digital SLR camera with manual settings, a sturdy tripod, and a remote shutter release. A wide-angle lens with a large aperture is also recommended for capturing more light.
Techniques
When photographing star trails, it is important to use a long exposure time to capture the movement of the stars across the sky. Set your camera to manual mode and experiment with different exposure times to achieve the desired effect.
Choosing the right equipment for the job
When photographing star trails with a digital SLR camera, having the right equipment is essential for getting the best results. Here are some key considerations:
- Camera: Choose a digital SLR camera with manual mode capability. This will allow you to set a long exposure time needed for capturing star trails.
- Lens: Use a wide-angle lens with a fast aperture (e.g., f/2.8 or wider) to capture more of the night sky and allow more light to enter the camera.
- Tripod: A sturdy tripod is crucial for keeping your camera stable during long exposure shots. Look for a tripod that can securely hold your camera and withstand outdoor conditions.
- Remote Shutter Release: Using a remote shutter release or setting a self-timer can help eliminate camera shake when pressing the shutter button.
Additional Tips:
- Consider bringing extra batteries and memory cards to avoid running out of power or storage space during your shoot.
- Check the weather forecast and plan your shoot on a clear night with minimal light pollution for the best results.
Setting up your digital SLR camera
Before you start photographing star trails with your digital SLR camera, you need to make sure your camera is set up correctly. Here are some steps to follow:
1. Use a sturdy tripod
Mount your camera on a sturdy tripod to keep it stable during the long exposure times required for capturing star trails. This will help prevent any camera shake or movement that could result in blurry images.
2. Set your camera to manual mode
Switch your camera to manual mode so you have full control over the exposure settings. This will allow you to adjust the aperture, shutter speed, and ISO to get the best results for capturing star trails.
Tip: Use a wide aperture (e.g. f/2.8) to let in more light and a lower ISO (e.g. ISO 100) to reduce noise in your images.
Finding the perfect location for star trails
When capturing star trails with your digital SLR camera, choosing the right location is crucial for achieving stunning results. Here are some tips to help you find the perfect spot:
1. Dark Sky Areas
Look for locations with minimal light pollution to ensure clear and vibrant star trails. National parks, remote areas, and open fields away from city lights are ideal choices for capturing the beauty of the night sky.
2. Interesting Foreground Elements
Consider including interesting foreground elements in your composition to add depth and visual interest to your star trail images. Trees, mountains, lakes, or other natural features can enhance the overall impact of your photos.
| Location | Key Features |
| Beach | Sand dunes, rocks, or ocean waves |
| Forest | Tall trees, winding paths, or wildlife |
| Mountaintop | Panoramic views, valleys, or snow-capped peaks |
Mastering the exposure settings for stunning results
When capturing star trails with your digital SLR camera, getting the exposure settings right is crucial for achieving stunning results. Here are some key tips to help you master the exposure settings:
1. Use a low ISO: Start with a low ISO setting (e.g., ISO 100 or 200) to minimize noise in your images.
2. Choose a wide aperture: Select a wide aperture (e.g., f/2.8 or lower) to let in more light and capture brighter star trails.
3. Set a long exposure time: Experiment with exposure times ranging from a few minutes to several hours to create longer star trails.
4. Consider using a remote shutter release: To avoid camera shake during long exposures, use a remote shutter release or the camera’s built-in timer.
5. Review and adjust: Periodically review your images on the camera’s LCD screen and make exposure adjustments as needed to achieve the desired results.
By mastering the exposure settings and making adjustments as you go, you can capture stunning star trail images with your digital SLR camera.
Techniques for achieving sharp and clear star trails
1. Use a sturdy tripod: To avoid any camera shake during long exposures, it is essential to use a stable tripod. Make sure it is set up on solid ground and tighten all the knobs to secure the camera in place.
2. Manual focus: Set your camera to manual focus mode and focus on a distant object or infinity to ensure sharp star trails. Using autofocus may result in blurry images.
3. Use a remote shutter release: To prevent any camera shake caused by pressing the shutter button, use a remote shutter release or the camera’s self-timer function to trigger the exposure.
4. Choose the right settings: Use a wide aperture (f/2.8 or wider) and a low ISO (around 400-800) to capture clear star trails. Experiment with different exposure times, typically between 15-30 seconds, to achieve the desired effect.
5. Check for light pollution: Avoid shooting in areas with high light pollution as it can affect the quality of your star trail images. Look for dark skies or plan your shoot during a new moon phase for the best results.
Tips for post-processing your star trail images
Once you have captured your star trail images, the next step is to enhance them through post-processing. Here are some tips to help you get the most out of your star trail photos:
1. Stacking multiple images
One common technique for creating star trails is to stack multiple images together. This can help reduce noise and enhance the visibility of the stars. Use software like Photoshop or specialized stacking software to align and blend your images seamlessly.

2. Adjusting exposure and contrast
Experiment with adjusting the exposure and contrast of your star trail images to bring out the details in the trails and the sky. Be careful not to overdo it, as this can lead to unnatural-looking results. Play around with different settings until you find the right balance.
| Tip: Try using the levels or curves tool in your editing software to fine-tune the exposure and contrast of your star trail images. |
Sharing your breathtaking star trail photos with the world
After capturing stunning star trail photos with your digital SLR camera, it’s time to share your work with the world. Here are some tips on how to showcase your photos:
1. Social media platforms
Share your star trail photos on popular social media platforms like Instagram, Facebook, and Twitter. Use relevant hashtags to reach a wider audience and engage with other photography enthusiasts.
2. Photography websites and forums
Join photography websites and forums to share your photos, receive feedback, and connect with fellow photographers. Sites like Flickr, 500px, and Reddit’s photography community are great places to showcase your star trail images.
By sharing your breathtaking star trail photos, you can inspire others and receive valuable feedback to improve your photography skills.
FAQ
What equipment do I need to photograph star trails with a digital SLR camera?
To photograph star trails with a digital SLR camera, you will need a sturdy tripod, a DSLR camera with manual mode, a wide-angle lens, and a remote shutter release. Additionally, it is recommended to have a fully charged battery and extra memory cards for long exposures.

How do I set up my digital SLR camera for capturing star trails?
To set up your digital SLR camera for capturing star trails, first, choose a dark location with minimal light pollution. Set your camera to manual mode and focus to infinity. Use a wide aperture and adjust the ISO to a low setting for high image quality. Set the exposure time to create long exposures, usually between 15-30 seconds, depending on the desired effect.
What is the best time of night to photograph star trails?
The best time to photograph star trails is during the hours of astronomical twilight when the sky is dark but the stars are still visible. This usually occurs after sunset or before sunrise. Avoid shooting during a full moon as the moonlight can wash out the stars. Check the weather forecast for clear skies and plan your shoot accordingly.
How can I enhance my star trail photographs during post-processing?
During post-processing, you can enhance your star trail photographs by stacking multiple images to create longer trails, adjusting the white balance to enhance the colors of the stars, and using editing software to remove any noise or imperfections. You can also experiment with different blending modes and filters to create unique effects and compositions in your star trail images.


