
 Carmen J. Moore

Have you ever wanted to experiment with your photography and try something new? One fun and creative way to do so is by making your own pinhole lens for your digital camera. A pinhole lens is a simple, DIY lens that can produce unique and artistic images with a dreamy, ethereal quality.
With just a few basic materials and some patience, you can create your own pinhole lens and start capturing stunning photos in no time. In this article, we will guide you through the process of making a pinhole lens for your digital camera, from choosing the right materials to assembling the lens and using it to take captivating photos.
So, grab your digital camera and let’s get started on this exciting journey into the world of pinhole photography!
Creating a Pinhole Lens
Creating a pinhole lens for your digital camera is a fun and creative DIY project that can yield unique and artistic results. Follow these steps to make your own pinhole lens:


Gather Materials:
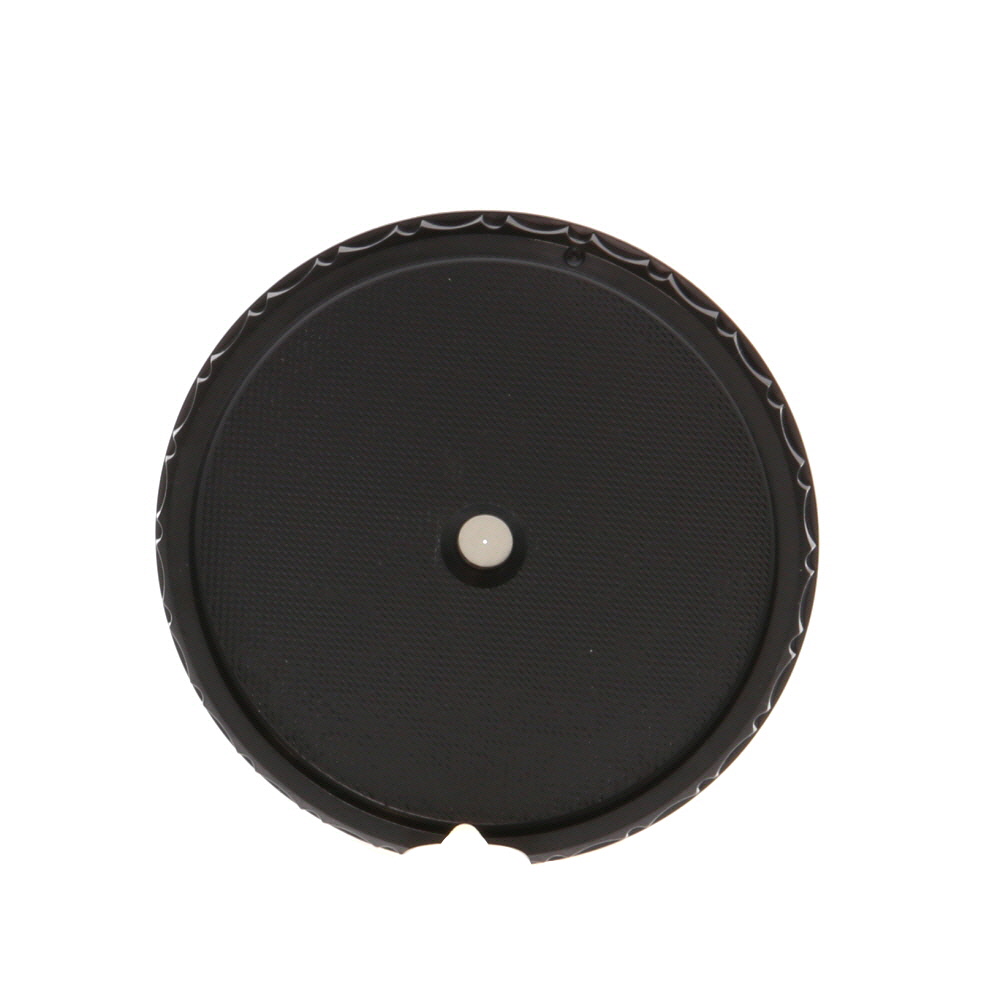
Start by gathering the necessary materials, which include a body cap for your camera, a piece of aluminum foil, a needle or pin, and tape. Make sure to choose a body cap that fits your camera model.
Make the Pinhole:
Using the needle or pin, carefully poke a small hole in the center of the aluminum foil. The size of the pinhole will determine the sharpness and brightness of the final image, so experiment with different sizes to find the desired effect.
Secure the aluminum foil with the pinhole over the body cap using tape, making sure the pinhole is centered and secure.
Your homemade pinhole lens is now ready to be attached to your camera. Simply replace the lens with the body cap containing the pinhole, making sure the pinhole is facing the camera sensor.
Experiment with different lighting conditions and subjects to capture unique and dreamy images with your DIY pinhole lens!

Gathering Materials and Tools
Before you start making your pinhole lens, you will need to gather a few materials and tools. Here’s what you’ll need:
- Aluminum foil: To create the pinhole for your lens.
- Cardboard: To make the body of the lens.
- Scissors: To cut the cardboard to the desired shape.
- Tape: To secure the components of the lens together.
- Needle: To create the pinhole in the aluminum foil.
- Marker: To mark the center of the pinhole.
Make sure you have all these materials and tools ready before you proceed with making your pinhole lens.
Preparing the Camera Body
Before attaching the pinhole lens to your digital camera, you need to prepare the camera body. Start by removing the lens from the camera. Next, locate the lens mount on the camera body where the lens was attached. Make sure the lens mount is clean and free from any dust or debris that could affect the image quality.
Once the lens is removed and the lens mount is clean, you can proceed to attach the pinhole lens. Carefully align the pinhole lens with the lens mount and secure it in place. Make sure the pinhole is centered and secure to prevent any light leaks.
After attaching the pinhole lens, you may need to adjust the camera settings to compensate for the lack of a traditional lens. Experiment with different exposure times and ISO settings to achieve the desired results with your new pinhole lens.
Constructing the Pinhole Lens
To create your pinhole lens for your digital camera, you will need the following materials:
| 1. An empty aluminum can |
| 2. A sharp knife or scissors |
| 3. A small piece of aluminum foil |
| 4. A needle or pin |
Step 1: Prepare the Aluminum Can
Using the sharp knife or scissors, carefully cut out a small rectangular piece from the aluminum can. Make sure to remove any sharp edges to prevent injuries.
Step 2: Create the Pinhole
Place the aluminum foil on a flat surface and use the needle or pin to create a tiny pinhole in the center. This will be the aperture of your pinhole lens.
Installing the Pinhole Lens
Now that you have created your pinhole lens, it’s time to install it on your digital camera. Follow these steps:
| 1. | Turn off your camera and remove the existing lens if it’s detachable. |
| 2. | Place the pinhole lens over the lens mount of your camera. |
| 3. | Secure the pinhole lens in place using a mounting ring or tape. |
| 4. | Turn on your camera and adjust the settings for manual focus and exposure. |
| 5. | Start experimenting with your pinhole lens and capture unique images. |
Taking Photos with Pinhole Lens
Using a pinhole lens for your digital camera can result in unique and artistic photos. Here are some tips for taking great pictures with a pinhole lens:

1. Experiment with different lighting: Since pinhole lenses have a small aperture, they work best in bright lighting conditions. Try taking photos outdoors on a sunny day to get crisp and clear images.
2. Use a tripod: To avoid camera shake and blurry photos, it’s recommended to use a tripod when using a pinhole lens. This will ensure that your photos are sharp and in focus.
3. Play with composition: Get creative with your composition by experimenting with angles and perspectives. Since pinhole lenses have a wide depth of field, you can capture both near and far subjects in focus.
4. Embrace the soft focus: Pinhole lenses create a dreamy and soft focus effect, which can add a unique and artistic touch to your photos. Embrace this characteristic and use it to your advantage in your photography.
5. Have patience: Taking photos with a pinhole lens requires patience and experimentation. Don’t be afraid to try different settings and techniques to achieve the desired results.

Experimenting and Improving Results
Once you have created your pinhole lens and attached it to your digital camera, it’s time to start experimenting with different settings and techniques to improve your results.
1. Adjust the aperture size:
- Try experimenting with different pinhole sizes to see how they affect the sharpness and exposure of your images.
- Smaller pinholes will result in sharper images but require longer exposure times, while larger pinholes will produce softer images with shorter exposure times.
2. Experiment with different subjects and lighting conditions:
- Test your pinhole lens in various lighting conditions and with different subjects to see how it performs in different situations.
- Try capturing still life, portraits, landscapes, and other subjects to see the unique effects created by the pinhole lens.
By experimenting with your pinhole lens and trying different techniques, you can improve your results and create unique and artistic images with your digital camera.
FAQ
What materials do I need to make a pinhole lens for my digital camera?
To make a pinhole lens for your digital camera, you will need a camera body cap, a piece of aluminum or brass sheet, a needle or pin for making the pinhole, sandpaper or a metal file, black spray paint, and adhesive or glue.
How difficult is it to make a pinhole lens for a digital camera?
Making a pinhole lens for a digital camera can be a bit challenging, especially when it comes to creating the pinhole itself. It requires precision and patience to ensure the pinhole is the right size and shape for optimal results. However, with the right tools and instructions, it is definitely doable as a DIY project.
What are the advantages of using a pinhole lens for photography?
Using a pinhole lens for photography can result in unique and artistic images with a soft focus and almost infinite depth of field. It allows you to experiment with different perspectives and create dreamy, ethereal effects in your photos. Additionally, making your own pinhole lens can be a fun and creative DIY project.
Can I use a pinhole lens for all types of photography?
A pinhole lens is best suited for experimental and artistic photography rather than for capturing sharp, detailed images. It may not be ideal for fast-moving subjects or situations where a high level of precision is required. However, it can add a creative touch to landscapes, portraits, and still life photography, allowing you to explore a different aesthetic.




Can someone clarify how the size of the pinhole affects image quality? I understand that smaller holes lead to sharper images, but what about exposure times?
I don't think a pinhole lens is worth the effort for most photography. The images can be very soft but lack the detail that many people want. Why not just use a good lens instead?
I see your point, but I think the uniqueness of pinhole photography is what makes it special. It’s about the artistic expression more than just sharpness.
Using a tripod really helps reduce blur when shooting with a pinhole lens. It makes a big difference!
I tried making a pinhole lens last weekend and it was a lot of fun! I used a body cap from an old DSLR and it works surprisingly well. I recommend starting with a larger pinhole size to see how the images turn out before trying smaller ones.
Thanks for sharing your experience! Starting with a larger pinhole is a great tip, as it allows for easier adjustments and understanding of the depth of field.
I've used both pinhole lenses and traditional lenses. The pinhole lens gives a very unique soft focus that you just can't replicate with a regular lens. However, I find that the low light situations can be really challenging with a pinhole lens compared to my standard lenses. Has anyone else noticed this?
I agree, the soft focus is beautiful but low light can be tough! I had to increase my ISO significantly, which sometimes adds noise to the photos.
What type of aluminum foil is best for making the pinhole lens? Does it have to be a specific thickness?