Long exposure photography is a technique that allows you to capture stunning images by keeping the camera’s shutter open for an extended period of time. This technique is commonly used to create dramatic effects such as silky smooth waterfalls, light trails, and star trails. While long exposure photography was traditionally associated with film cameras, modern digital cameras also offer this capability.
If you’re interested in learning how to get long exposure on your digital camera, there are a few key steps to keep in mind. First and foremost, you’ll need a camera that allows you to manually control the exposure settings, including the shutter speed. Additionally, you’ll need a sturdy tripod to keep your camera steady during the long exposure.

Understanding the relationship between shutter speed, aperture, and ISO is crucial for successful long exposure photography. By adjusting these settings, you can achieve the desired effect and create stunning images that capture the passage of time in a single frame.
Mastering Long Exposure Photography with Your Digital Camera
Long exposure photography is a technique that allows you to capture stunning images by keeping the camera’s shutter open for an extended period of time. This technique is commonly used to create smooth water effects, light trails, and star trails.
Setting Up Your Camera
Before you start shooting long exposure photos, it’s important to set up your camera properly. Here are some key steps to follow:
| 1. Use a Tripod | Stability is crucial for long exposure shots. Use a sturdy tripod to keep your camera steady during the long exposure. |
| 2. Set a Low ISO | Using a low ISO setting (such as ISO 100) will reduce noise in your images and produce cleaner, sharper results. |
| 3. Adjust Aperture | Choose a small aperture (high f-stop number) to increase depth of field and control the amount of light entering the camera. |
| 4. Use a Remote Shutter Release | To prevent camera shake, use a remote shutter release or set a timer to trigger the shutter without touching the camera. |
Taking Long Exposure Shots
Once your camera is set up, it’s time to start taking long exposure shots. Here are some tips to help you get the best results:
- Experiment with different shutter speeds to achieve the desired effect.
- Consider using neutral density filters to reduce the amount of light entering the camera.
- Frame your shot carefully and pay attention to composition.
- Review your images and make adjustments as needed to achieve the desired outcome.
By following these tips and practicing regularly, you can master long exposure photography with your digital camera and capture stunning images that showcase the beauty of motion and light.
Understanding the Basics of Long Exposure
Long exposure photography is a technique where the camera’s shutter is left open for an extended period of time, allowing more light to enter the sensor. This results in unique and creative effects such as light trails, smooth waterfalls, and star trails.
One of the key factors in long exposure photography is controlling the amount of light that enters the camera. This can be achieved by using a small aperture (high f-stop), low ISO, and a neutral density filter to reduce the amount of light entering the lens. Additionally, a tripod is essential to ensure sharp images during long exposures.
Tips and Techniques for Setting Up Your Camera
Before you start shooting long exposure photos, it’s important to properly set up your camera. Here are some tips and techniques to help you achieve the best results:
- Use a sturdy tripod to prevent camera shake during long exposures.
- Set your camera to manual mode to have full control over the exposure settings.
- Choose a low ISO setting to reduce noise in your photos.
- Select a small aperture (high f-stop number) to increase depth of field and capture more details in the scene.
- Use a remote shutter release or the camera’s self-timer to avoid camera shake when pressing the shutter button.
- Experiment with different shutter speeds to achieve the desired effect – longer exposures will result in more motion blur.
- Consider using a neutral density filter to reduce the amount of light entering the lens, allowing for even longer exposures in bright conditions.
Choosing the Right Settings for Long Exposure Shots
When setting up your digital camera for long exposure shots, it is important to choose the right settings to achieve the desired effect. Here are some key settings to consider:
| Shutter Speed: | Set a slow shutter speed to allow more light to enter the camera and create a long exposure effect. Experiment with different shutter speeds to find the right balance. |
| Aperture: | Use a small aperture (higher f-stop number) to increase depth of field and ensure sharpness throughout the image. |
| ISO: | Keep the ISO low to reduce noise in the final image. Lower ISO settings are ideal for long exposure shots in low light conditions. |
| Use a Tripod: | For long exposure shots, a stable tripod is essential to prevent camera shake and ensure sharpness in your images. |
| Remote Shutter Release: | Consider using a remote shutter release or the camera’s self-timer function to minimize camera shake when taking long exposure shots. |
Using Filters to Enhance Your Long Exposure Photos
Filters are essential tools for long exposure photography as they can help you achieve different effects and improve the overall quality of your images. Here are some common filters that you can use to enhance your long exposure photos:
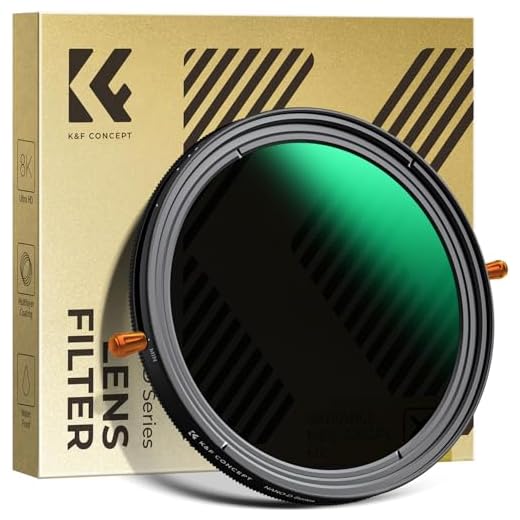
Neutral Density (ND) Filter
A neutral density filter reduces the amount of light entering your camera, allowing you to use longer shutter speeds without overexposing your image. This filter is perfect for capturing smooth water motion or creating dreamy cloud effects in your long exposure photos.
Graduated ND Filter
A graduated ND filter is useful for balancing the exposure in scenes with high contrast, such as sunsets or landscapes. It darkens the bright areas of your image while keeping the darker areas unaffected, helping you achieve a well-exposed long exposure shot.
Experiment with different filters and combinations to create stunning long exposure photos that stand out from the rest!
Common Mistakes to Avoid in Long Exposure Photography
Long exposure photography can produce stunning and unique images, but it also comes with its own set of challenges. Here are some common mistakes to avoid when trying your hand at long exposure photography:
1. Not Using a Tripod
One of the most important tools for long exposure photography is a sturdy tripod. Without a tripod, even slight movements can cause blur in your images. Make sure to invest in a good quality tripod to ensure sharp and clear long exposure shots.
2. Overexposing the Image
Long exposure shots can easily result in overexposed images, especially in bright conditions. To avoid this, make sure to use a low ISO setting, a small aperture, and consider using a neutral density filter to reduce the amount of light entering the camera.
By avoiding these common mistakes and practicing your long exposure photography skills, you can capture stunning images with unique and captivating effects.
Editing and Enhancing Long Exposure Images in Post-Production
Once you have captured your long exposure images, the next step is to enhance and edit them in post-production to achieve the desired effect. Here are some tips to help you get the best results:
1. Adjust Exposure and Contrast
Start by adjusting the exposure and contrast of your image to make sure the details are clear and the colors are vibrant. Use tools like levels, curves, and contrast adjustments to fine-tune the overall look of your photo.
2. Reduce Noise
Long exposure images can sometimes have a lot of noise, especially in low-light conditions. Use noise reduction tools in your editing software to clean up any unwanted noise and make your image look smoother and more professional.
- Apply selective sharpening to enhance details in specific areas of the image.
- Use the clone or healing brush tool to remove any distractions or imperfections in the photo.
- Experiment with creative filters or presets to add unique effects to your long exposure images.
By following these tips and techniques, you can take your long exposure photography to the next level and create stunning, captivating images that truly stand out.
FAQ
How can I achieve long exposure on a digital camera?
To achieve long exposure on a digital camera, you need to set your camera to manual mode and select a slow shutter speed. This will allow more light to enter the camera, resulting in a longer exposure time. You may also need to use a tripod to keep the camera steady during the long exposure to avoid camera shake.
What are some tips for getting a successful long exposure shot with a digital camera?
Some tips for getting a successful long exposure shot with a digital camera include using a remote shutter release or timer to avoid camera shake, choosing a low ISO setting to reduce noise in the image, and using a neutral density filter to control the amount of light entering the camera. Additionally, experimenting with different shutter speeds and compositions can help you achieve the desired effect in your long exposure photographs.