
 Carmen J. Moore
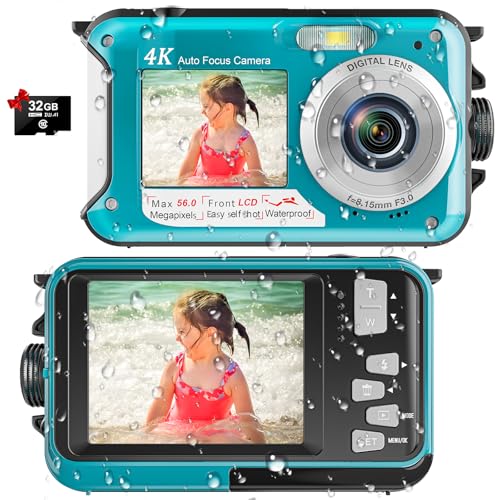
Water damage can be a nightmare for any digital camera owner. Whether it was dropped in a pool, got soaked in the rain, or accidentally spilled with a drink, water can wreak havoc on the delicate electronic components of a camera. However, all hope is not lost! With prompt action and the right techniques, you may be able to salvage your water-damaged camera and get it back in working condition.
Step 1: Act Quickly
As soon as your camera comes into contact with water, it is crucial to act fast. Remove the battery and memory card immediately to prevent further damage. Do not try to turn on the camera or press any buttons, as this can cause a short circuit.
Step 2: Dry the Camera



Once the battery and memory card are removed, gently shake the camera to remove any excess water. Use a soft, absorbent cloth to wipe down the exterior of the camera. Avoid using a hairdryer or placing the camera in direct sunlight, as this can damage the internal components. Instead, place the camera in a bowl of uncooked rice or silica gel packets to absorb moisture.
Steps to repair water damaged digital camera
If your digital camera has been damaged by water, follow these steps to try and repair it:
- Remove the battery immediately to prevent further damage.
- Take out the memory card and any other removable parts.
- Wipe down the exterior of the camera with a dry cloth.
- Place the camera in a bag of uncooked rice to absorb moisture.
- Leave the camera in the rice for at least 24 hours.
- After 24 hours, remove the camera from the rice and try turning it on.
- If the camera does not turn on, take it to a professional repair service.
Step 1: Remove battery and memory card
When dealing with a water damaged digital camera, the first step is to remove the battery and memory card immediately. This will help prevent any short circuits or further damage to the internal components of the camera.
To remove the battery, locate the battery compartment on the camera and open it carefully. Take out the battery and set it aside in a dry place.
Next, locate the memory card slot on the camera and remove the memory card. Make sure to handle the memory card with care to avoid any damage.

By removing the battery and memory card, you can ensure that the electrical components are not at risk of corrosion or short circuits due to water exposure.
Step 2: Dry the camera
After removing the battery and memory card, gently shake the camera to remove any excess water. Do not shake it too vigorously as this could cause further damage.
Next, use a soft, absorbent cloth to gently pat the camera dry. Avoid rubbing the camera, as this can spread the water inside. Pay special attention to the crevices and buttons where water may be trapped.
Important:
Do not use a hairdryer or heat gun to dry the camera, as the heat can damage the internal components.
Once you have gently dried the exterior, place the camera in a bowl of uncooked rice or silica gel packets. These materials will help absorb any remaining moisture inside the camera. Leave the camera in the rice or silica gel for at least 24 hours to ensure it is completely dry.
Step 3: Use silica gel packets
After removing the battery and memory card, place your water damaged digital camera in a container filled with silica gel packets. Silica gel is a desiccant that can help absorb moisture from the camera.
Make sure the camera is fully submerged in the silica gel packets and leave it there for at least 48 hours. The silica gel will help dry out the internal components of the camera and reduce the risk of further damage.
Once the 48 hours have passed, carefully remove the camera from the silica gel and check for any remaining moisture. If the camera still feels damp, repeat the process until it is completely dry.
Step 4: Submerge in rice
After removing the battery and memory card, gently place your water damaged digital camera in a container filled with uncooked rice. Make sure the camera is completely covered with rice and leave it submerged for at least 24-48 hours.
Rice is known for its ability to absorb moisture, which can help draw out any remaining water in the camera. Keep the container in a dry and warm place to aid in the drying process.

Do not attempt to turn on the camera until you are certain it is completely dry to avoid causing further damage. Patience is key in this step to ensure the best chance of salvaging your camera.
Step 5: Clean with alcohol
Once the camera components are completely dry, you can clean them with isopropyl alcohol to remove any residue or impurities left by the water. Dip a cotton swab or cloth in the alcohol and gently wipe the affected areas, making sure not to apply too much pressure to avoid damaging the delicate parts of the camera.
Alcohol evaporates quickly, so it won’t leave any moisture behind. This step helps to ensure that your camera is free from any remaining water damage and is ready for further inspection and testing.
Step 6: Use a hairdryer
If your digital camera has been exposed to water, using a hairdryer can help remove any remaining moisture. Make sure to set the hairdryer on a low heat setting and hold it at least 6 inches away from the camera to prevent overheating. Gently blow warm air over the camera for 10-15 minutes, moving it around to ensure all areas are dried.
Do not use a high heat setting or hold the hairdryer too close to the camera, as this can cause damage to the internal components. Once you have used the hairdryer, let the camera sit in a dry area for a few hours to ensure all moisture has evaporated before attempting to turn it on.

Step 7: Consult a professional
If you have tried all the previous steps and your water damaged digital camera is still not functioning properly, it may be time to seek help from a professional. Contact the manufacturer of the camera or a reputable camera repair service to get an expert opinion on the extent of the damage and the potential cost of repairs.
A professional technician will be able to assess the damage, perform any necessary repairs, and ensure that your camera is in working condition again. While this option may come with a cost, it is often the best way to ensure that your camera is restored to its original state.
Step 8: Test the camera
After completing all the previous steps, it’s time to test your digital camera to see if it’s functioning properly. Insert a fully charged battery or connect the camera to a power source and turn it on.
Check the LCD screen for any signs of damage or abnormal display. Try taking a few test shots and review them to ensure the image quality is not affected. Test the zoom, focus, flash, and other functions to make sure everything is working as it should.
If you notice any issues or malfunctions during testing, you may need to repeat some of the previous steps or seek professional help to fix the problem.
Once you are satisfied with the test results and the camera is working correctly, you can start using it again for capturing beautiful moments.
Step 9: Prevent future damage
1. Use a waterproof case: Invest in a waterproof case for your digital camera to protect it from water damage in the future. This will provide an extra layer of protection when you are using your camera near water.
2. Keep your camera dry: Avoid using your camera in wet or humid conditions. If your camera does get wet, make sure to dry it thoroughly before using it again.
3. Store your camera properly: When not in use, store your camera in a dry and safe place. Avoid leaving it exposed to moisture or extreme temperatures.
4. Regular maintenance: Check your camera regularly for any signs of damage or wear. Clean it gently with a soft cloth and keep the lens free from dust and debris.

5. Handle with care: Be mindful of how you handle your camera to prevent accidental drops or bumps that could lead to damage. Treat your camera with care to ensure its longevity.
FAQ
What should I do if my digital camera gets water damaged?
If your digital camera gets water damaged, immediately remove the batteries and memory card. Dry the camera with a soft cloth and then place it in a container filled with uncooked rice to absorb moisture. Leave it in the rice for at least 48 hours before attempting to turn it on again.
Can water damage to a digital camera be repaired?
Water damage to a digital camera can sometimes be repaired, but it depends on the extent of the damage. If the camera has been submerged in water for a long time or if the water has caused significant internal damage, it may not be salvageable. It’s best to take the camera to a professional repair service to assess the damage and determine if it can be fixed.



Good article! I have a question though—what if the camera was submerged for a longer time, like several hours? Is there still hope to fix it?
When you say to use rice for 24-48 hours, is there a difference in effectiveness? Should I just leave it longer for better results?
Leaving it longer can be more effective, especially if it was exposed to a large amount of water. 48 hours is often recommended for better absorption.
What is the best way to know if my camera is beyond repair after water damage? Should I just take it to a professional?
It's wise to consult a professional if you’ve followed all the drying steps and it still doesn’t work. They can assess the damage more accurately.
I had a similar issue last summer when my camera fell into a pool. I followed the rice method but left it in there for 48 hours instead of 24, and it worked perfectly afterward! Just a tip for anyone who might be worried about drying time.
Thanks for sharing your experience! Leaving it longer can indeed help in some cases, but it's always good to check after the initial drying time to avoid any damage.
I had a similar incident with my camera. I dropped it in the ocean and immediately removed the battery and memory card. I left it in a bowl of rice for 48 hours. It worked perfectly after that! I can’t stress how important it is to act quickly.
Good article! I didn’t know that silica gel packets could be used for drying out cameras. I’ll keep some on hand next time.
I disagree about using a hairdryer. I think it could still cause damage even on a low setting. I’d stick with rice or silica gel.
I disagree with using a hairdryer at all. I’ve seen it cause more problems than it solves. It’s better to just let it air dry or use rice/silica.
I’ve also heard that using silica gel packets works better than rice. Just a thought!
Could you clarify what you mean by "gently shake the camera"? I'm worried about causing more damage.