
 Carmen J. Moore

Are you looking to turn your raw video footage into a polished masterpiece? Editing movies from your digital camera can be a rewarding and creative process. Whether you’re a beginner or an experienced filmmaker, there are several steps you can take to enhance your videos and make them stand out.
From cutting and arranging clips to adding special effects and music, editing allows you to tell a story and evoke emotions through your videos. In this article, we’ll explore some tips and techniques to help you get started with editing movies from your digital camera.



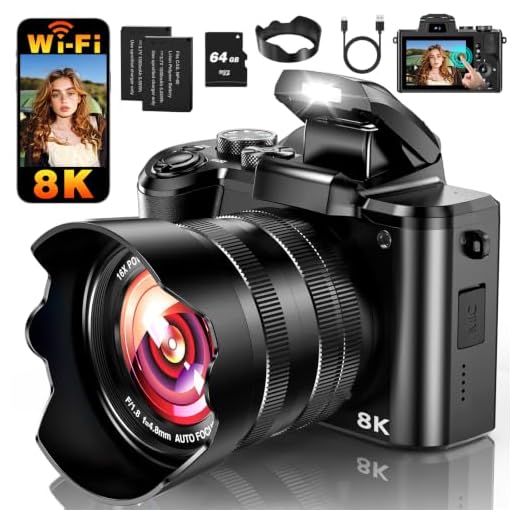
Step-by-Step Guide to Editing Movies from Digital Camera
Editing movies from a digital camera can be a fun and creative process. Follow these simple steps to edit your movies like a pro:
| Step 1: | Transfer your movie files from your digital camera to your computer using a USB cable or memory card reader. |
| Step 2: | Choose a video editing software like Adobe Premiere Pro, Final Cut Pro, or iMovie to start editing your movie. |
| Step 3: | Import your movie files into the editing software and arrange them on the timeline in the order you want them to appear. |
| Step 4: | Trim and cut your footage to remove any unwanted parts and create a cohesive storyline. |
| Step 5: | Add transitions, effects, and music to enhance the visual appeal of your movie. |
| Step 6: | Adjust the color, brightness, and contrast of your footage to achieve the desired look. |
| Step 7: | Preview your movie and make any necessary adjustments before exporting the final version. |
| Step 8: | Export your edited movie in the desired format and resolution for sharing online or saving to your computer. |
Importing Footage to Editing Software
Once you have transferred the footage from your digital camera to your computer, the next step is to import it into your editing software. The process may vary depending on the software you are using, but generally, you can follow these steps:
Step 1: Open Your Editing Software
Launch your editing software on your computer. Create a new project or open an existing one where you want to import the footage.
Step 2: Import Footage
Locate the folder or directory where you saved the footage from your digital camera. Select the files you want to import and drag them into your editing software’s media library or import window. Alternatively, you can use the import function within the software to browse and select the files.
Tip: Make sure to organize your footage into folders or bins within the software for easier access and management.
Organizing Clips and Creating a Timeline
Once you have imported your video clips into the editing software, it’s important to organize them before you start editing. You can create folders or bins to categorize your clips based on different scenes or sequences. This will make it easier to locate specific clips when you are ready to add them to your timeline.
After organizing your clips, you can start creating a timeline. A timeline is where you arrange your clips in the order you want them to appear in your final movie. You can cut, trim, and rearrange clips on the timeline to create the desired sequence and flow of your movie. Make sure to pay attention to the transitions between clips to ensure a smooth and cohesive viewing experience for your audience.
Trimming and Cutting Unwanted Footage
When editing movies from your digital camera, one of the key tasks is trimming and cutting unwanted footage to refine your final video. Here are some steps to help you accomplish this:
- Import your video footage into your editing software.
- Play through the video and identify the sections you want to trim or cut.
- Use the trim tool to select the beginning and end points of the unwanted footage.
- Hit the cut or delete button to remove the selected portion.
- Review the edited video to ensure a smooth transition between clips.
- Make further adjustments if needed to achieve the desired flow.
By effectively trimming and cutting unwanted footage, you can enhance the overall quality and storytelling of your video from the digital camera.
Adding Transitions and Effects
Once you have organized your clips and trimmed them to your liking, it’s time to add transitions and effects to make your movie more dynamic and engaging. Transitions help smooth out the flow between clips, while effects can enhance the overall look and feel of your movie.

To add transitions, simply drag and drop the desired transition between two clips. You can choose from a variety of options such as fades, wipes, and dissolves. Experiment with different transitions to see which one works best for your movie.
When it comes to effects, most editing software comes with a library of pre-installed effects that you can easily apply to your clips. These effects can range from basic color corrections to more advanced filters and overlays. Play around with different effects to give your movie a unique and professional look.
Remember, less is often more when it comes to transitions and effects. Don’t overdo it and distract from the content of your movie. Use transitions and effects strategically to enhance your story and keep your audience engaged.
Adjusting Color and Audio Levels
When editing movies from a digital camera, it’s important to ensure that the color and audio levels are just right. Here are some tips on how to adjust them:
Color Adjustment
To adjust the color in your movie, you can use video editing software to tweak the brightness, contrast, saturation, and color balance. Make sure to check the color levels on a calibrated monitor to ensure accurate results.

Audio Level Adjustment
Adjusting the audio levels is crucial to creating a professional-looking movie. You can adjust the volume, balance, and equalization of the audio to ensure that it sounds clear and balanced. Use a waveform monitor to visualize the audio levels and make precise adjustments.
| Tip: | Experiment with different color and audio settings to find the perfect balance for your movie. |
Incorporating Music and Sound Effects
Adding music and sound effects to your movie can greatly enhance the viewing experience. Here are some tips on how to incorporate them effectively:
1. Choose the Right Music
When selecting music for your movie, consider the mood and tone you want to convey. Choose music that complements the visuals and helps to tell the story.
2. Use Sound Effects Sparingly
Sound effects can add depth and realism to your movie, but be careful not to overdo it. Use sound effects strategically to highlight important moments or create atmosphere.
Exporting the Final Edited Movie
Once you have finished editing your movie, it’s time to export the final version. Most editing software programs have a specific export feature that allows you to save your movie in a desired format.

Here are some common steps to export your movie:
- Go to the File menu.
- Select “Export” or “Save As”.
- Choose the format in which you want to save your movie (e.g., MP4, AVI, MOV).
- Select the destination folder where you want to save the file.
- Adjust any additional settings like resolution, frame rate, and quality.
- Click “Export” or “Save” to start the exporting process.
Once the export is complete, you will have a final edited version of your movie that you can share, upload, or burn to a DVD.
Sharing Your Masterpiece with the World
Once you have finished editing your movie from your digital camera, it’s time to share your masterpiece with the world. Here are some ways you can do that:
1. Upload to Social Media: Share your video on platforms like YouTube, Facebook, Instagram, or TikTok to reach a wider audience and get feedback from viewers.
2. Create a DVD or Blu-ray: If you prefer physical copies, you can burn your movie onto a DVD or Blu-ray disc to share with friends and family.

3. Submit to Film Festivals: If you think your movie is exceptional, consider submitting it to film festivals for a chance to showcase your work to a larger audience and gain recognition.
4. Collaborate with Other Creators: Team up with other filmmakers or content creators to cross-promote each other’s work and reach new audiences.
5. Host a Screening Event: Organize a movie screening event at a local venue or online to showcase your movie to a live audience and engage with fans.
By sharing your movie with the world, you can inspire others, receive valuable feedback, and potentially open up new opportunities for your filmmaking career.
FAQ
What software can I use to edit movies from my digital camera?
You can use a variety of video editing software programs such as Adobe Premiere Pro, Final Cut Pro, iMovie, or Windows Movie Maker. These programs offer different levels of complexity and features, so you can choose one that best suits your needs and skill level.

Can I edit movies directly on my digital camera?
Most digital cameras do not have built-in editing capabilities for movies. You will need to transfer the video files to a computer and use video editing software to edit them. Some cameras may have basic editing features, but for more advanced editing, a computer program is recommended.
What are some common editing techniques used for movies from digital cameras?
Some common editing techniques for movies from digital cameras include trimming and cutting footage to remove unwanted parts, adding transitions between scenes, adjusting colors and contrast, adding text or subtitles, incorporating music or sound effects, and applying special effects like filters or slow motion. These techniques help enhance the quality and storytelling of your movies.


I don’t think transitions should be used sparingly. With the right ones, they can really enhance the story. I used a lot in my last video, and it added a lot of life to the cuts!
That's a valid point! It really depends on the style of the movie and personal preference. Some filmmakers enjoy a more dynamic approach with transitions.
I recently edited a short film using Final Cut Pro. The color grading options are fantastic, and I found the timeline very intuitive. I spent a lot of time adjusting the audio levels, and I think it really improved the final product. Just be careful not to overdo the transitions; I made that mistake at first!
Can you explain more about the color adjustment steps? I’m not sure what settings I should focus on first.
Of course! Start by adjusting brightness and contrast to improve visibility, then tweak saturation and color balance to enhance the overall look. It's best to make adjustments incrementally and check on a calibrated monitor.
What are the best software options for beginners? I have only used iMovie, but I'm looking for something a bit more advanced. Any recommendations?
I started with iMovie too and then moved to Adobe Premiere Elements. It's user-friendly and has some nice features without being overwhelming.